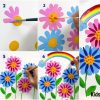
Painting
Beautiful Rose Flower Pot Painting Idea For Beginners

Try this simple DIY rose flower pot painting idea suited for beginners! Follow the step-by-step instructions and pictures to make stunning floral art for your home.
We all love roses and the beautiful aroma they bring to their atmosphere and today, we will be making a painting of this particular flower. They have a huge variety to offer when it comes to colors and the colors that we have chosen for this painting are pink purple and red. This painting will depict roses in a pot. It is a simple yet wonderful painting as we will be using multiple methods to make it. So, collect all the material required, and let’s start making this flower painting.
DIY Beautiful Rose Flower Pot Idea For Kids
Read More: Easy Dusk Scenery Painting Step-by-step Tutorial For Kids
Materials Required
- A white and a blue sheet of paper
- A pair of scissors
- A glue stick
- Watercolors
- Paintbrush
- Earbuds
Procedure
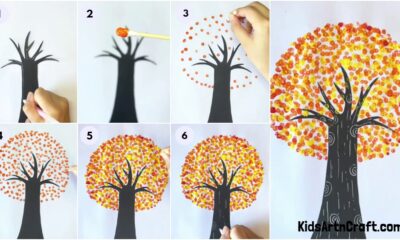
Step 1: Starting With The Sheet Of Paper
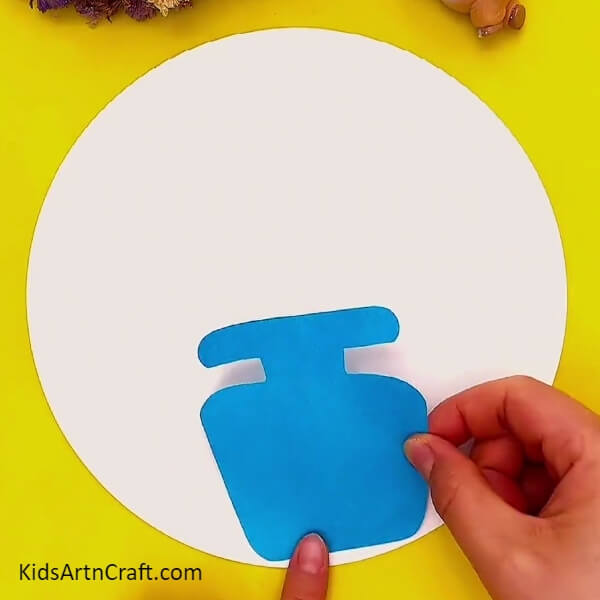
Take a white sheet of paper and cut a circle out of it. Now, take a blue sheet of paper and cut a small shape out resembling a pot. You can do that by first, drawing the pot on the sheet and then cutting it out. Finally, paste the pot at the bottom of the white sheet as shown in the picture below.
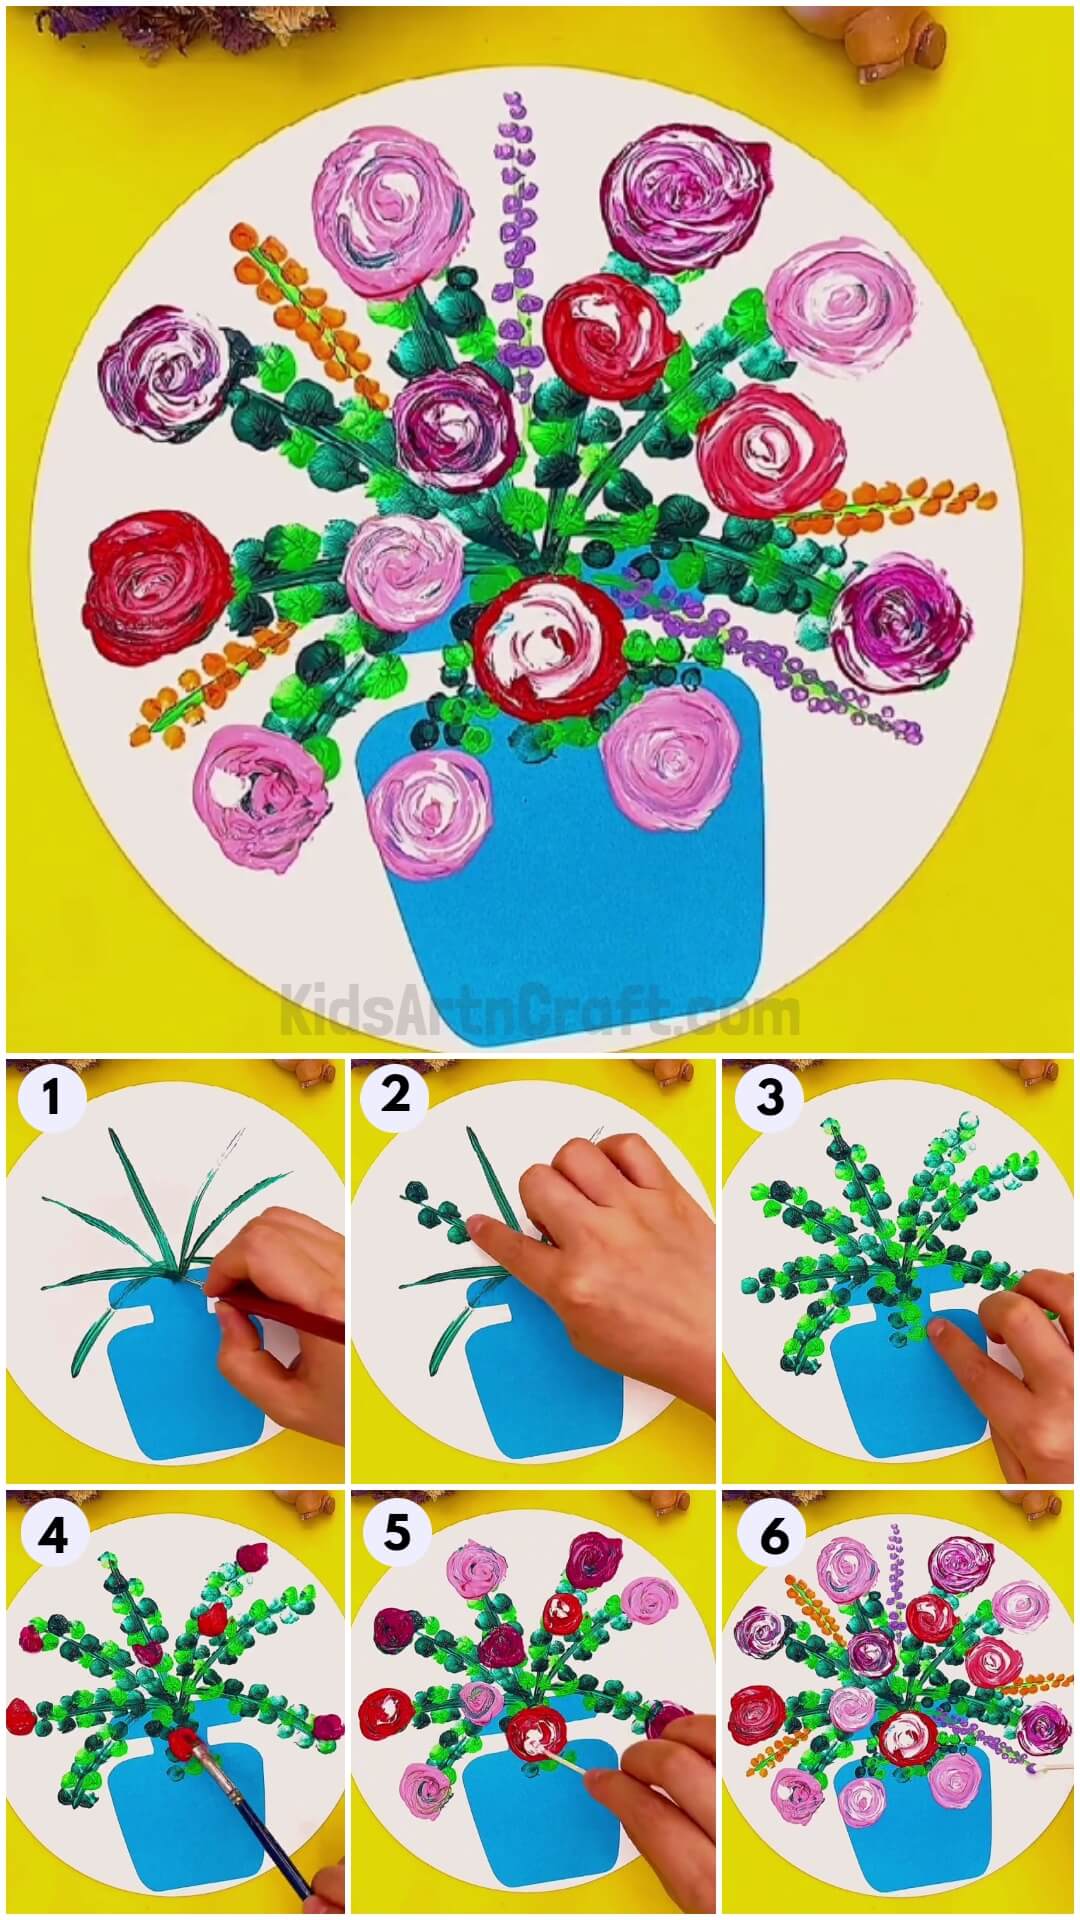
Step 2: Painting With The Brush
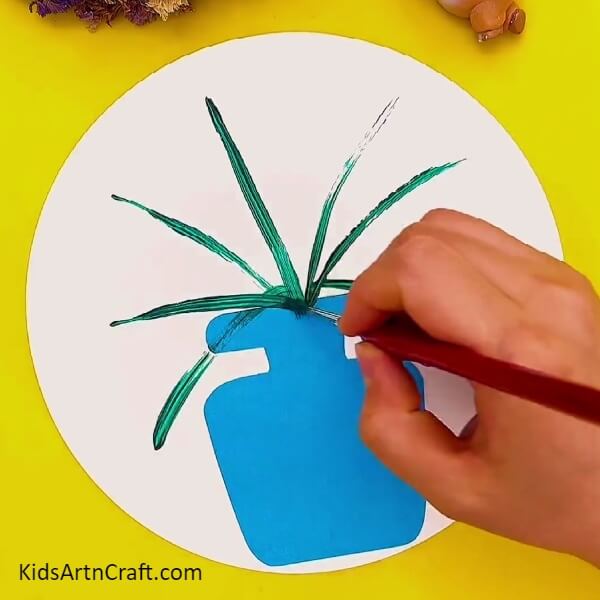
Take some dark green paint on a paintbrush and start star-making strokes above the pot that you pasted in the previous step. You need to make seven long strokes in total around the top section of the pot. See the picture below for reference.
Step 3: Using More Green Paint

Take some more green paint and dip your index finger in it as shown in the picture below.
Step 4: Stamping Your Finger On The Sheet
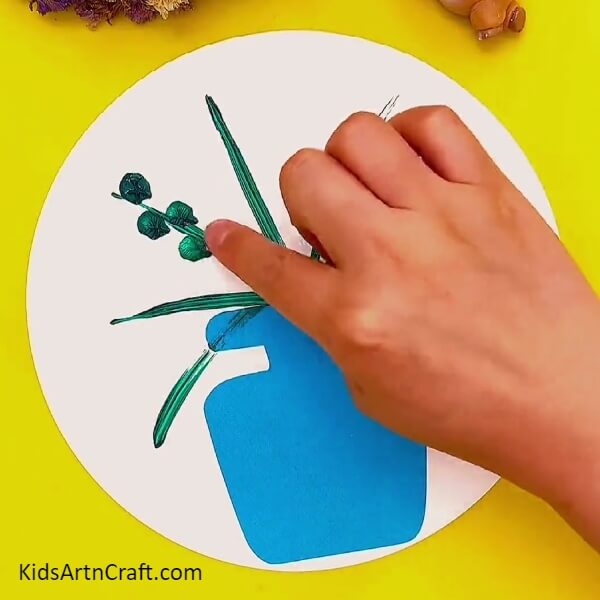
Stamp your finger on one of the strokes that you painted earlier. Stamp it on both sides of the stroke as shown in the picture below.
Step 5: Stamping All The Lines
Stamp all the lines following the same technique. Now, dip your finger in some light green paint and stamp them again in the spaces on the lines left between the stamps that you just made. See the picture below for reference.
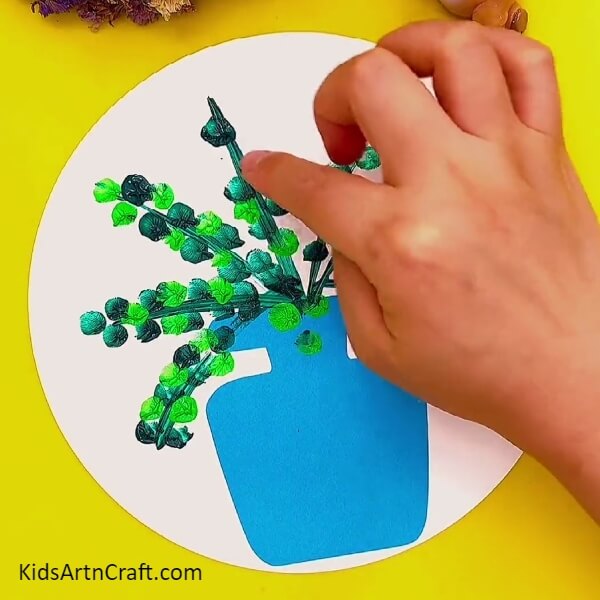
Step 6: Stamping Some Prints On The Pot
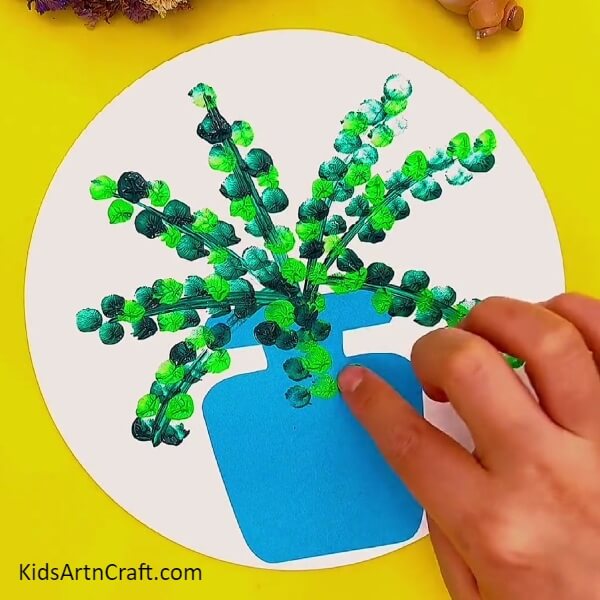
Stamp some fingerprints using the same two points at the top of the pot right in the middle. See the picture below for reference.
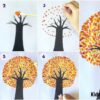
Step 7: Using Some Red Paint

Let the painting dry completely. Now, take some red paint on a brush and paint some rough circles on the tips of four of the lines and three in between the lines. See the picture below for reference.
Step 8: Shaping The Circles With Some More Paint
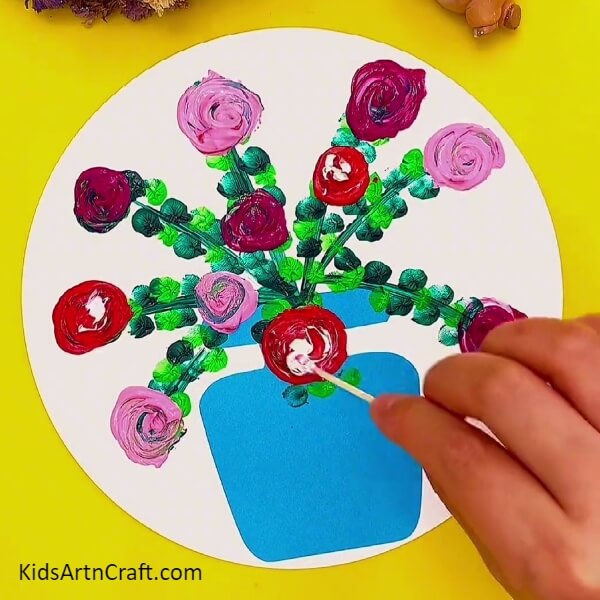
Using the same red paint shape these circles by making circular brush strokes around them until they look like roses. Now repeat the process on other lines using pink paint. Finally, dip a clean earbud in some white paint and stroke it on each red rose using a circular motion. See the picture below for reference.
Step 9: Using The Earbud On All Roses
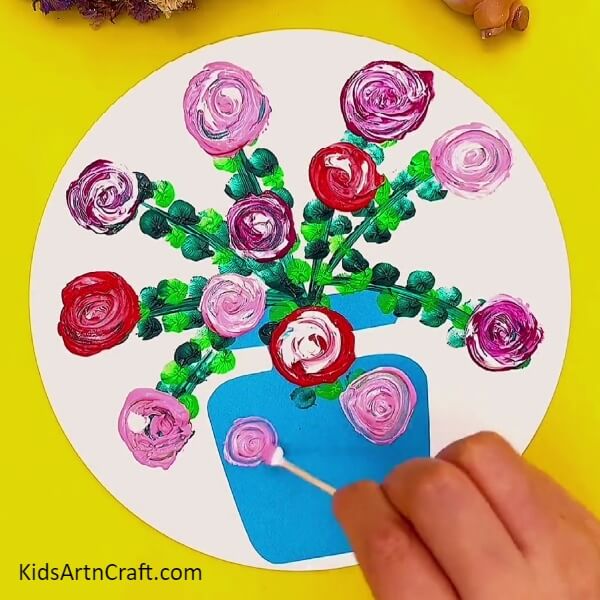
Repeat the process on all roses using the same white paint. Now, draw two roses on the blue pot with the excess paint left on the earbud. You can do that by making circular strokes on the pot. See the picture below for reference.
Step 10: Painting Dots With The Earbud
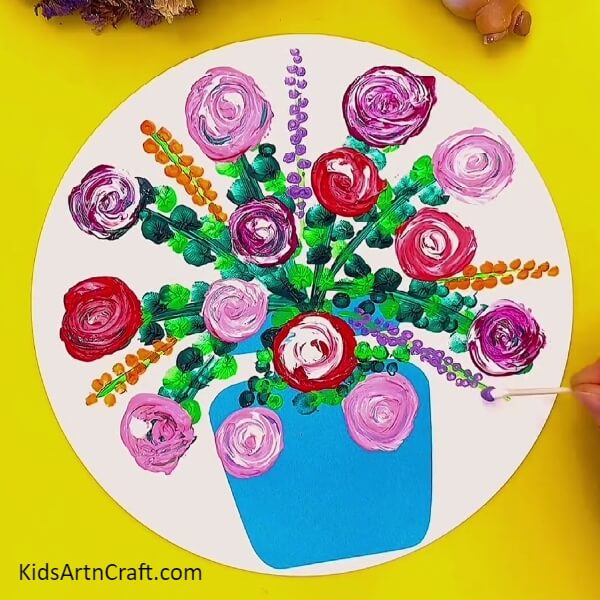
Take some green paint on a clean earbud and make light lines in the empty spaces between the flower stems. Now, using some purple paint and an earbud, make dots on each side of two of these lines that you just drew. Repeat the process on the rest of the lines using some orange paint. See the picture below for reference.
Finally, Wonderful Rose Pot Painting Is Ready
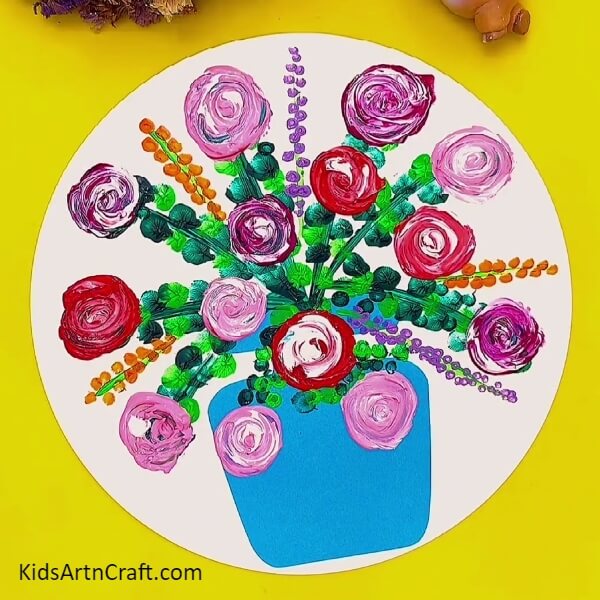
This completes the process of making this incredible art and we are left with a painting with all its colourful roses and stems.
Today, you learned to paint using three different techniques and I hope that you now have a great hold on your painting skills. You can hang it on the walls of your drawing room or submit it as an art project in school. Keep practicing these techniques and keep working hard.
See you in many more tutorials to come. Till then, good luck and goodbye.
Thank you for visiting the website.
Follow us on Youtube for art and craft tutorials and much more.
More Articles from Kids Art & Craft
- Realistic Tree Landscape Stamp Painting Using Fruit foam
- Easy Crayons Drawing At Home Video Tutorial for Beginners
- Easy Tulip Flower Painting Tutorial For Kids
- Creative Owl Painting Idea For Kids Step-by-step Tutorial
- Cute Bunny Artwork Using Paint Tutorial For Kids