Recycled Crafts
Easy Paper Cup Bunny Craft Tutorial For Beginners

This easy paper cup bunny craft tutorial is perfect for beginners! Learn how to make an adorable bunny out of a paper cup, some construction paper, and a few other simple supplies. Perfect for Easter or a fun craft project for the kids!
Are you looking forward to another fun craft project? We have got your back! Welcome, to this step-by-step tutorial on another alluring and easy-to-make craft project- Paper Cup Bunny Craft! This is a fun and easy craft project and can be done in a few simple steps. This craft will be loved by both children and adults alike. This tutorial will show you how to make your own paper cup bunny using your usual craft materials and a paper cup! With all that being said.
Let’s get started!
Paper Cup Bunny Craft – An Easy Step-by-Step Tutorial

Materials Required
- Paper Cup
- Pencil
- Sketch Pens(Black, White, Red)
- Colored Paper(Pink, White)
- Scissors
- Glue
Procedure
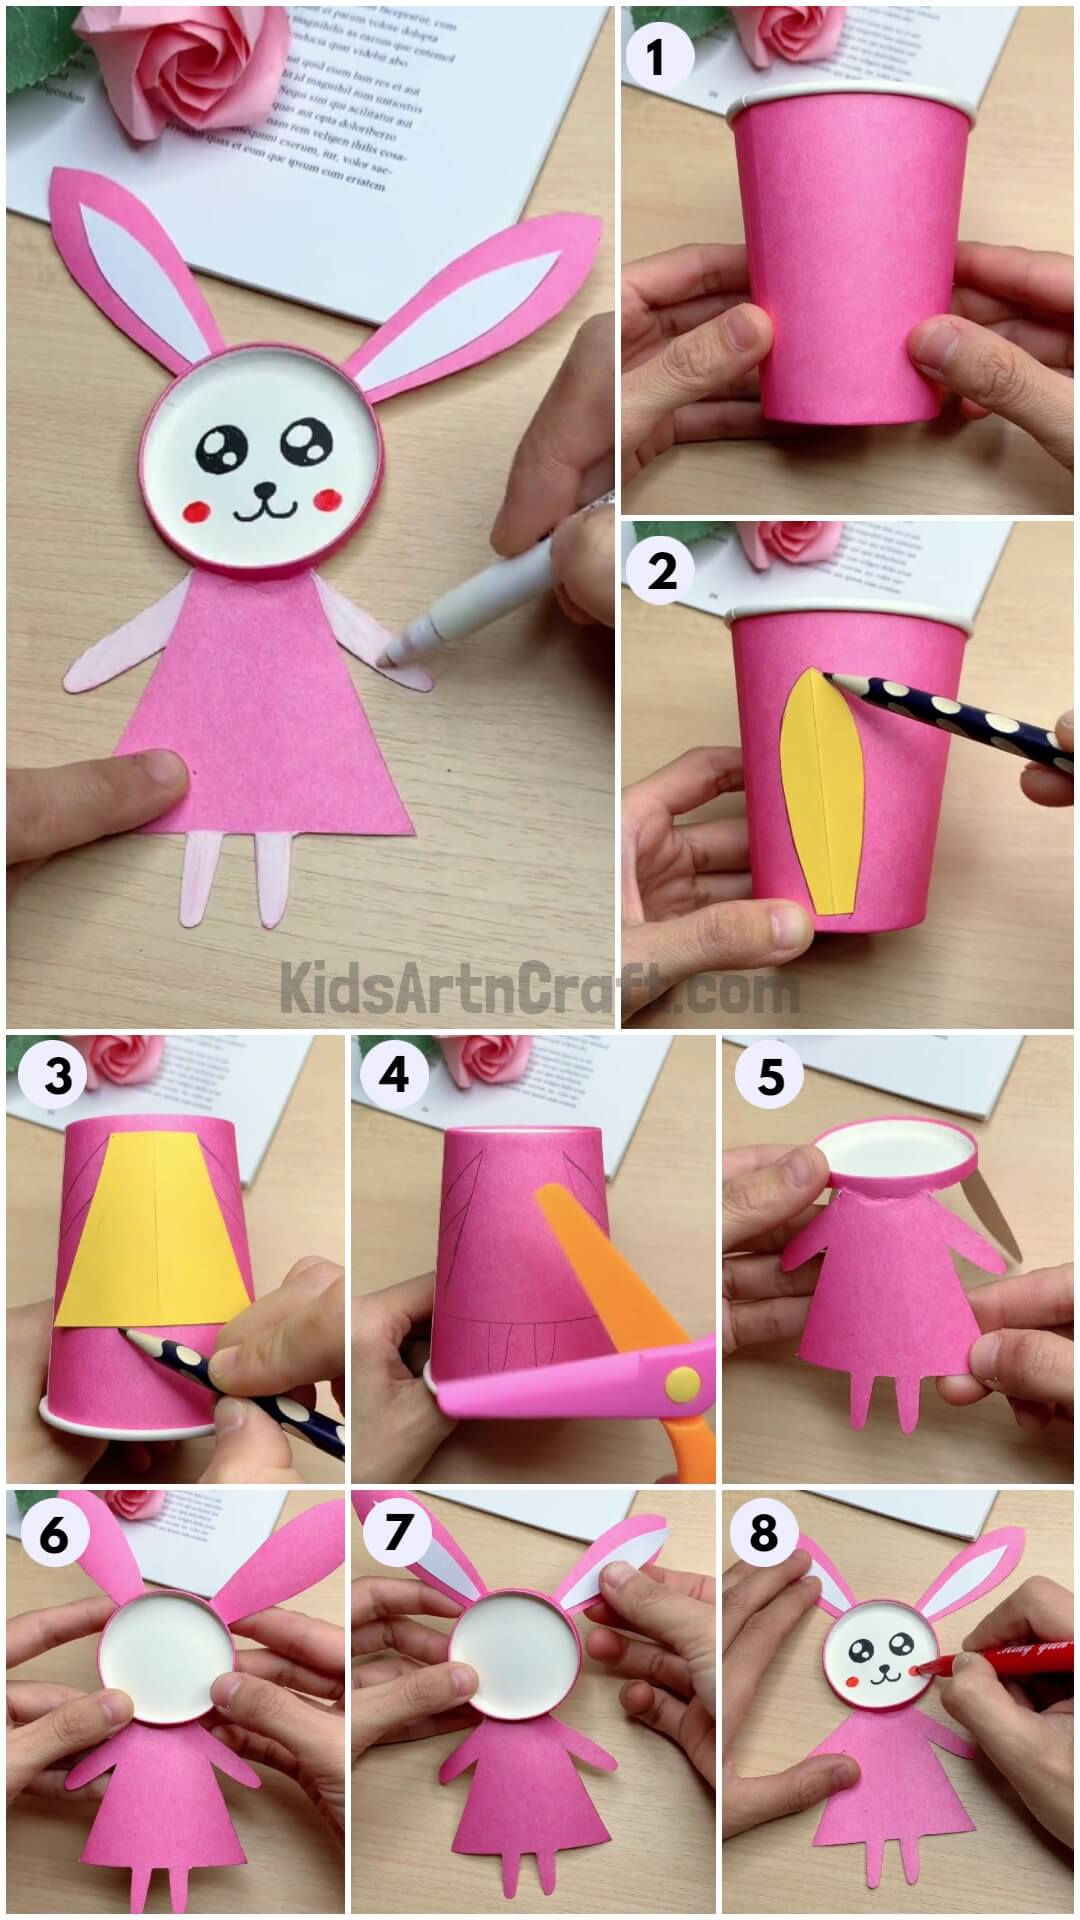
Step 1: Getting A Paper Cup
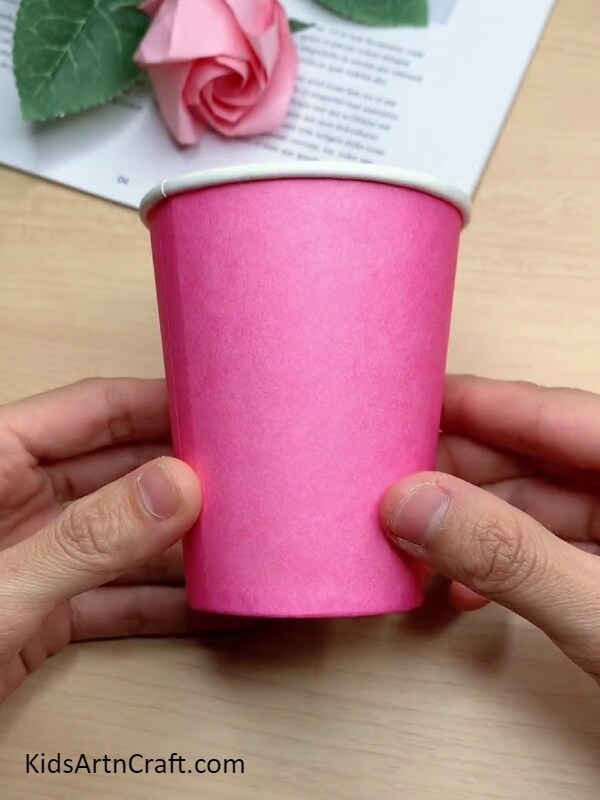

Hold your paper cup straight, with the open side on the top and the closed side at the bottom.
Step 2: Tracing the Paper Cup Bunny’s ears
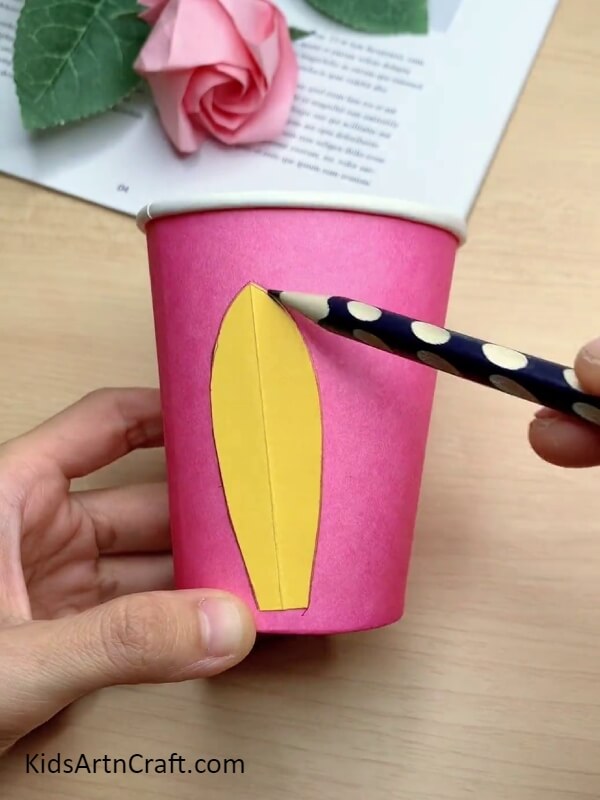
Using the chart paper and a pencil, draw out an ear shape that will serve as your bunny’s ears. Then cut the drawn ear from the paper and use the cut-out chart paper to trace the ears on the cup. The paper cut-out will help you draw more accurately.
Step 3: Drawing The Bunny
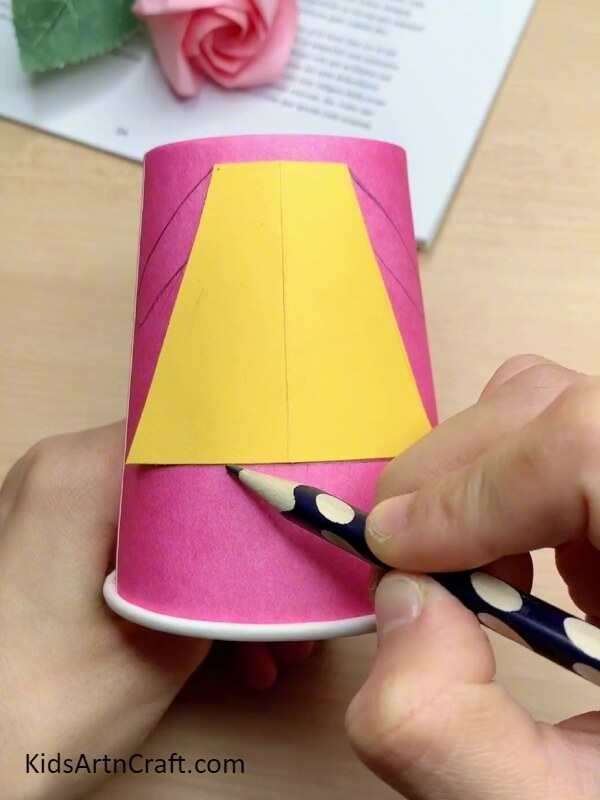
Flip the cup upside down and turn it around. Using another chart paper or paper cut out, trace the bunny’s body onto the cup using a pencil. Draw two arms and legs as well.
Step 4: Cutting Out The Paper Cup Bunny
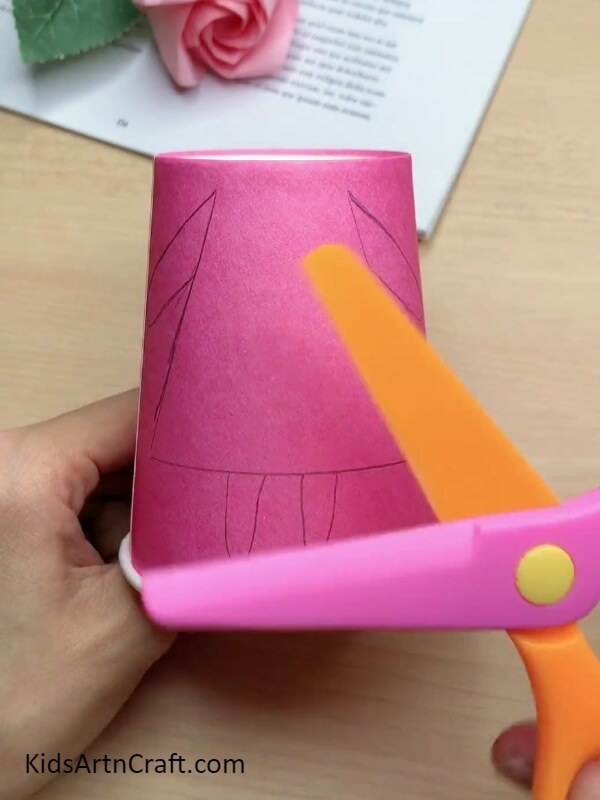
Now that you are all done with the drawing, let’s pick up the scissors! Cut along the lines you have drawn to make a bunny outline.
Step 5: Getting The Bunny’s Body
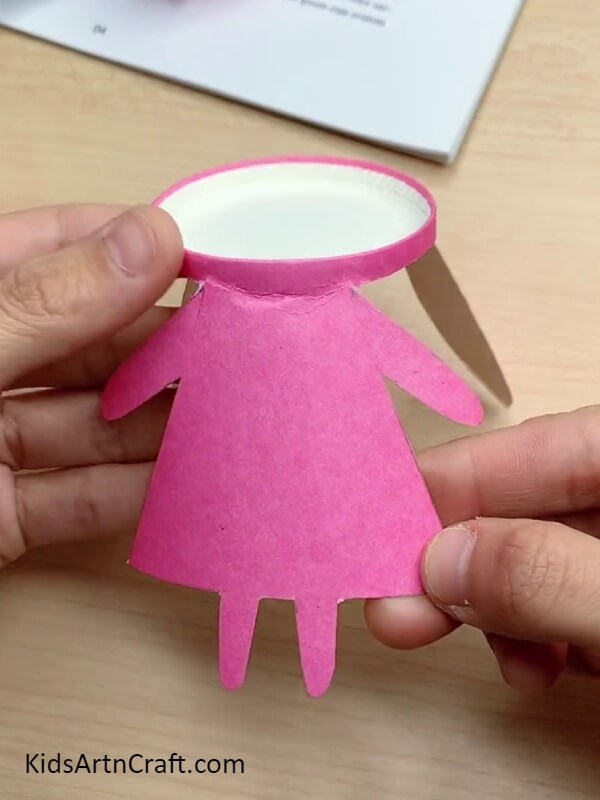
Cut perfectly until you have a cut-out of the body of the bunny wearing a dress, along with its ears that we had drawn in the second step. The underside or bottom of the cup will be the face of the bunny.
Step 6: Preparing The Bunny’s Face
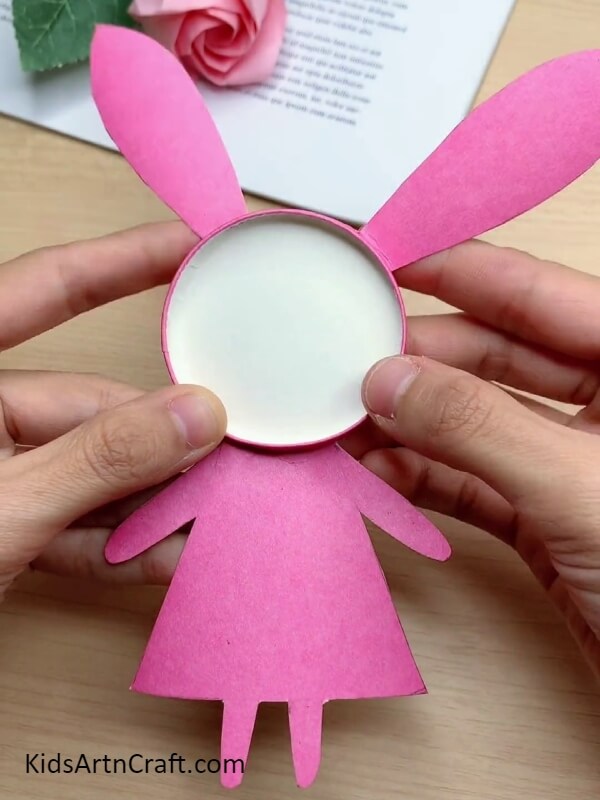
Our cut-out bunny is ready! Now we work on the face. Fold or bend the underside of the cup such that it faces you and keep it pressed for a while.
Step 7: Decorating The Ears
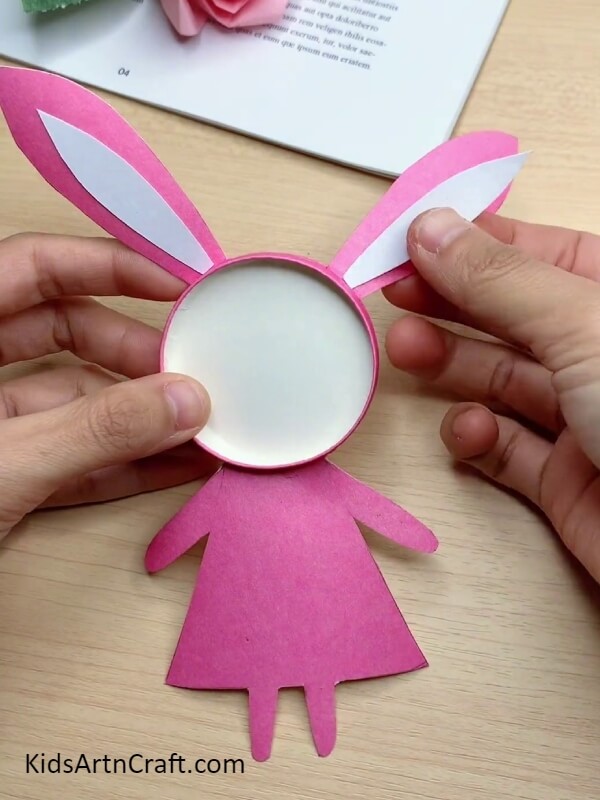
Now use a white piece of paper to draw out two smaller ears. Cut these ears out and using glue paste them on the paper cup bunny, such that they work as the inner part of the bunny’s ear. Ta-da! You now have realistic-looking bunny ears!
Step 8: Drawing The Face
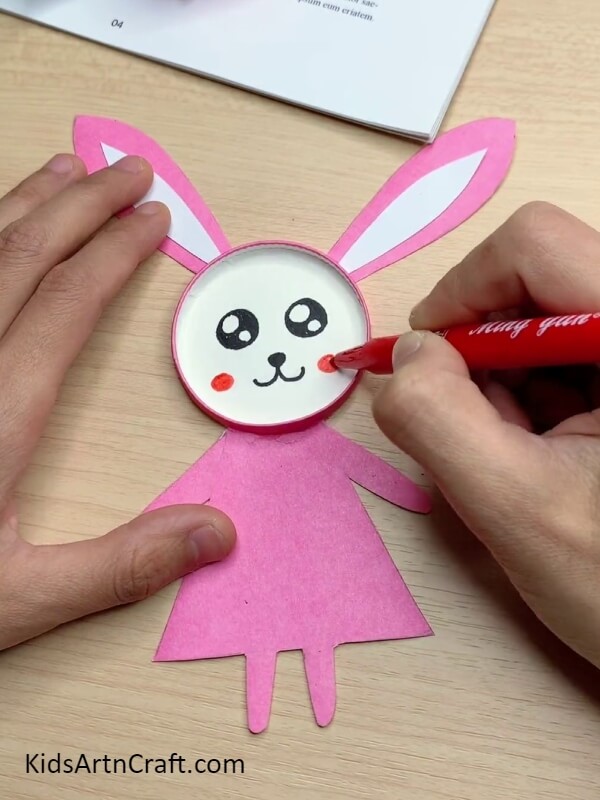
Now pick up those sketch pens and get to work! Using a black sketch pen make the eyes, the nose, and the mouth. You can also add a little blush to your bunny using a red or pink sketch pen.
Step 9: Coloring The Arms And Legs
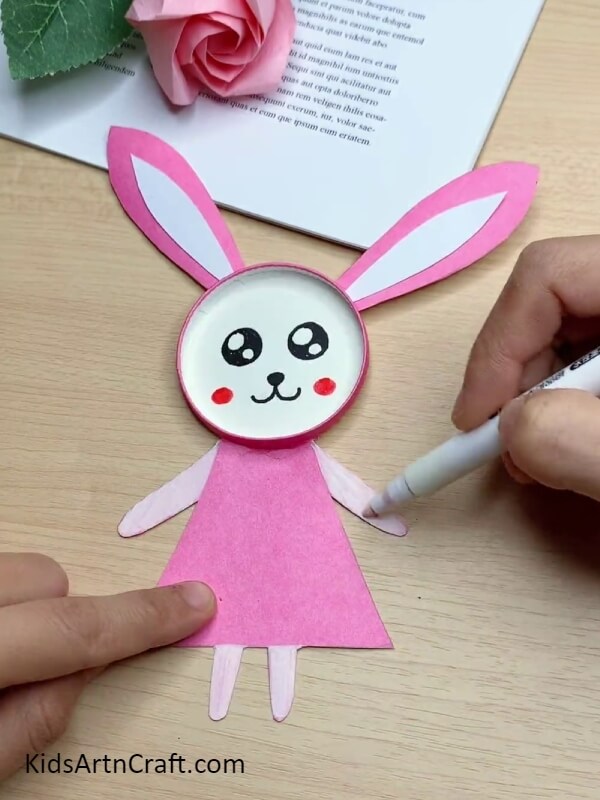
Your bunny is almost ready! Pick up a white sketch pen or marker and color the hands and legs of the paper cup bunny. Now you have a cute paper cup bunny wearing a pretty dress!
Your Paper Cup Bunny is Ready!
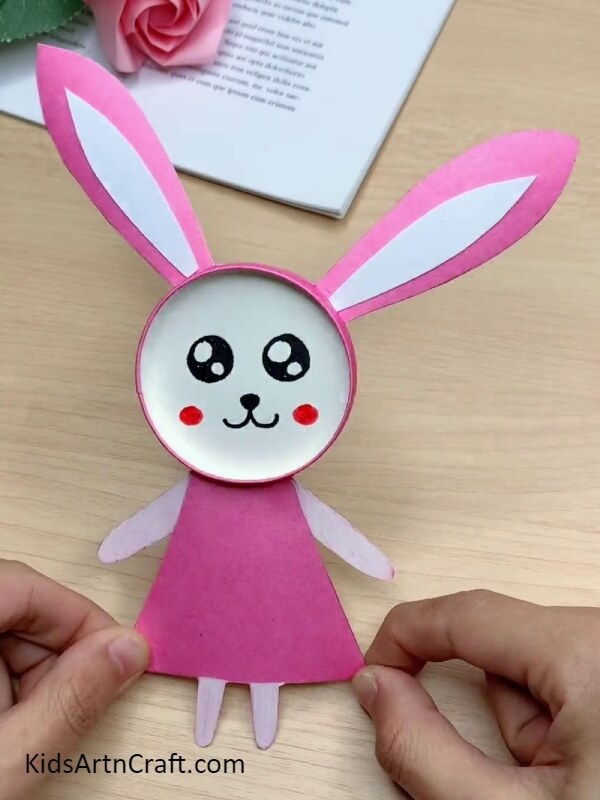
And there you have it! Your paper cup bunny is ready!! With this easy tutorial, anyone can make their paper cup bunnies and show them off. Use it as gifts or craft decorations. You can get even more creative by adding more details to the dress or face of the Bunny.
This craft is engaging, fun, and interactive and would be liked by all! So try this craft and engage your kids in a fun craft-learning activity! We hope you like this paper cup bunny craft step-by-step tutorial. We would love to hear your thoughts in the comment section below. And be sure to visit our other articles for more ideas!
Some More Bunny Craft Tutorial
Learn To Make Paper Bunny Crafts for Kids


Image Source/Tutorial: Kids Art & Craft
This is a great article for parents looking for an easy and fun craft to do with their kids. It teaches how to create a creative paper bunny craft that is sure to bring a smile to children’s faces. It’s easy to make and an enjoyable way to spend quality time with your kids.
Ideas For Kids To Make Bunny Finger Puppet Craft

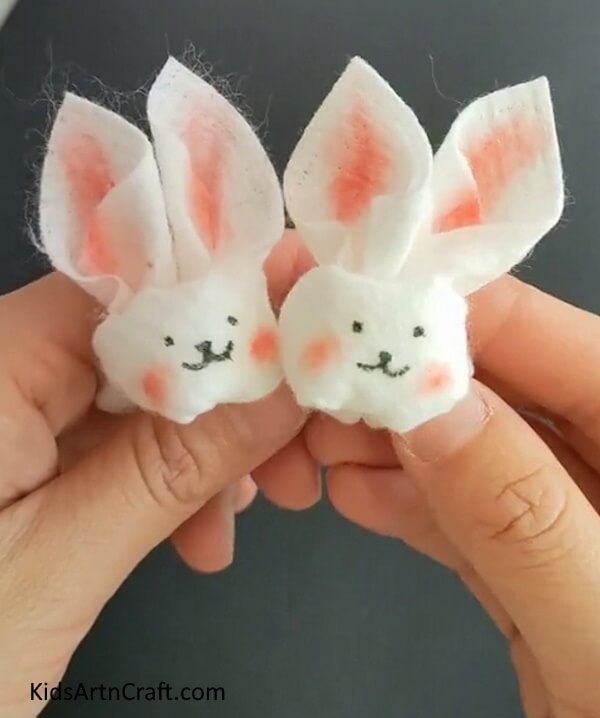
Image Source/Tutorial: Kids Art & Craft
This fun Bunny Finger Puppet Craft is a great activity for kids! All you need is felt, scissors, glue and a few other supplies. Kids will love creating their own finger puppets and using them to put on a show. It’s a great way to encourage creativity and have some fun!
DIY Peanut Shell Bunny Craft For Kids

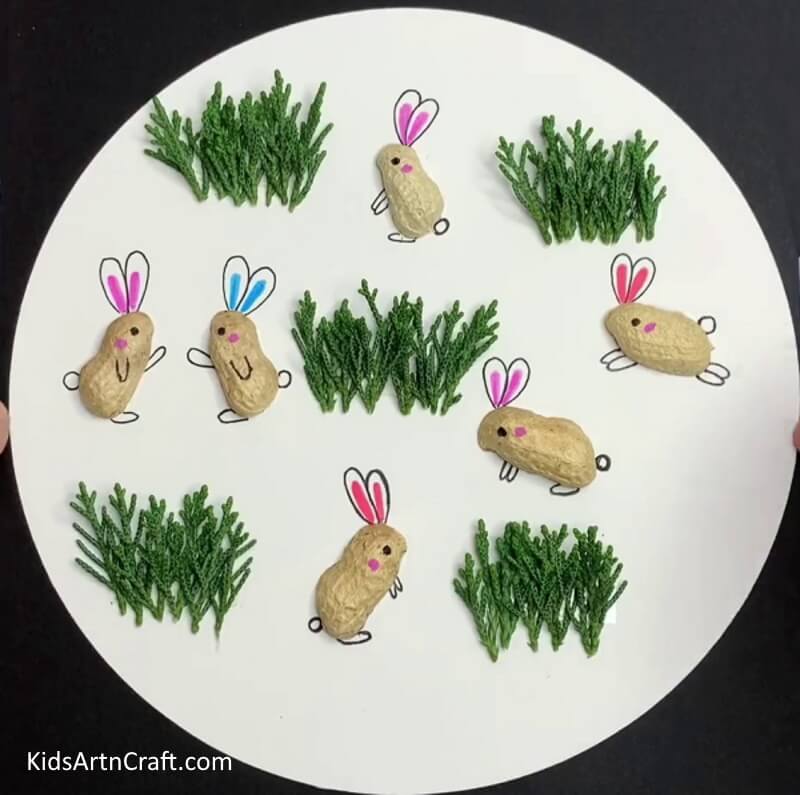
Image Source/Tutorial: Kids Art & Craft
This DIY Peanut Shell Bunny Craft is a fun and easy activity for kids to do. It’s a great craft for Easter or any time of the year. Kids will love making and decorating their own bunnies with a variety of colors and materials.
Thank you for visiting our website!
Making A Paper Bunny Craft For Kids

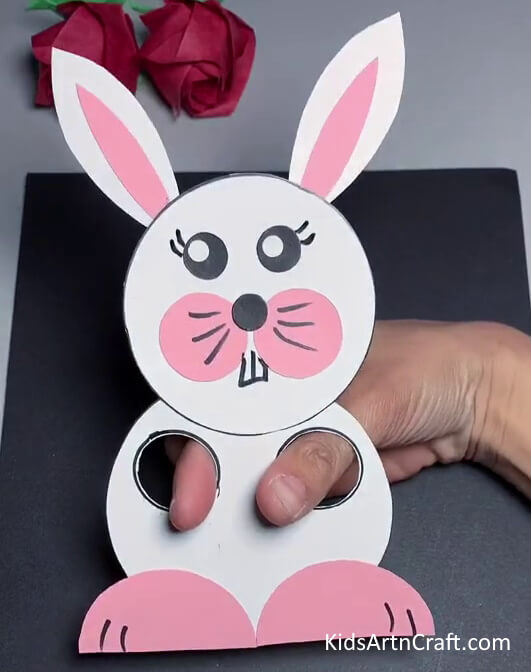
Image Source/Tutorial: Kids Art & Craft
Making a paper bunny craft is a great way to keep kids entertained and engaged. With just a few supplies, kids can make their own paper bunnies that they can proudly display. This craft is a fun and easy way to bring creativity and imagination to life!
Ideas For Kids To Make Bunny Finger Puppet Craft
Image Source/Tutorial: Kids Art & Craft
This fun Bunny Finger Puppet Craft is a great activity for kids! All you need is felt, scissors, glue and a few other supplies. Kids will love creating their own finger puppets and using them to put on a show. It’s a great way to encourage creativity and have some fun!
Simple To Make Paper Cup Bunny project for kids

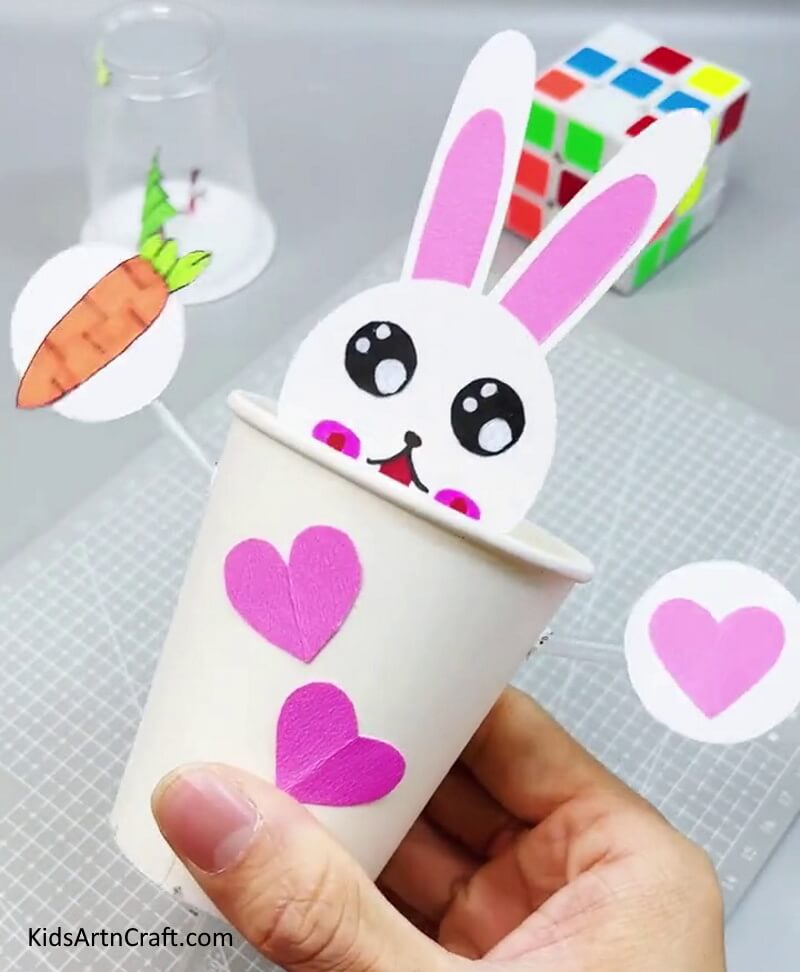
Image Source/Tutorial: Kids Art & Craft
This simple paper cup bunny project is perfect for kids! It is easy to make and will give your kids a fun craft to do. They will love creating their own bunny and can use it as a decoration or a toy for playtime.
Follow us on Youtube for art and craft tutorials and much more.
More Articles from Kids Art & Craft
- How to Make Paper Cup Wrist Watch Tutorial for Kids
- How to Make Paper Cup Doll Craft for Kids
- DIY Paper Cup Swan Step-by-Step Tutorial For Kids
- Easy Paper Cup Fish Craft In Simple Steps
- How to Make a Paper Bunny Easy Tutorial for Kids