Paper Crafts
Unique Candy Basket Craft Step-by-step Tutorial

Create a special treat for a loved one with this easy-to-follow step-by-step tutorial to create a unique candy basket craft. It’s perfect for any occasion and makes a great gift for any recipient.
Hello there! This is a unique tutorial on Candy Basket Crafts. This craft is especially for schoolers to work on their creativity and is also a perfect gift option for their friends on their birthdays. It is a beautiful way to represent candies and make anyone feel special and loved. All you need is some craft papers, scissors to get creative, and lots of toffee or candies! Let’s get started!
Unique Candy Basket Craft Step-by-Step Tutorial

Read More: How to Make Paper Doll Craft For Kids
Materials Required
- Craft Paper(Green)
- Scissors
- Candies or Toffees
- Glue
- Pencil
- Ruler
Procedure
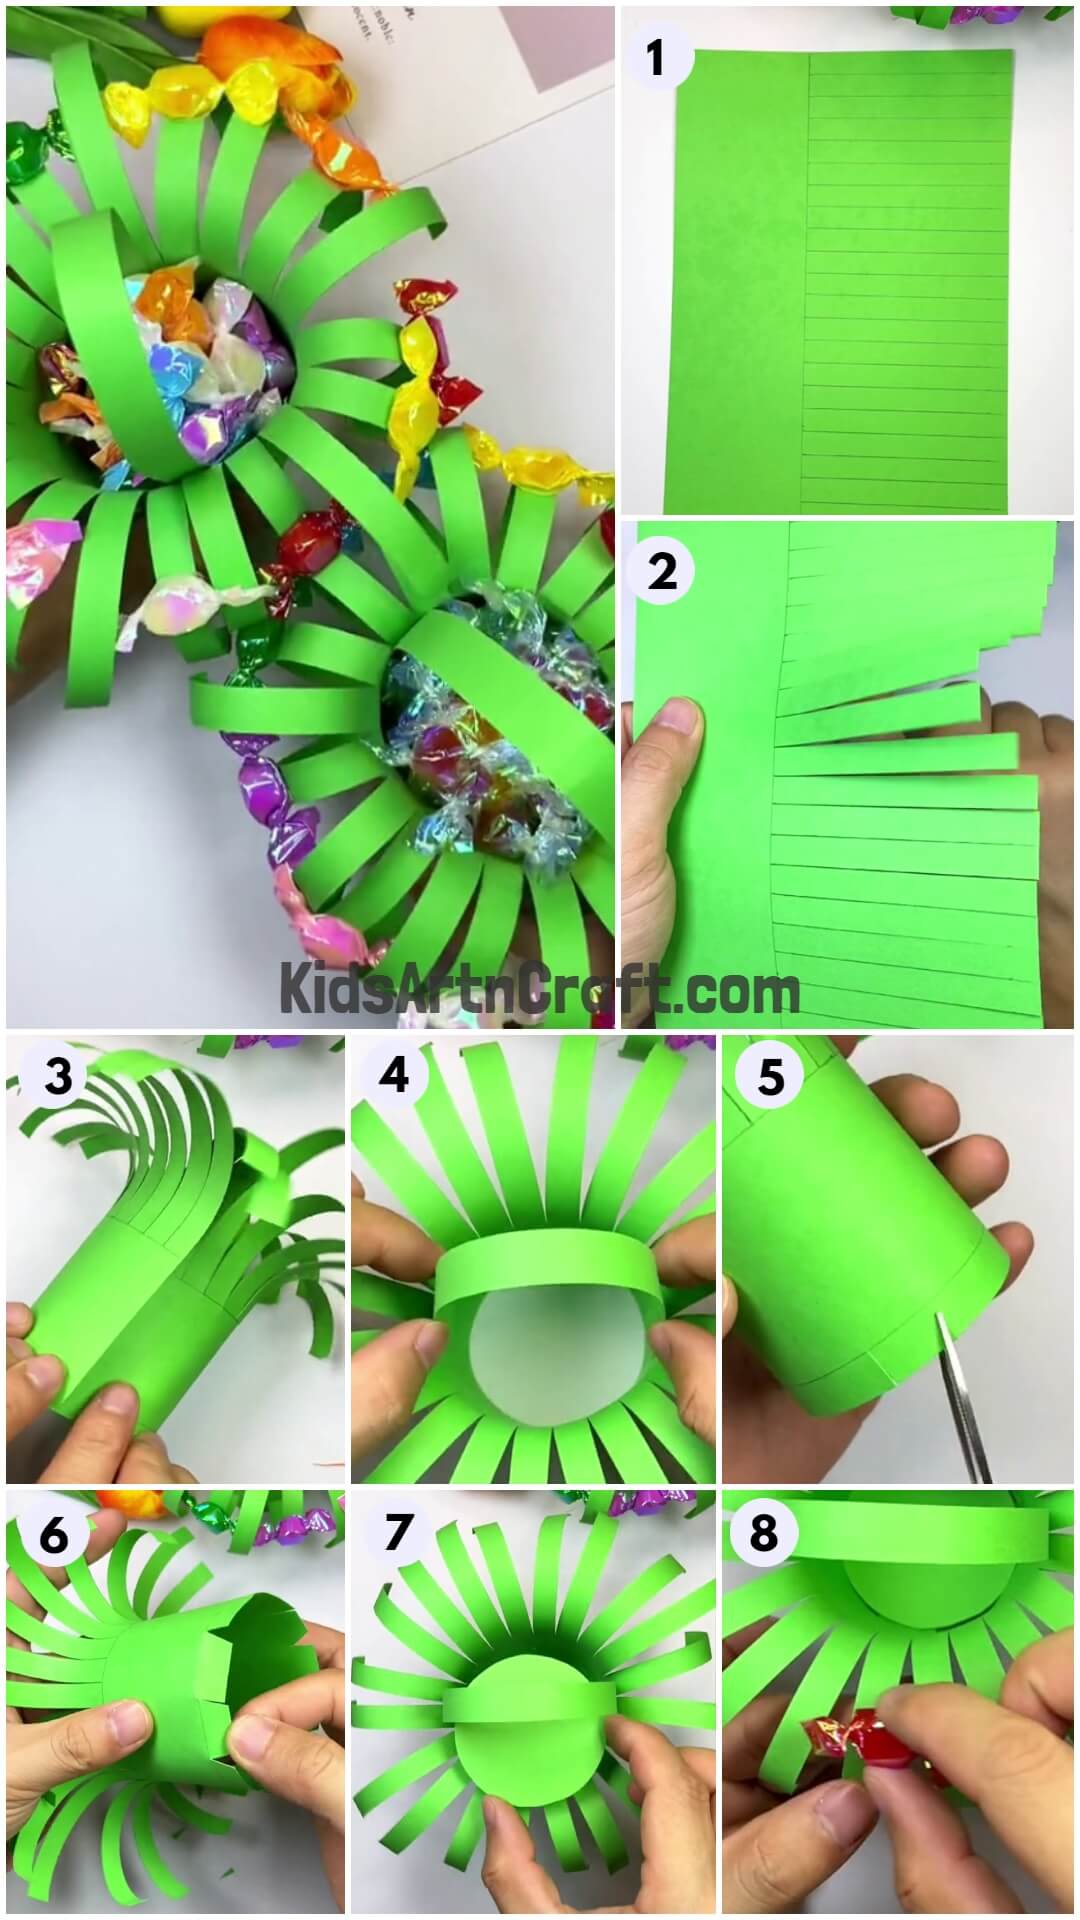
Step 1: Drawing Lines On Green Paper
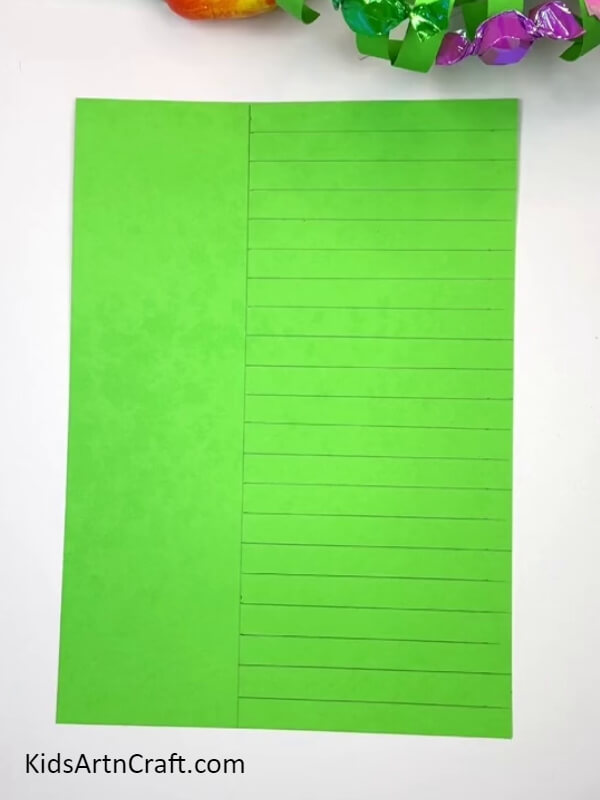

Let’s begin by getting a green craft sheet, and drawing horizontal lines that are equally spaced on one side of the paper as shown in the image.
Step 2: Cutting Along The Lines
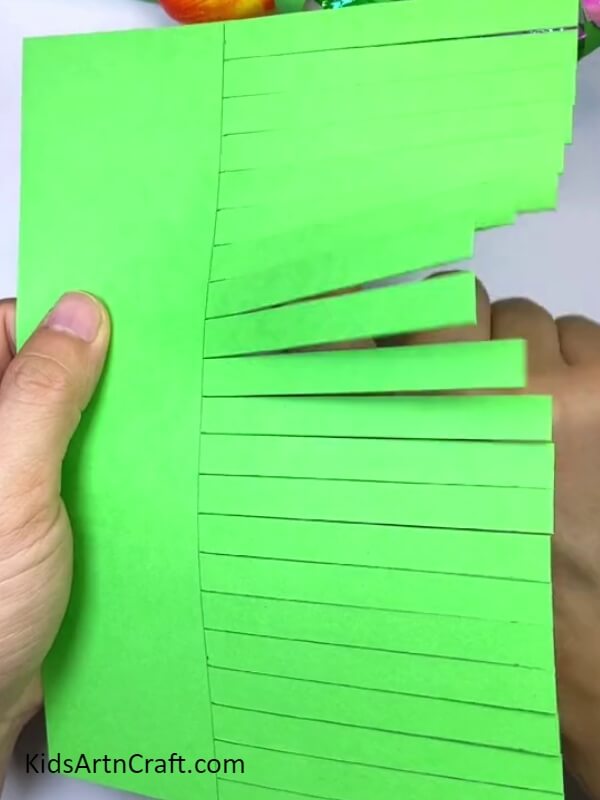
Using scissors, cut along the vertical lines. You will get rectangular strips.
Step 3: Curling The Strips
Take a pen and using the pen and your fingers, curl up the strips to the middle to make a curved shape as shown in the image.
Step 4: Folding The Green Paper
Roll up the remaining side of the craft sheet and paste the edges and glue them by letting the curls face outwards.
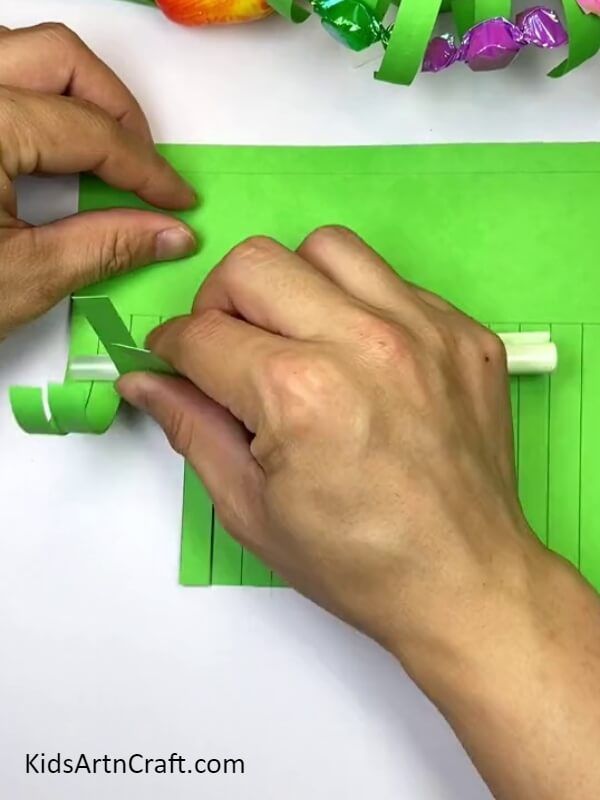
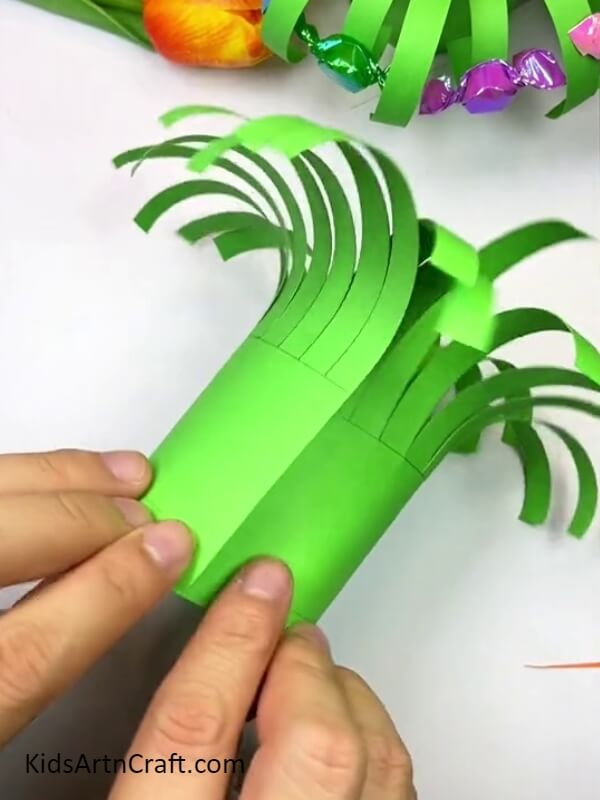
Step 5: Making A Handle
Flip the rolled-up strips so that the curls face downwards and then cut a rectangular strip of paper and glue it inside to create a handle as shown in the image above.
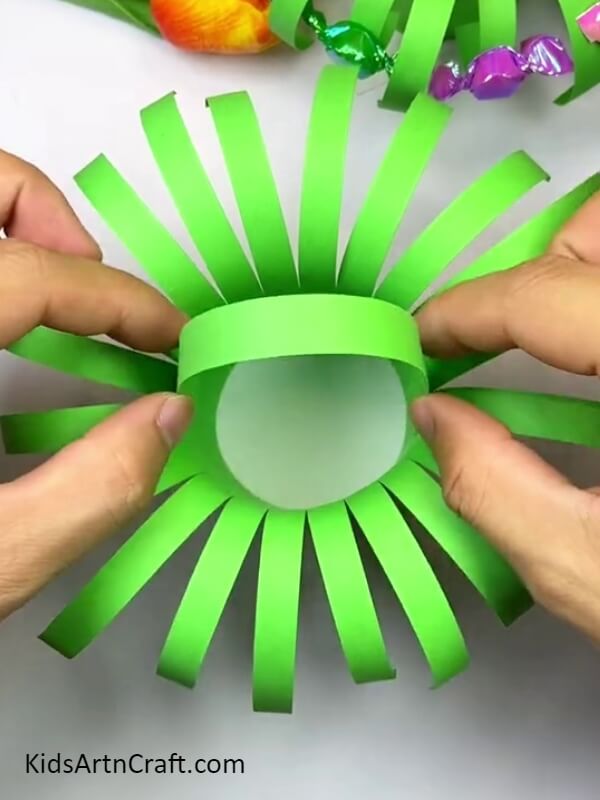
Step 6: Making A Cut At The Bottom

To avoid mess, mark a horizontal line, a centimeter away from the bottom edge. And cut vertically a centimeter away from each to prepare the base for your basket.
Step 7: Folding The Cuts
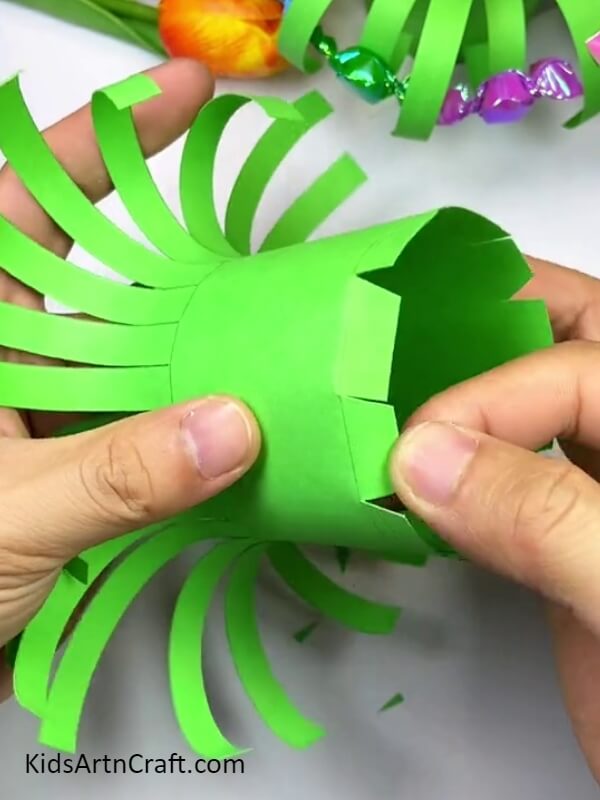
After cutting them make sure to fold every piece internally.
Step 8: Pasting A Circular Base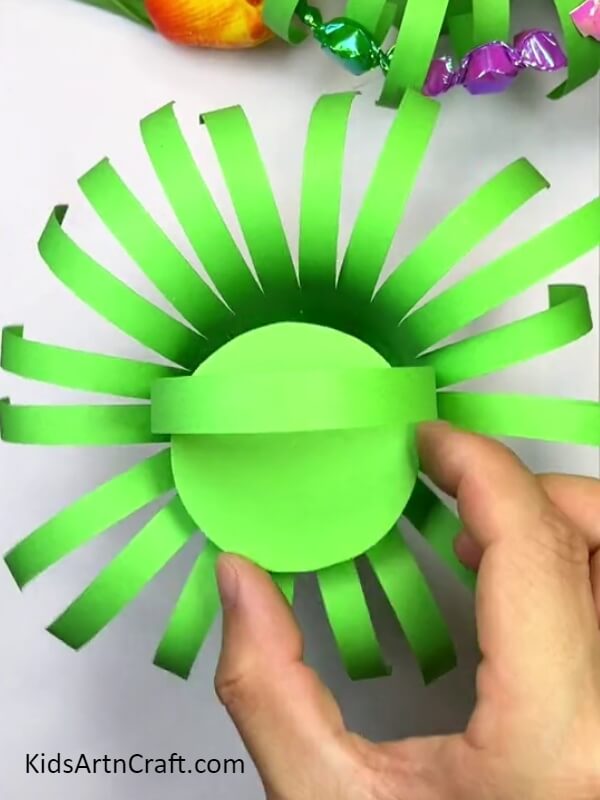
Finish up the basket by placing a circular paper to create a base for the basket. Paste the bottom folded cuts onto this circular paper to make a sturdy base.
Step 9: Sticking Candies
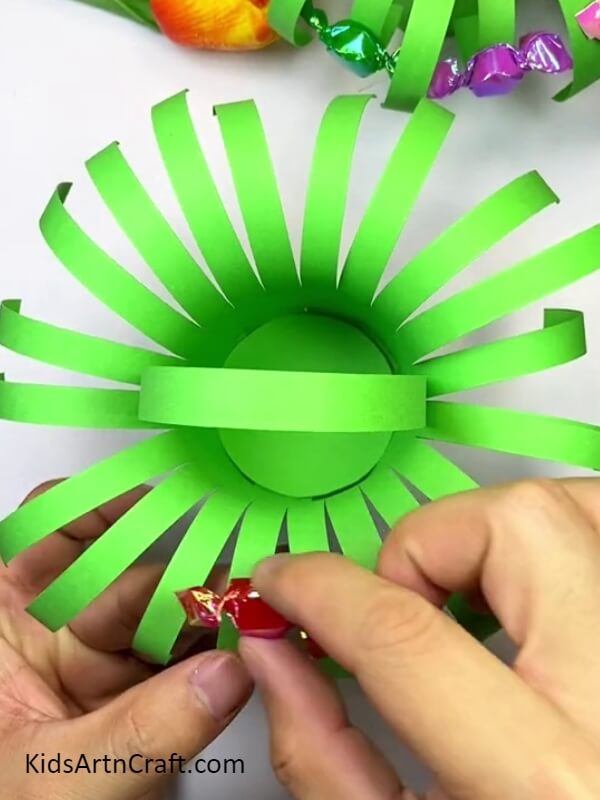
At last, you will get something like this. So, start by sticking candies on the strips. Place some candies inside the basket also. You will get a beautiful candy basket!
Our Paper Candy Basket Is Ready!

When you are done with sticking candies on the strips, finish it up by filling the candies in the baskets. You can add paper-crafted flowers to make it look more attractive. There you go!! Your candy basket is ready. You can present this Cute Candy basket to your friends and siblings. They will love it!
Hope you like this Candy basket craft step-by-step tutorial. We would love to hear your thoughts in the comment section below. And be sure to visit other articles for more ideas! Thanks for visiting our website.
Follow us on Youtube for art and craft tutorials and much more.
More Articles from Kids Art & Craft
- How To Make Sunflower Clock Craft Using Paper
- Colorful Fish Paper Craft To Make With Kids
- Paper Lollipop Craft – Learn to Make Origami Paper Candy with Step-By-Step Tutorial
- DIY Paper Basket Step by Step Tutorial For Kids
- Simple Drawing Trick on Paper Video Tutorial for Kids