Cardboard Craft
Fun Elephant Ring Toss Game Craft Tutorial For Kids

This craft tutorial will show you how to make a fun and easy-to-play ring toss game using an elephant toy and a few other craft supplies. Perfect for any kids party or family game night, this game will keep your kids entertained for hours!
In this tutorial, we going to learn how to make a fun elephant ring toss game craft with simple steps. This is a perfect indoor game for kids, and also for adults. You know what, creating this game with cardboard sheets is also a fun part. With using some easily available craft essentials you can create this fun game at your home, not only your kids and also you will love it, have fun with it.
DIY Paper Elephant Craft Ideas For Kids

Read More: Farm Animal Crafts for 3 Year Olds
Materials Required
- Cardboard Sheet
- Pencil
- Rubber
- Scissors
- Sticky Tape Or Glue
- Black Pen
Procedure
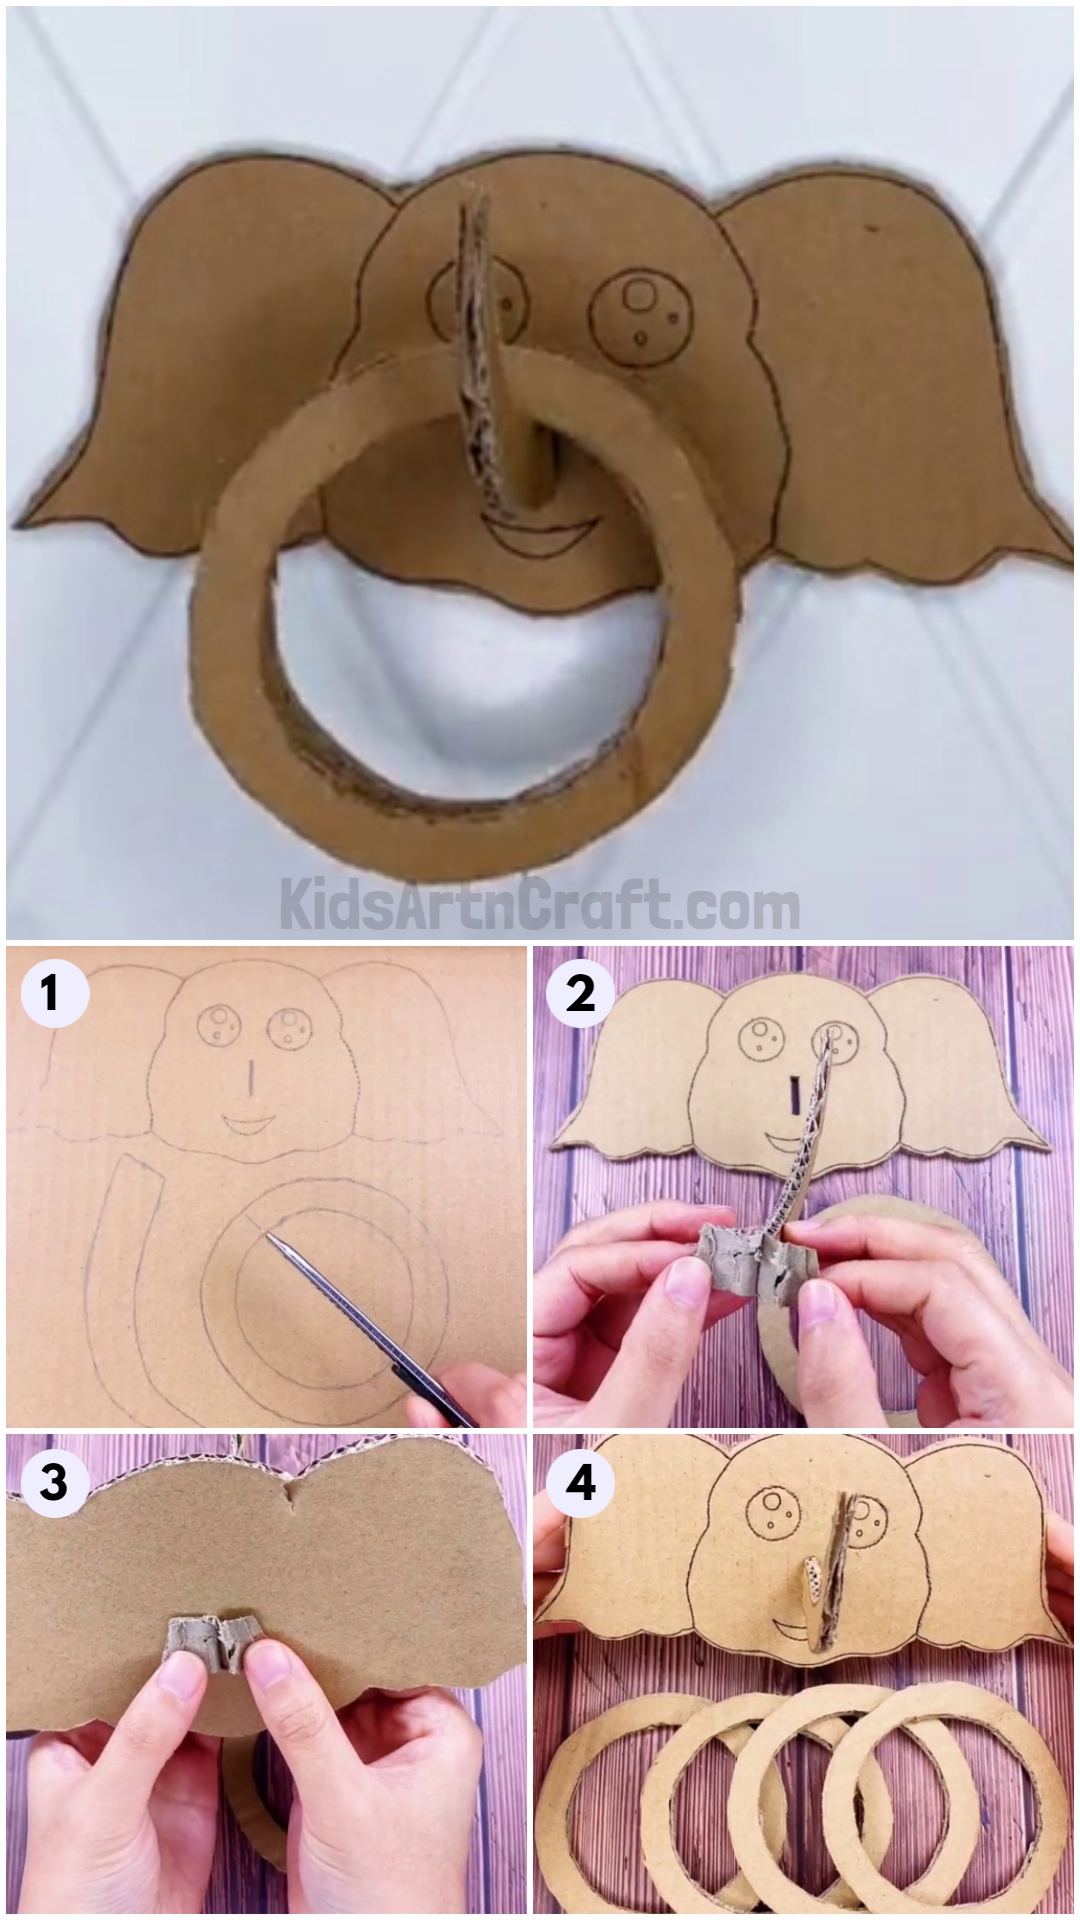
Step 1: Drawing An Elephant Face, Trunk, And Rings
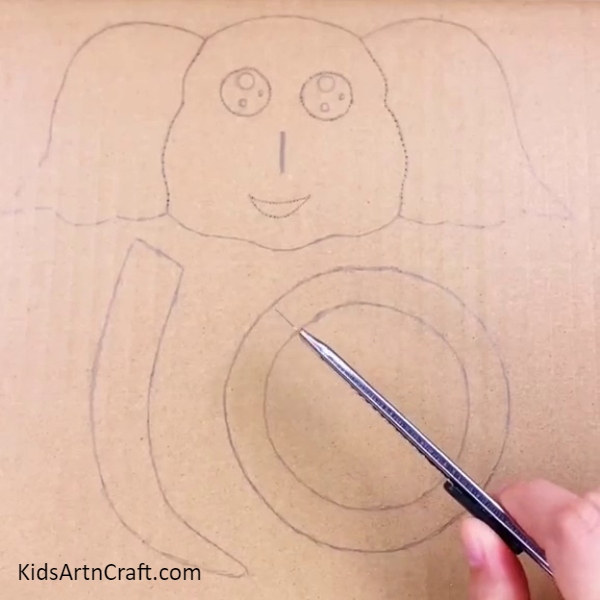

Draw an elephant in the cardboard sheet as in the image or you can draw as you like. Draw the trunk alone in the cardboard and draw circles for making the rings.
Step 2: Cutting The Drawing With A Knife Or Scissors
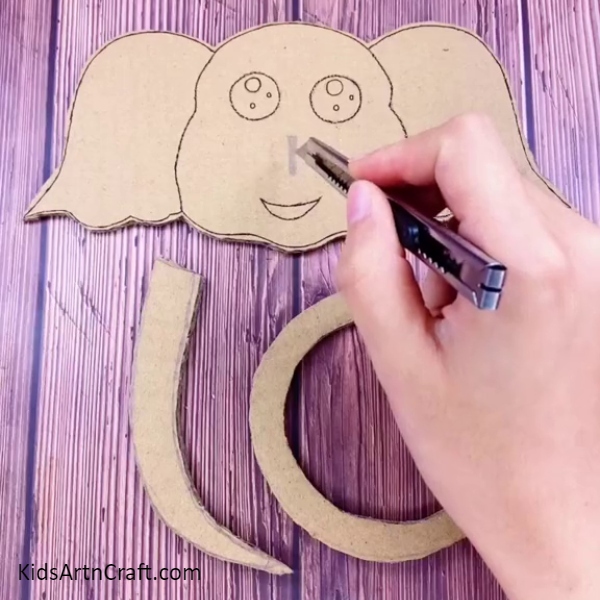
Then, highlight your drawing with a black pen, and cut all the pieces perfectly. You have to just cut the outline of the drawing, then cut the trunk and keep it, and also the rings.
Step 3: Splitting Trunk To Paste It With Elephant’s Head
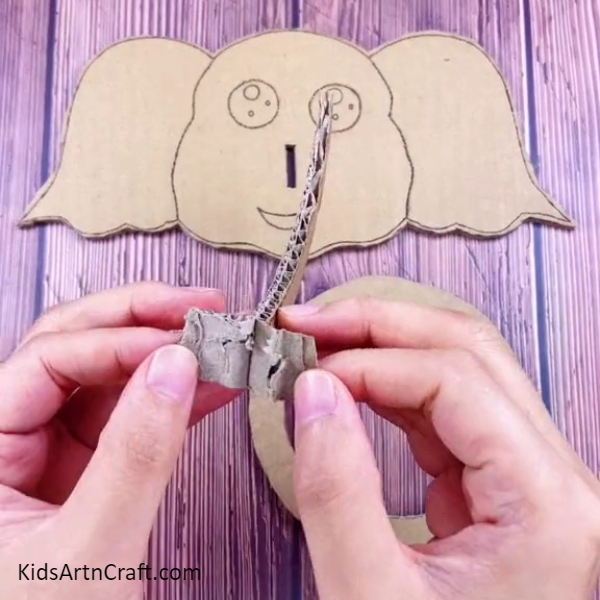
Now, cut a little rectangular shape hole in the middle of the elephant’s face. After that, take the trunk and tear it at the broad end of the trunk, just like the person in the image did. Be careful with it and don’t tear too much.
Step 4: Making Trunk Of Elephant

After you tear it a little bit, just insert the torn side of the trunk into the hole that you cut in the center of the elephant’s face. Don’t put force to insert the trunk, just gently insert the trunk until you reach the untorn part of the trunk.
Step 5: Spreading The Trunk Into Two Part
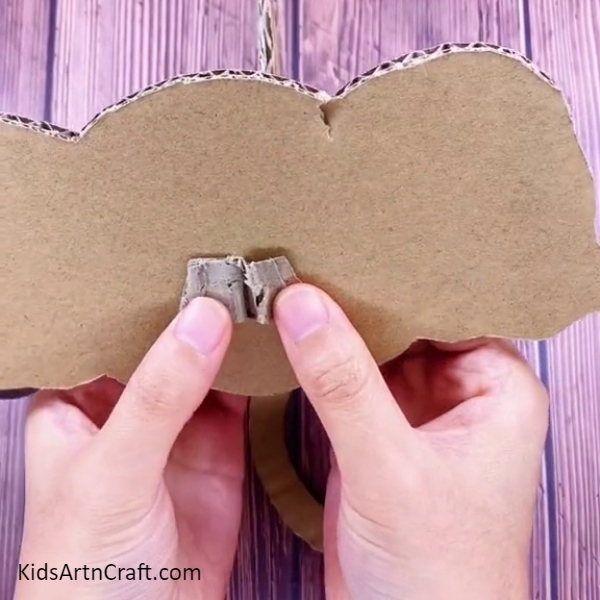
Turn the elephant’s head, behind the elephant’s head, and just gently separate the torn trunk into two parts as shown in the image.
Step 6: Pasting Trunk With Head
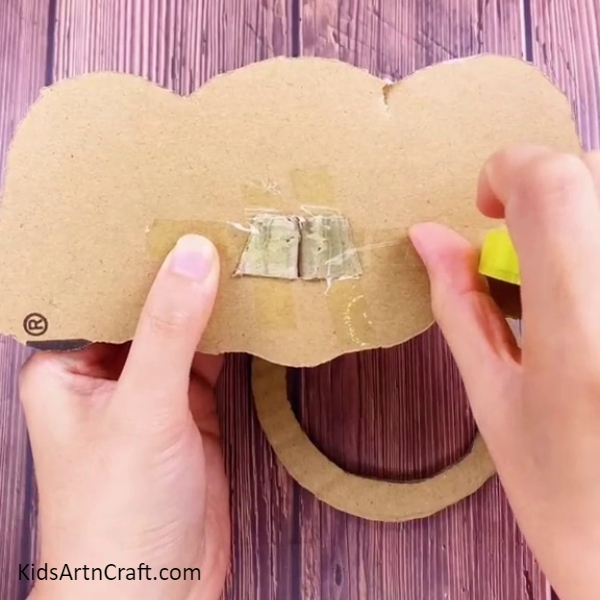
Then you have to paste the trunk with the elephant’s head strongly with tape. You can also use glue to paste the trunk with the head.
Step 7: Completing It By Cutting Rings
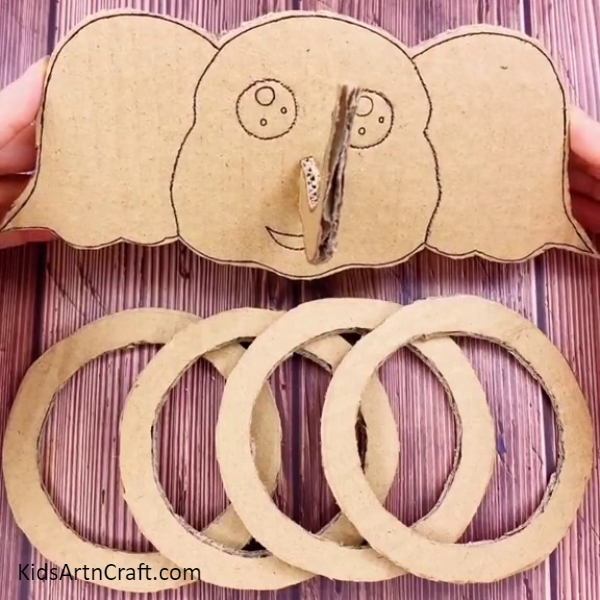
After that, cut four or more rings. For the circles, draw a 10 to 12 cm circle first on the cardboard sheet and then draw 8 to 9 cm circle inside of the 10 cm circle and cut the circles like just shown in the image. If you want to make it more fun, you can also paint the rings and elephant.
Finally! Pasting The Elephant Craft Into The Wall
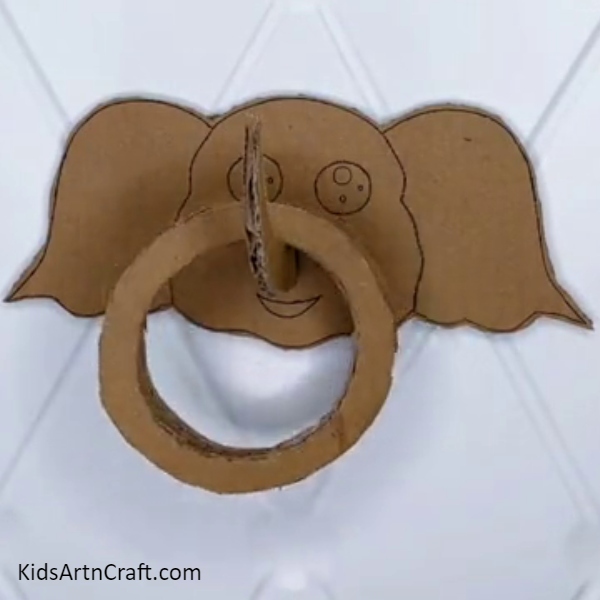
Then take some double side tape and stick that elephant’s head into the wall properly then set the elephant’s trunk as your target and use to put the rings into the trunk correctly. If you want, you can make more rings. Don’t miss your target!
This is a simple craft, even kids can also make this craft and we give very simple steps to make this craft, hope you make it easy, and you enjoy this tutorial. Have fun with making crafts using our tutorial. Please leave some comments to encourage our work and also visit our website for more easy craft tutorials.
Thank you for visiting our website!
Follow us on Youtube for art and craft tutorials and much more.
More Articles from Kids Art & Craft
- Glory Lily Coloring Pages For Kids – Free Printables
- Hedgehog Crafts & Activities for Kids
- Pigeon Drawing & Sketches For Kids
- Fairies in Jar Craft Ideas for Kids
- DIY Christmas Yarn Wreath Ideas