Clay Crafts
Easy Carrot Growing Artwork Craft Step-by-step Tutorial

This step-by-step tutorial will show you how to create a unique carrot-growing artwork craft. Learn how to use common household items to make a fun and creative project that will bring a smile to your face!
It’s time to get crafty with these easier and quicker no-prep basic tutorials. If you’re one of those who think crafting is not their cup of tea then trust me you’ve to try these less-budget crafts which can be easily made in about 10 to 15 minutes using the materials that are already present in your home. Let’s get started
Easy Carrot and Ant Growing Artwork Craft For Kids

Read More: DIY Miniature Clay Cake Craft Activities for Kids
Materials Required
- Pencil
- Plain sheet
- Colorful Sketch pens
- Clay
- pair of eyes
Procedure
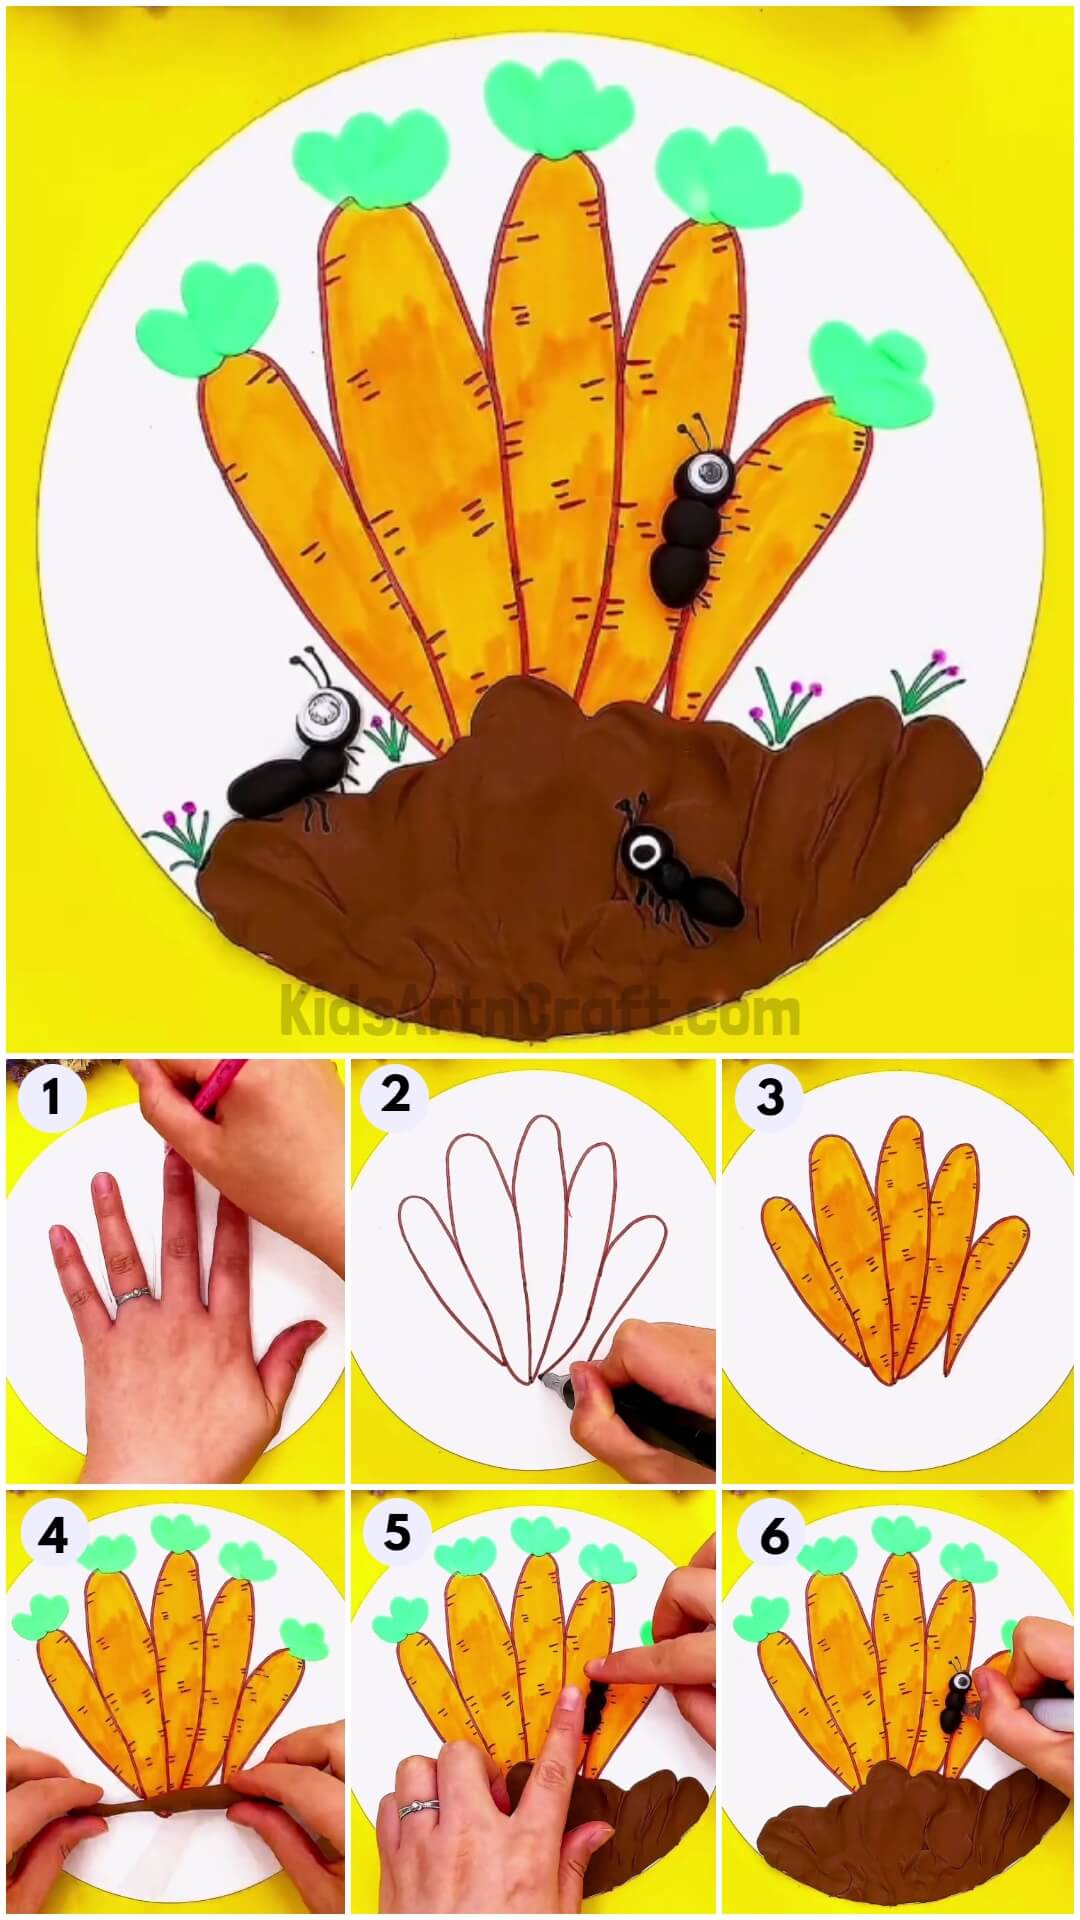
Step 1: Outline Your Five Fingers With The Help Of A Pencil
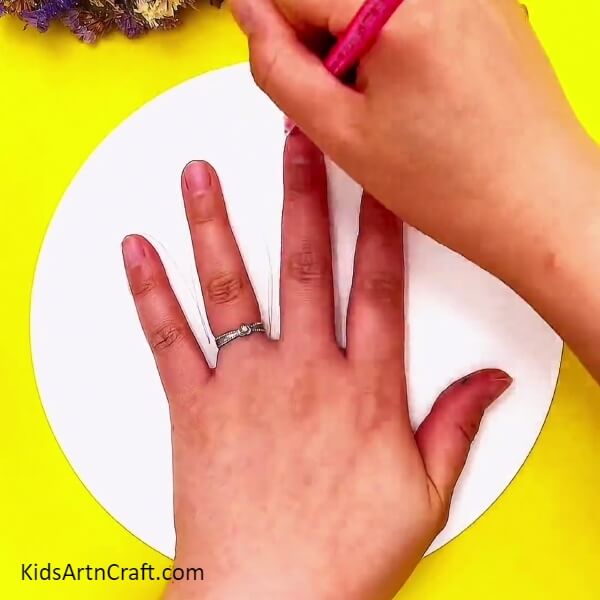

Place your five fingers on a plain sheet of paper and outline them with a pencil as shown in the image above.
Step 2: Take A Sketch Pen And Highlight The Figure Drawn
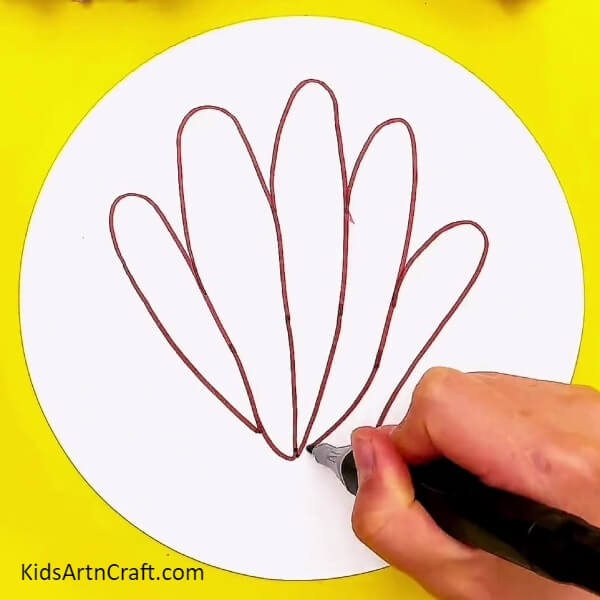
For the next step take a sketch pen and highlight the design that you’ve created with the pencil. Join all five carrots together as displayed in the image above.
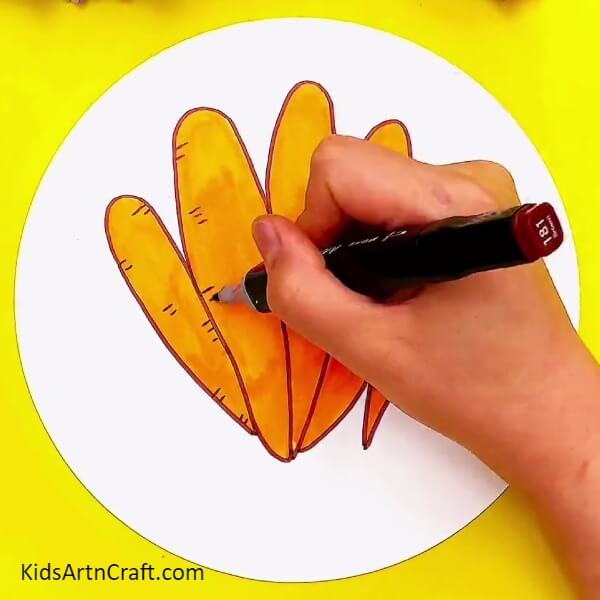
Step 3: Colour Your Carrots With An Orange Sketch Pen

Take an orange sketch pen and color all five carrots that you’ve drawn carefully.
Step 4: Draw A Pattern On The Carrot As shown Below
Take a black sketch pen and draw a similar pattern as shown in the image above to give it a more realistic look.
Step 5: Draw The Same Pattern On All Five Carrots

Design the same pattern sequentially as shown above.
Step 6: Take A Clay Of Green Color
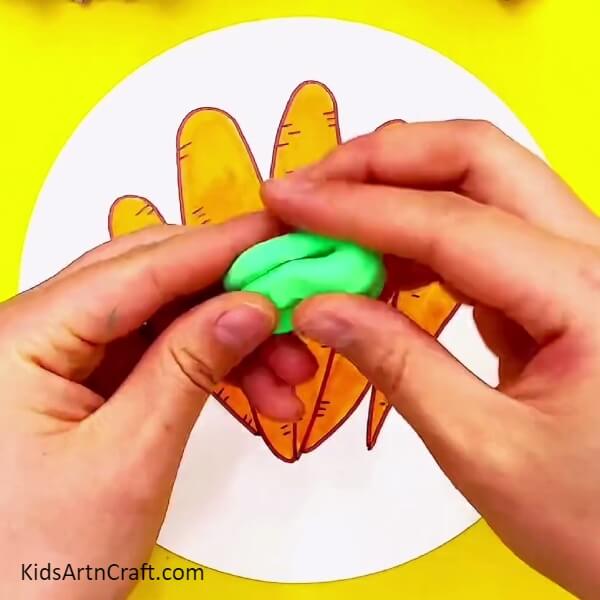
For the next step take some clay of green color and make a small dough out of it.
Step 7: Design The Leaves Of The Carrot With The Green Clay
Mold the green clay in the shape of thin leaves and stick it on the carrot.
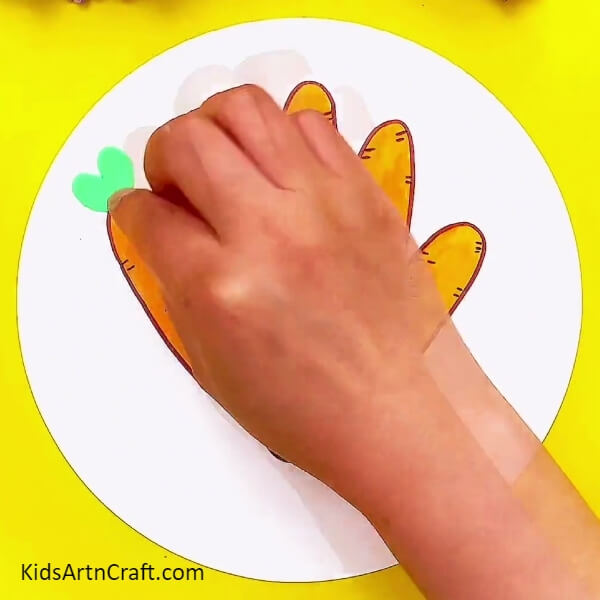
Step 8: Design All Leaves Of The Five Carrots In A Similar Pattern
Design all five leaves of carrots with the green clay in the same proportion and take a brown clay and extend it as shown.
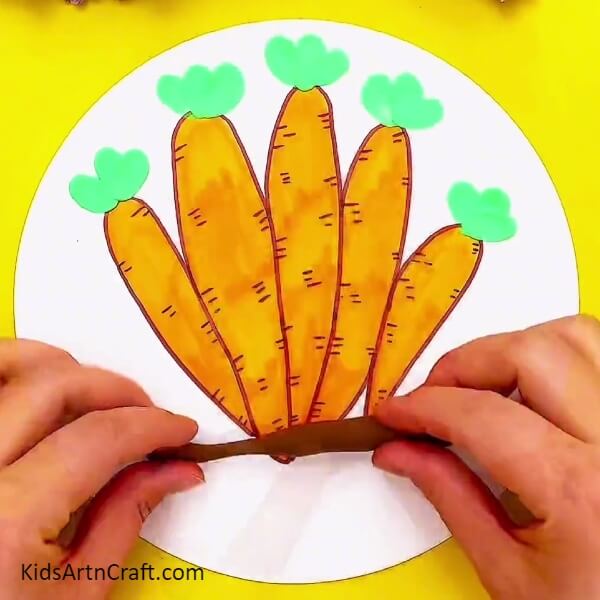
Step 9: Make Soil From The Brown Clay
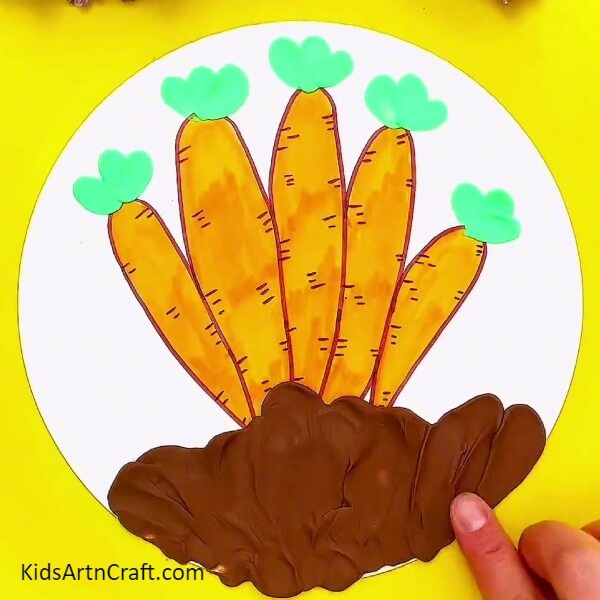
Take some brown clay and make soil for the carrots by stretching and sticking it on the sheet.
Step 10: Structure Tiny Ants On The Carrots
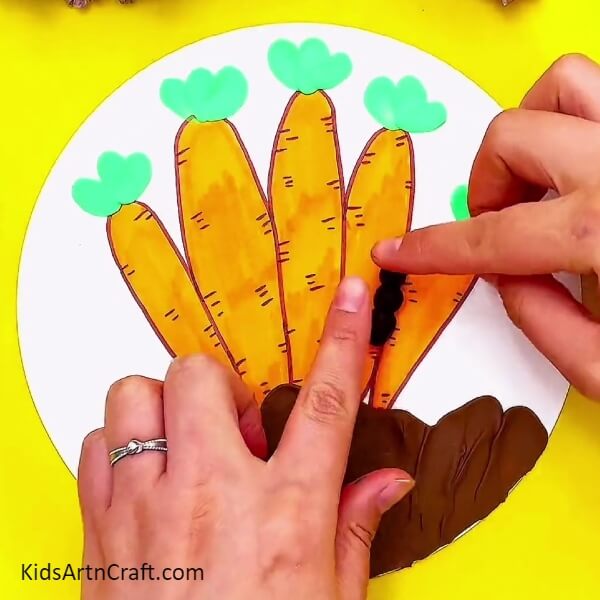
With the brown clay structure some ants on the carrot and stick them carefully.
Step 11: Stick The Eyes Of The Ant
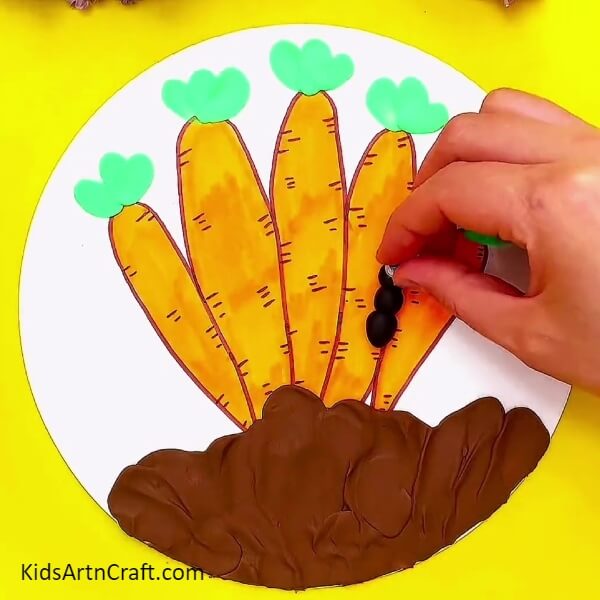
On the clay stick the eye of the ant and press it.
Step 12: Draw The Antennae And Legs Of The Ant
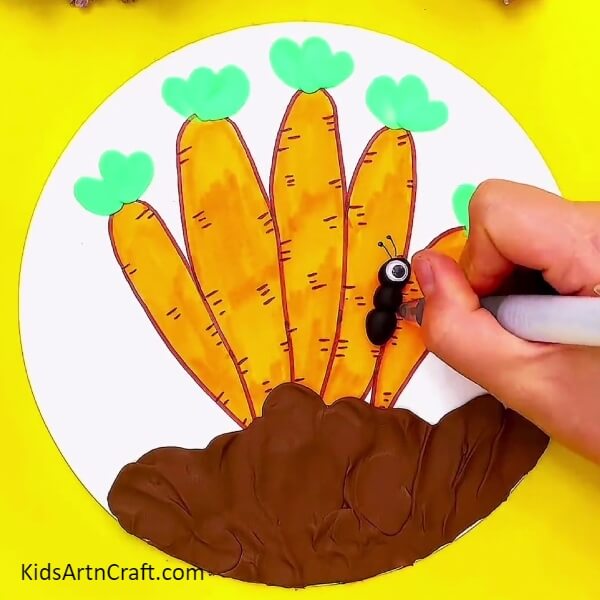
Take a black sketch pen or marker and draw the antennae and legs of the ant neatly.
Step 13: Draw Tiny Bushes On The Sheet With A Green Sketch Pen
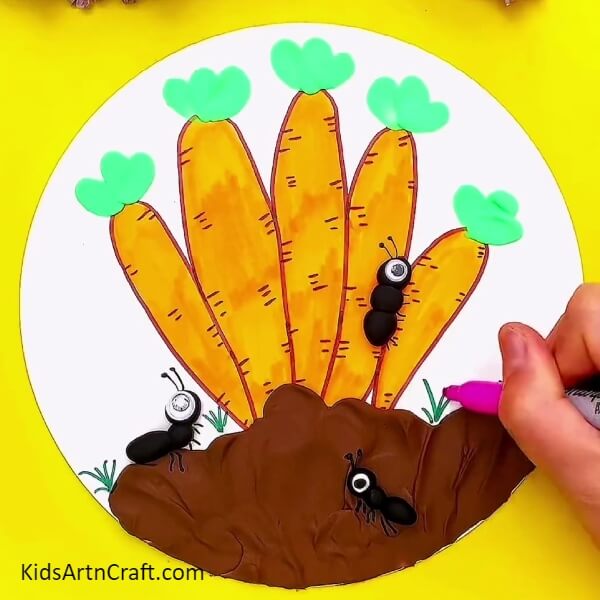
Take a green sketch pen and draw small bushes on the plain sheet above the brown soil.
Draw Pink Flowers On The Green Bushes With A Sketch Pen
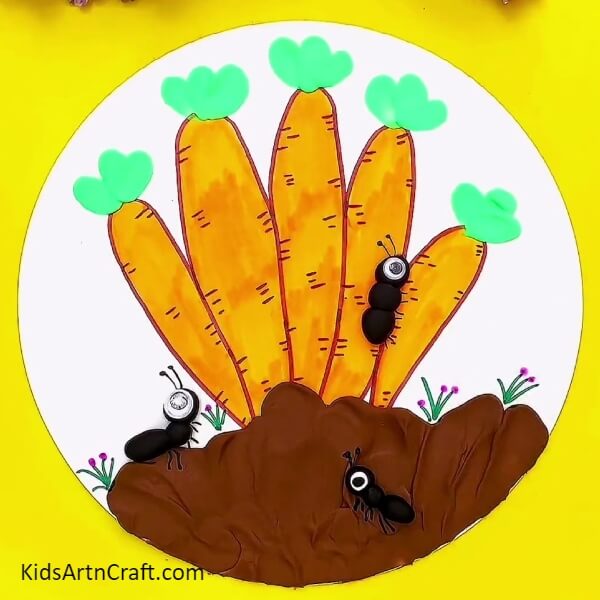
Congratulations! For the final step take a pink sketch pen and draw small circles on the green bushes and your craft is completed.
I hope you’ve enjoyed creating this craft. Share your views and opinions with us in the comments section. For more such easy-peasy art and craft tutorials visit our website.
Follow us on Youtube for art and craft tutorials and much more.
More Articles from Kids Art & Craft
- Simple & Tasty Ice-Cream Craft Using Clay – Step-by-Step Tutorial
- DIY Creative Clay Craft Activities Video Tutorial for Kids
- Easy to Make Handmade Bee Craft Tutorial for Kids
- Step-by-Step Drawing Tricks Video Tutorial for Beginners
- DIY Easy Paper Plate Strawberry Craft Tutorial