Clay Crafts
Doll Craft Using Clay Step-by-step Tutorial

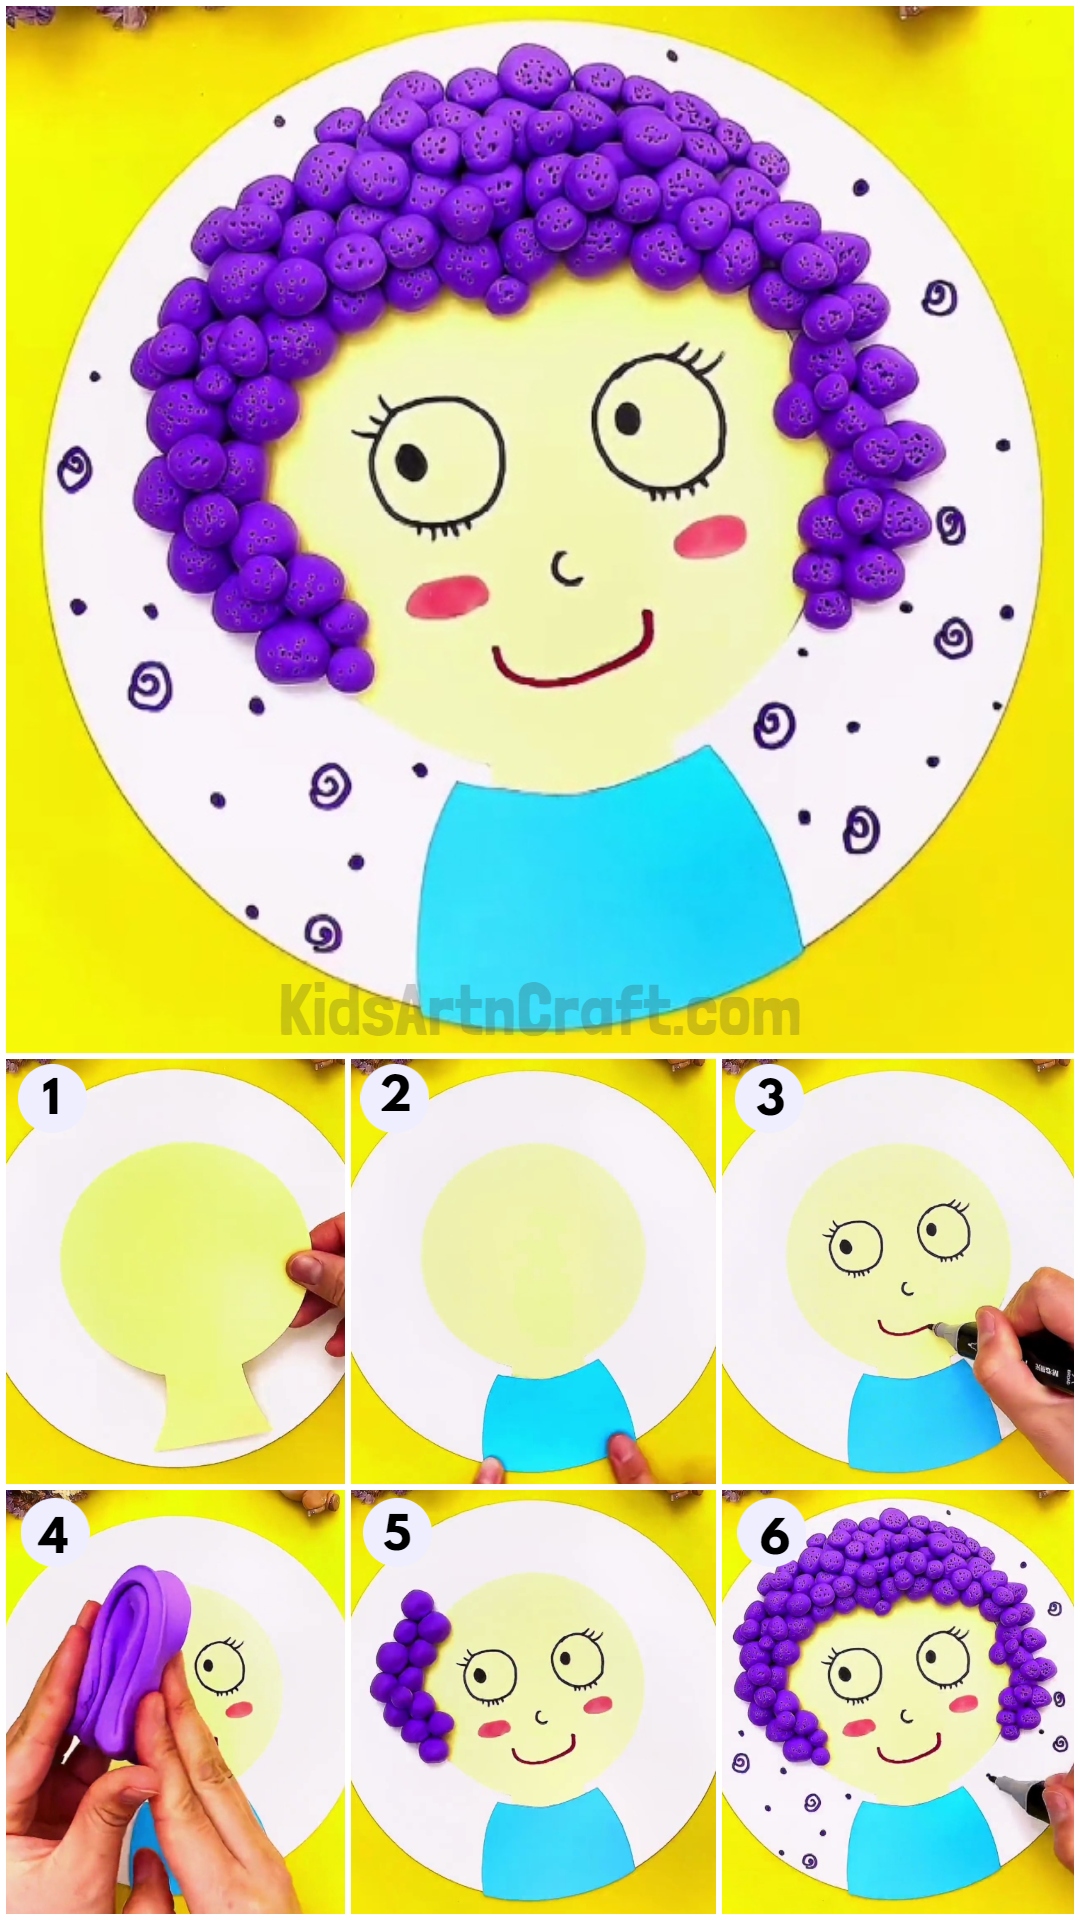
Learn how to make a cute clay doll with this step-by-step tutorial! Perfect for anyone looking to explore the world of clay crafting, this tutorial will have you creating adorable clay dolls in no time.
This tutorial will teach you to create a doll face using sheets of paper for its face and clay dough for its hair and the presence of clay as one of the materials will make the tutorial extremely enjoyable. So, collect all the material required, and let’s start making this craft.
DIY Doll Craft Using Clay

Read More: How To Make Hen And eggs Using Clay For Kids
Materials Required
- Sheet Of Paper (White, Blue, Yellow)
- Purple Clay Dough
- Glue Stick
- A Pair Of Scissors
- Black And Red Sketch Pen
- Tooth Pick
- Purple Marker
Procedure
Step 1: Starting With The Sheets Of Paper
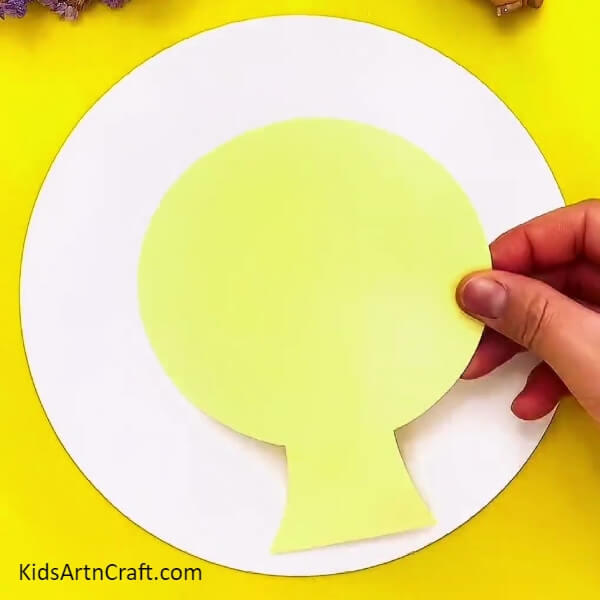

Take a white sheet of paper and cut a circle out of it. Now, take a yellow sheet of paper and cut out a shape resembling a head with a neck connected to it. Paste the head in the middle of the white circular sheet. See the picture below for reference.
Step 2: Pasting The Blue Sheet Of Paper
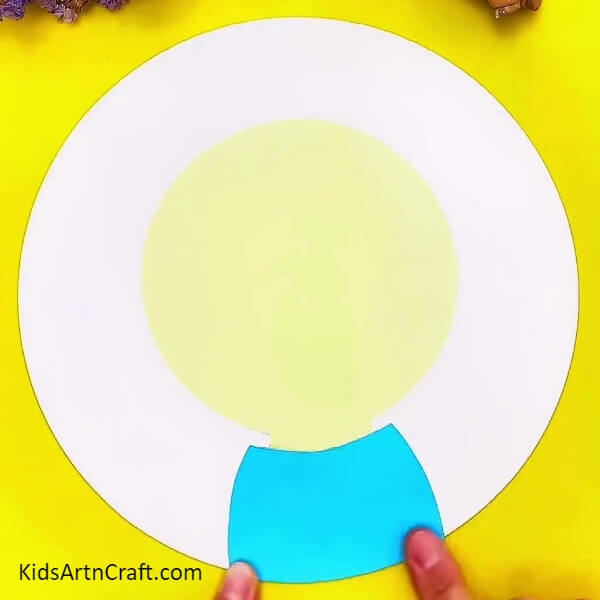
Take a blue sheet of paper and cut a trapezium out of it. This trapezium should have slightly curved sides. Now, paste the trapezium on the neck of the head you pasted earlier. See the picture below for reference.
Step 3: Making Drawings On The Face
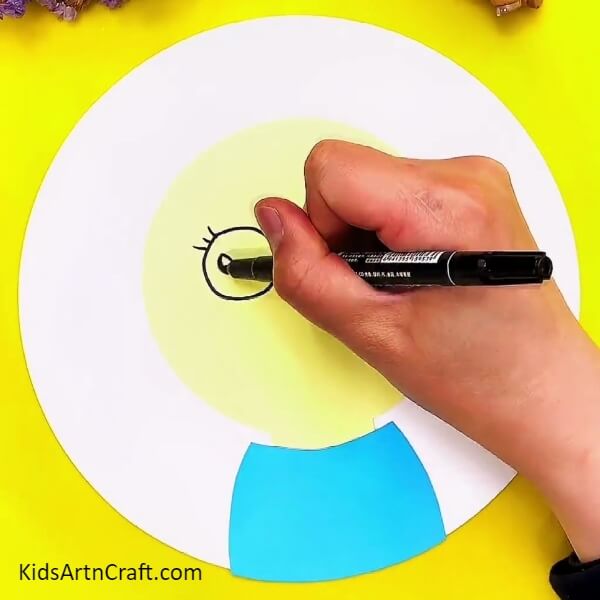
Draw the eyes of the doll!
Step 4: Making A Nose And A Mouth
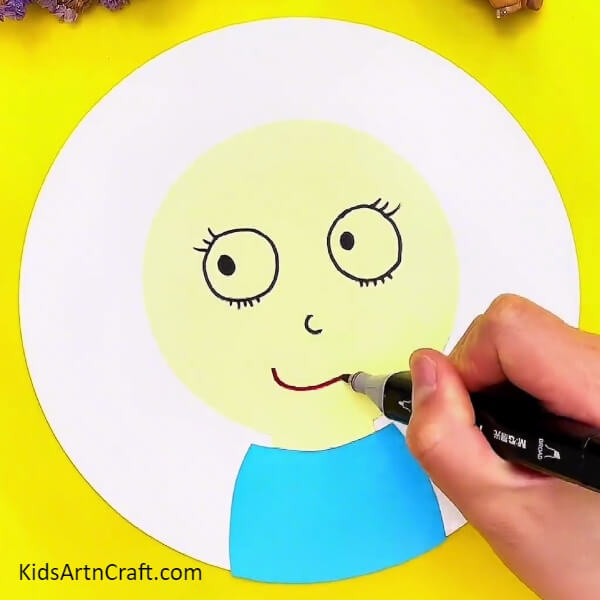
Draw a small nose in the middle of the face using the same sketch pen. Now, taking a red sketch pen, draw a smiley below the nose that you just drew. See the picture below for reference.
Step 5: Working With The Clay Dough
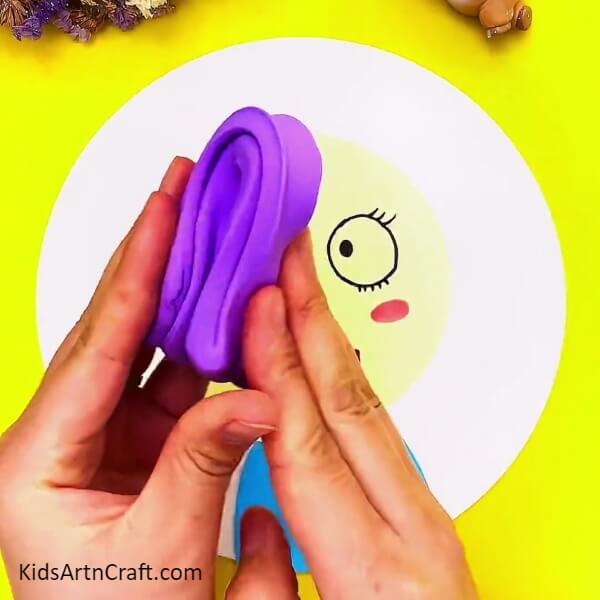
Using the same sketch pen add an oval dot below each eye to add some blush to its cheeks. Now, take some purple clay dough and start molding it until it becomes flexible enough to be molded into different shapes as shown in the picture below.
Step 6: Pasting The Clay On The Sheet
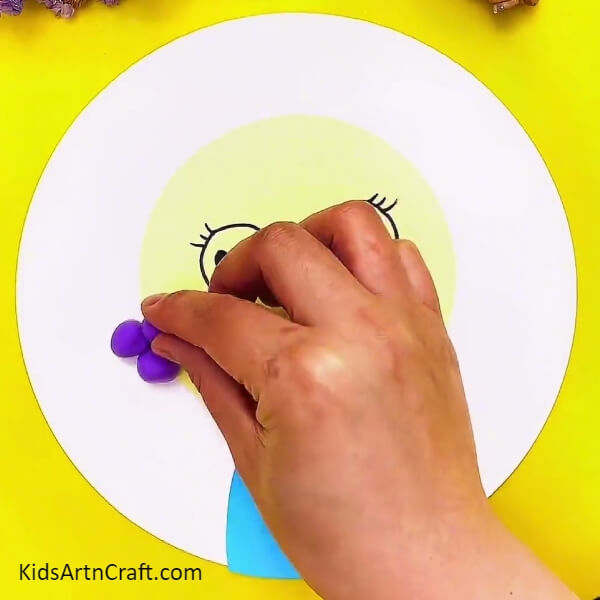
Mold the clay into ninety small balls and place three balls around the left circumference of the face. They should be placed next to each other in a close-knit fashion as shown in the picture below.
Step 7: Placing More Clay Balls
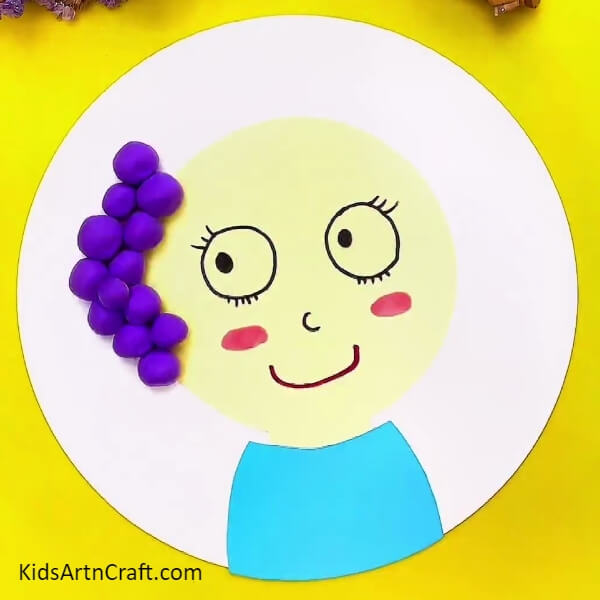
Place more clay balls around the circumference of the face following a similar pattern as you did for the three clay balls in the previous step. See the picture below for reference.
Step 8: Covering the entire head
Cover the entire circumference with all the clay balls that you molded out. They need to be positioned in a cloistered pattern in order to achieve the hair-like structure desired as shown in the picture below.
Step 9: Make Small Holes In The Clay Balls
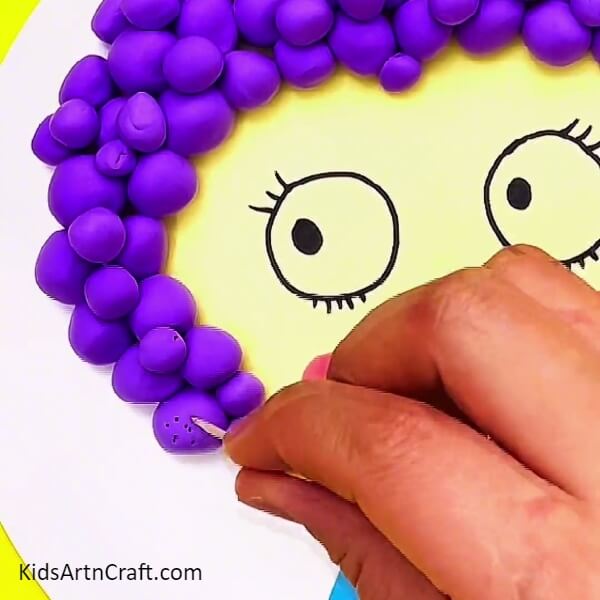
Using a toothpick, poke light holes in all the clay balls that you pasted on the head of the face. See the picture below for reference.
Step 10: Adding Definition To The Background
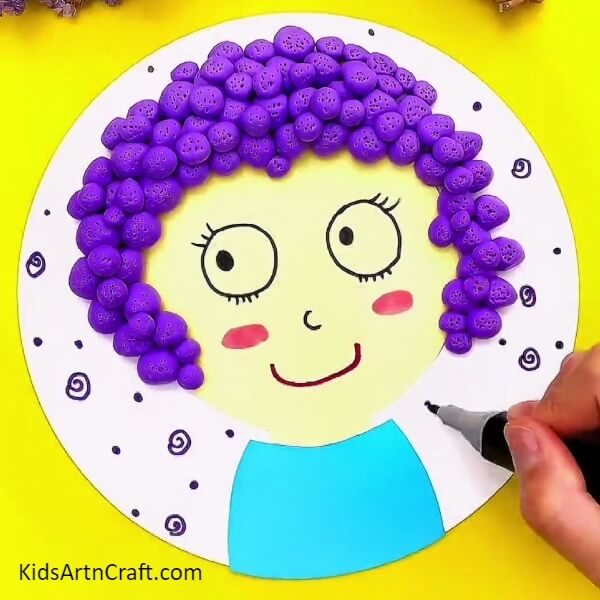
Take a purple marker and make small spirals throughout the blank white sheet in the background. Now, add some dots in between these spirals as well. See the picture below for reference.
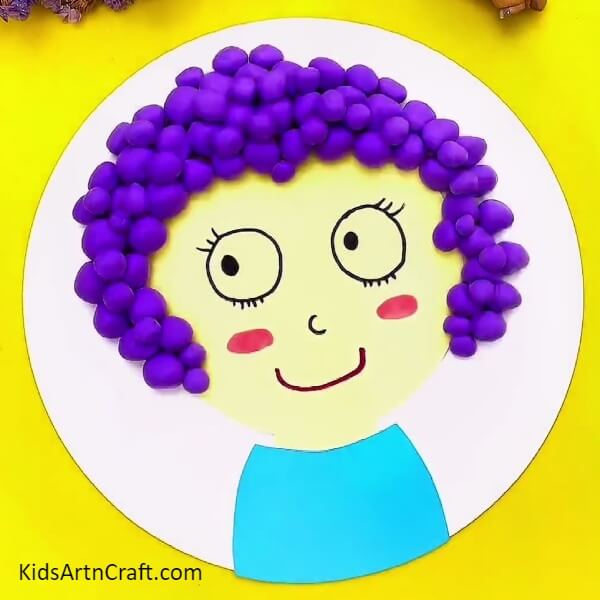
Final Step: Gorgeous Doll Face Lady
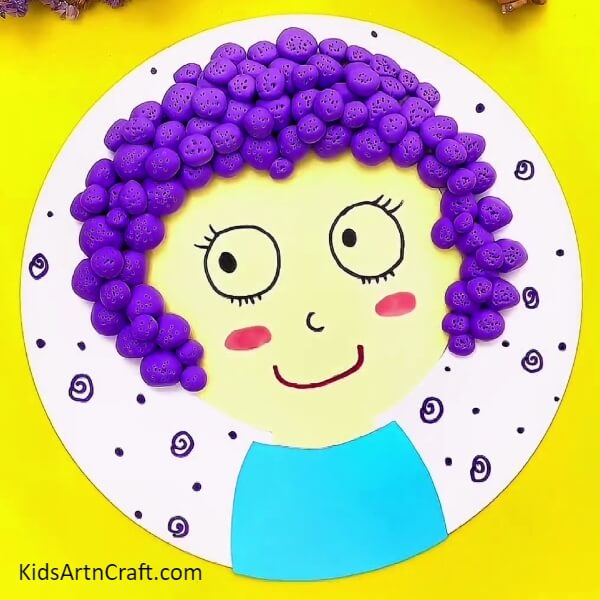
This completes the tutorial and we are left with a beautiful doll-face lady with purple curly hair and blush cheeks.
Some More Doll Craft Tutorial
Crafting A Paper Cup Doll With Different Clothing

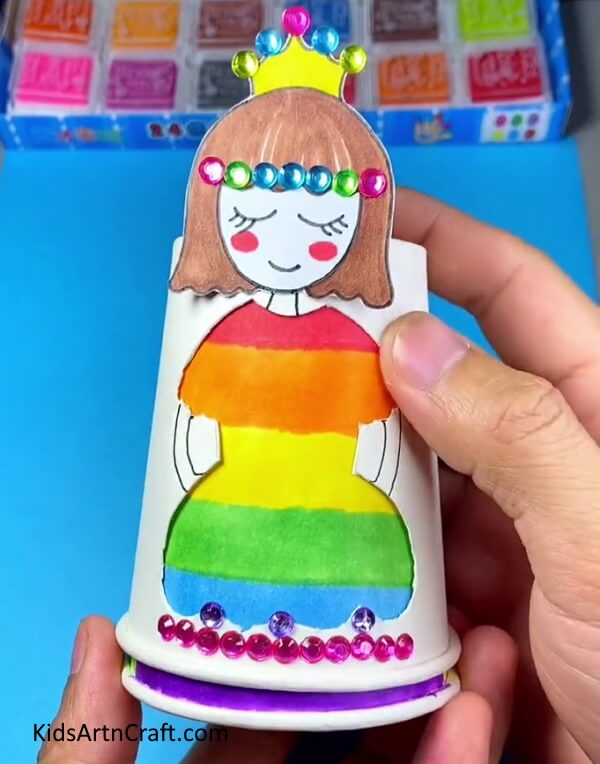
Image Source/Tutorial: Kids Art & Craft
Making a paper cup doll is a great way to have fun with children. It is easy to dress the doll up with different clothing and accessories. All you need are cups, construction paper, glue and markers. With a few simple steps, you can create a unique and personalized paper cup doll.
Today, you learned great drawing and molding skills. You also learned good cutting and pasting skills. You can hang it on the walls of your room or gift it to your mother on Mother’s Day. Think of more such ideas taking some inspiration from your surroundings and keep up the good work. Good luck.
Follow us on Youtube for art and craft tutorials and much more.
More Articles from Kids Art & Craft
- How To Make Caterpillar Eating Apple Using Clay
- How to Make Clay Flower Easy Tutorial for Kids
- Clay watermelon ice cream easy craft tutorial
- How to Make Worms Using Clay For Kids
- DIY Clay Giraffe Step-by-Step Tutorial For Kids