Painting
Flower Fingerprint Painting Tutorial For Kids

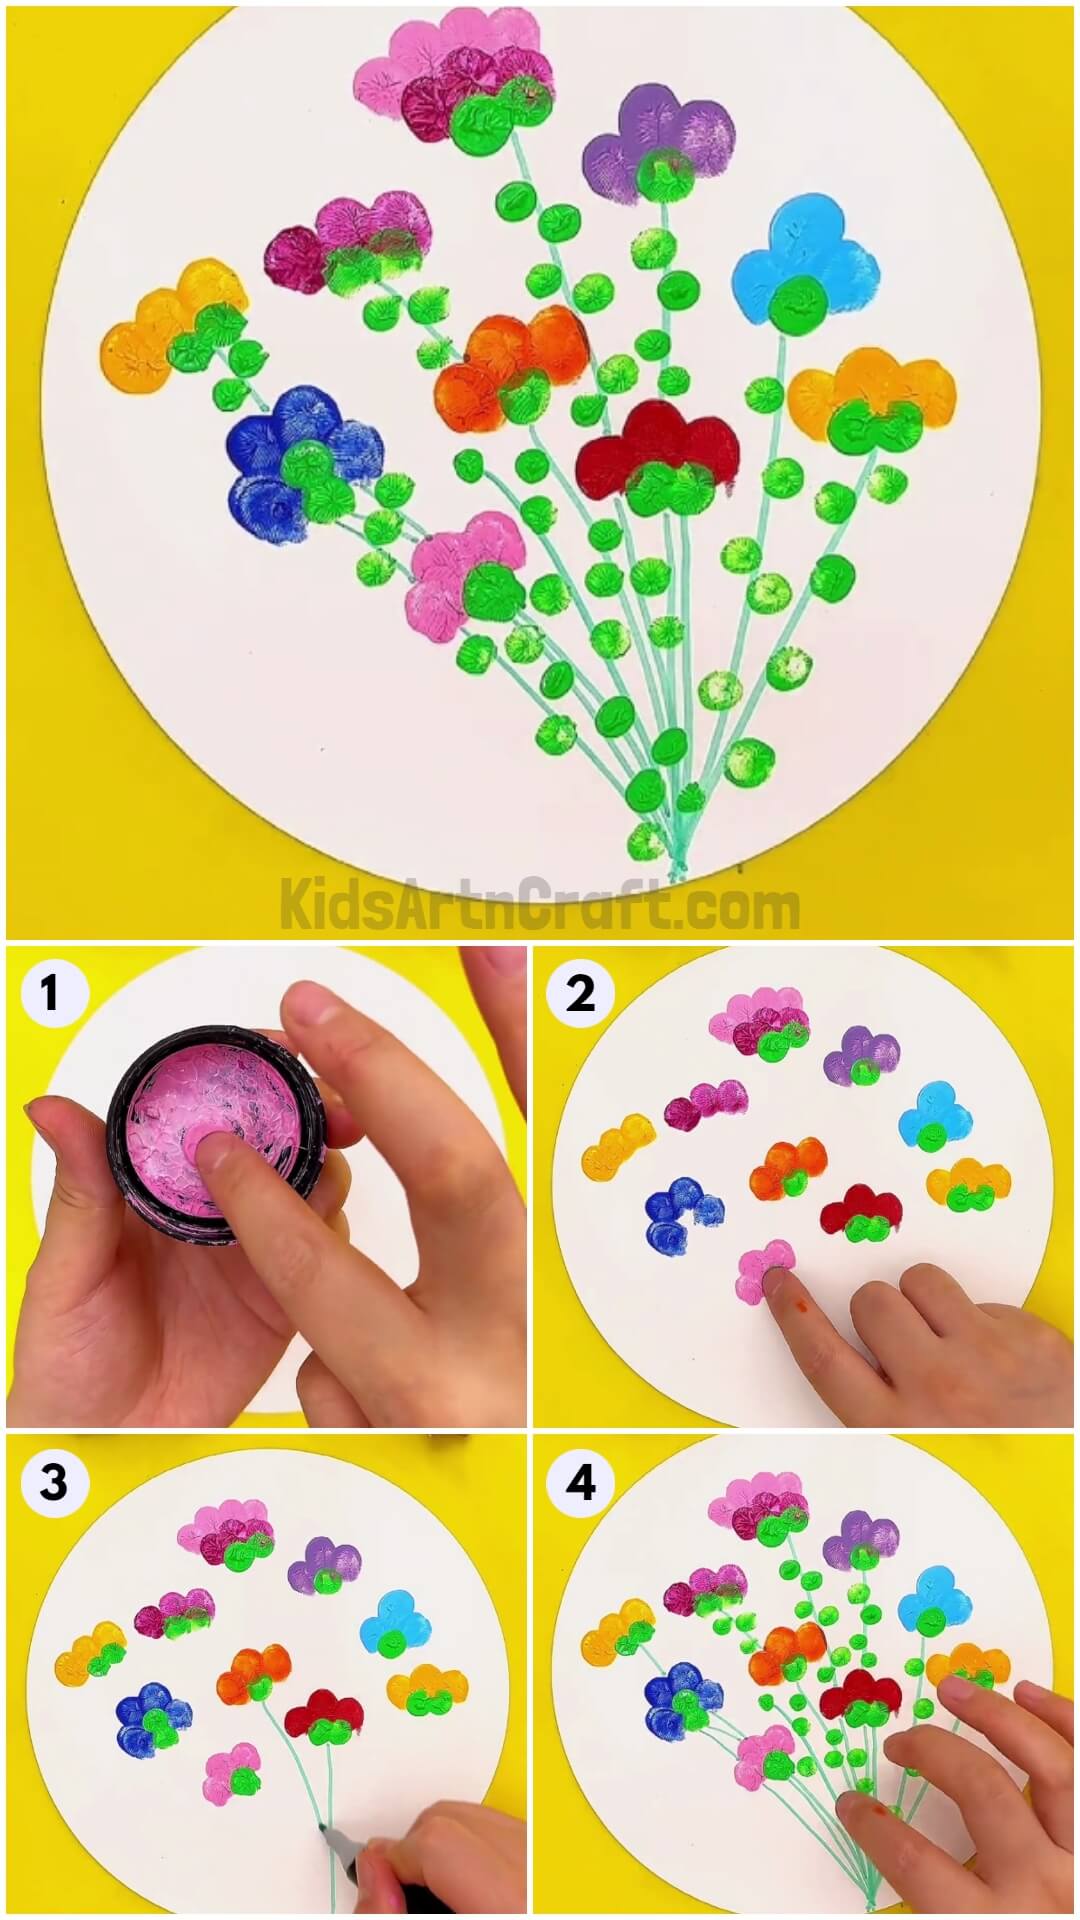
This guide will teach kids how to create a stunning, multi-colored flower painting using fingerprints. They’ll get to be creative and make a one-of-a-kind piece of art. It’s great for a fun art project at home or school.
You always think of colouring with different things like paints, poster colours, oil pastels, crayons and even marker, etc. but have you ever thought about colouring only with your fingers and nothing else. If not, then, let’s try it today and have some fun playing around with colours on your fingers. Let the fun begin! Bring your colours to the table and follow these cute little steps and let’s play around with some colours.
Easy To Make Colorful Flower Fingerprint Painting – Step by Step Tutorial

Read More: Mushroom Drawing Step by Step Tutorial For Kids
Materials Required
- Different colours
- White craft paper
- Green marker/sketch pen
Procedure
Step 1: Dipping your fingers into the colours
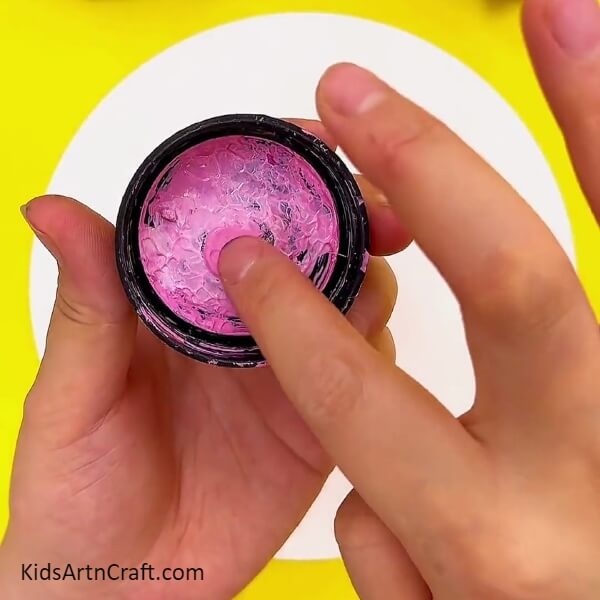

Your first step is to take a white coloured craft paper and make it into a circle. Then, take a colour of your choice or your favourite colour. Dip your finger in it. (Preferably use acrylic colours as it it toxic free colours for children).
Step 2: Making prints with your finger colour on white craft paper
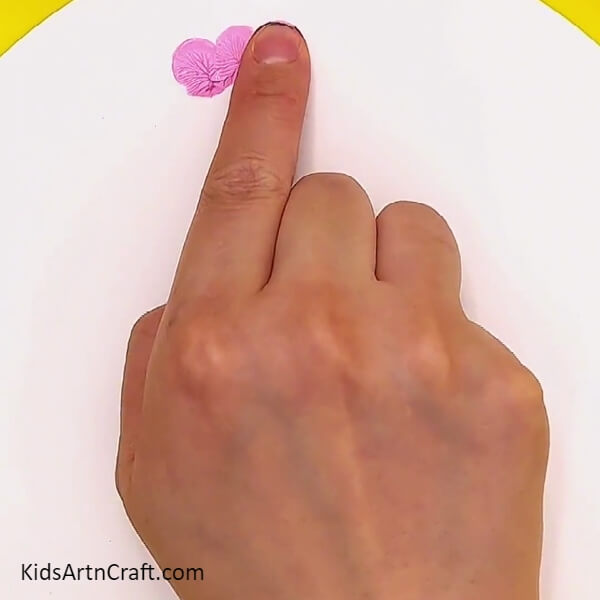
Now, take your finger on which you have dipped your favorite colour and start making prints on circular white coloured craft paper. Make three prints close to each other as shown.
Step 3: Keeping making prints from your favourite colours
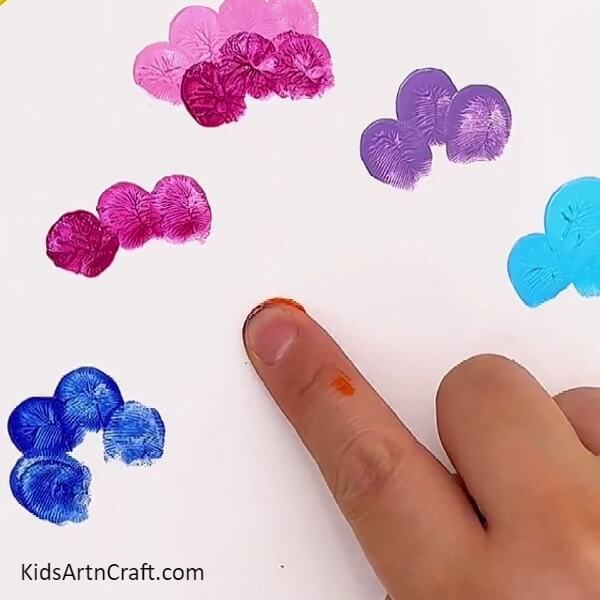
Keep repeating the same process of dipping your fingers into colours and making three prints with each colour on the white coloured craft paper. Do this process till the whole white coloured craft paper is filled. (Preferably repeat this process ten times).
Step 4: Making a finger print from green colour
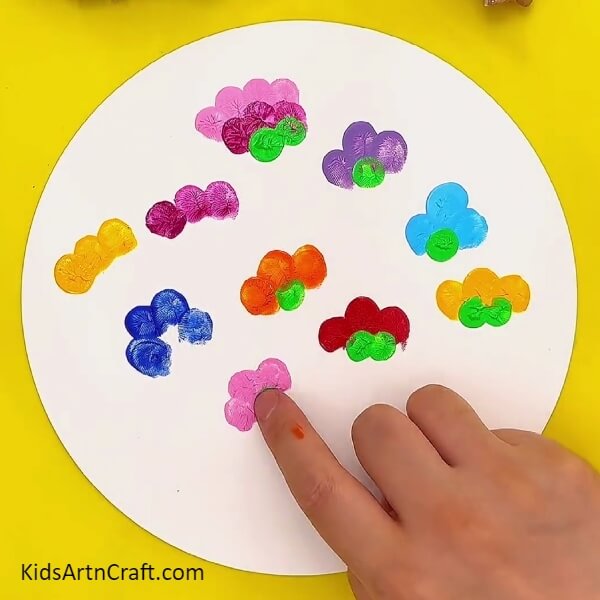
Now, take a green colour and dip your fingers in it. After dipping, make a one or two prints just below the the prints you made from other different colours. Remember the green print should be very close to other different colours as shown in the picture.
Step 5: Making stems with green marker/sketch pen
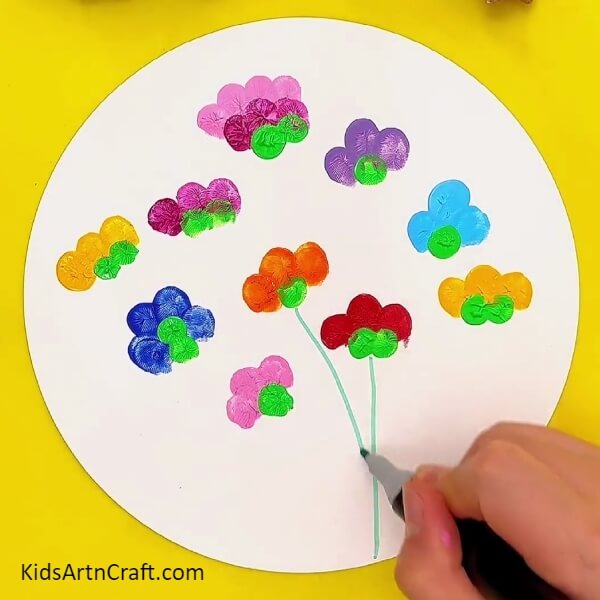
With the help of green marker/sketch pen, make stems of the flowers which you made from different colours as shown.
Step 6: Making stems for each flower with green marker/sketch pen
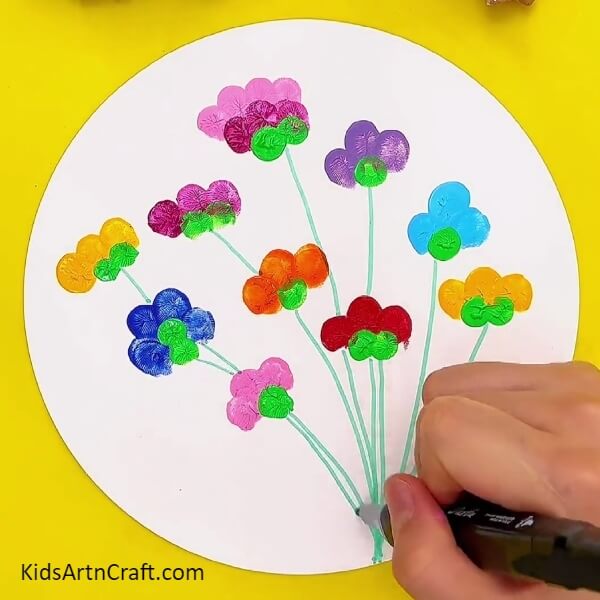
You have to make stem for each flower/finger print you have made on the white coloured craft paper with the help of green marker/sketch pen as shown in the picture.
Step 7: Making green prints all over the stems from green colour
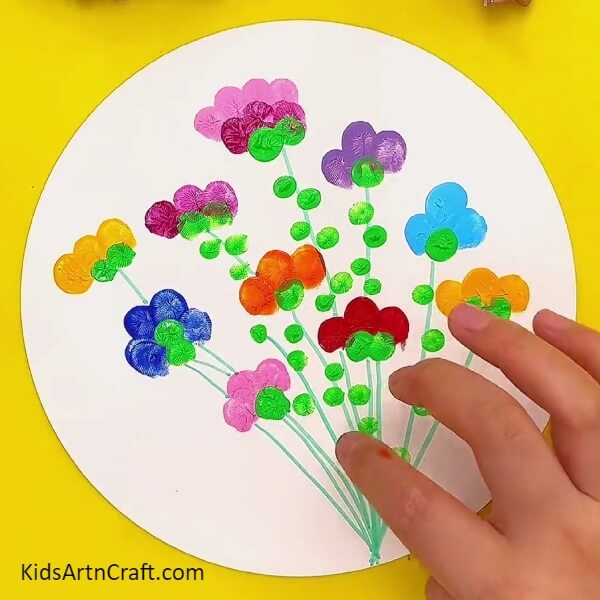
Now, take a green colour, dip your finger in the green colour. After dipping your finger in green colour, make a green print all over the each stem which you have made from green marker/sketch pen as shown.
Your colourful painting of flower printing is finally ready
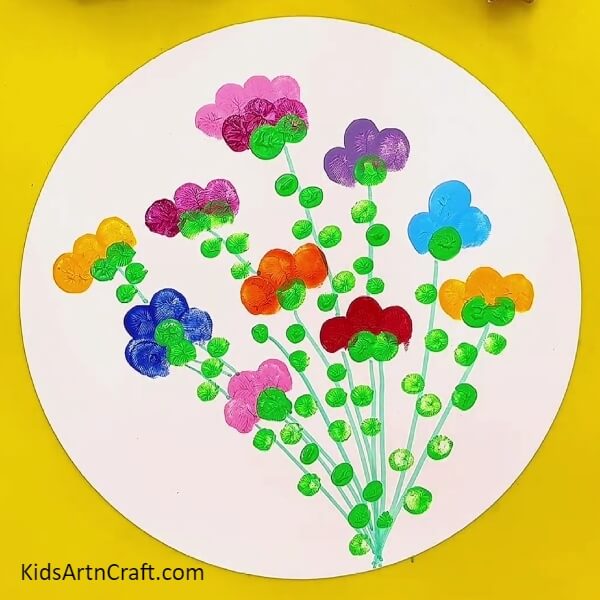
It is looking more like a bouquet of flowers though. But however, it does look pretty. See, how with just your fingers, you can make such great art. Kids should definitely try this cute painting as this will help them with their creativity and they will even learn new things. This is definitely a fun activity everyone should try out. You can even create different things of your choice from this finger painting technique.
So, what are you waiting for, go and make this super cute and fun finger painting and show everyone how the magic of your finger works. Enjoy and have fun!
Follow us on Youtube for art and craft tutorials and much more.
More Articles from Kids Art & Craft
- Colorful Lion Artwork Craft Tutorial For Kids
- Amazing Way To Make Handprint Giraffe Painting Art
- Beautiful Way To Make Tree & Bird Paste Painting With Peanut Sells
- Recycled Plastic Bottle Dragon Craft Tutorial for Kids
- Easy Paper Folding Crafts Video Tutorial for Kids