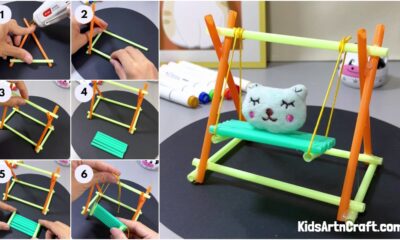
Kids Activities
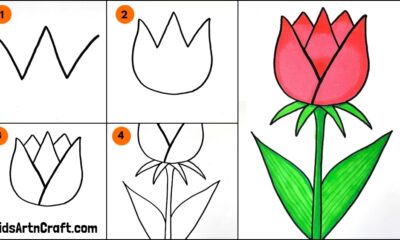
Learn to Draw a Flower Pot Easy Artwork Tutorial For Kids

This tutorial is easy for kids to follow and shows them how to draw a flower pot. The finished result is something they’ll love and can use as a jumping off point for other art projects. It’s a fun and educational way to be creative!
We always want to do gardening in our garden, so that our garden looks fresh and the air that we breathe is also not toxic or poisonous. We want that our garden to be filled with flowers and plants that are beautiful to look at. So, today we are going to draw a flower pot which you can put up in your garden and see whether it looks good or not. Let’s get started!
DIY Flower Pot Easy Artwork For Kids
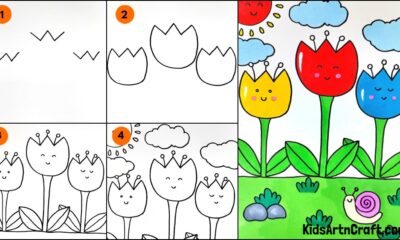
Read More: DIY Foam Net Home Craft For Kids
Materials Required
- White craft paper
- Brown craft paper
- Black marker/sketch pen (Thick and Thin)
- Brown marker/sketch pen
- Earbud
- Red poster colour
- Green poster colour (Light and Dark)
- Ochre marker/sketch pen
- Paintbrush
- Glue
Procedure
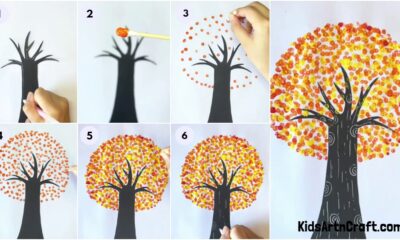
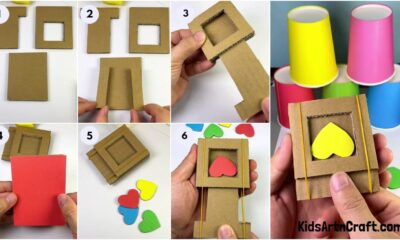
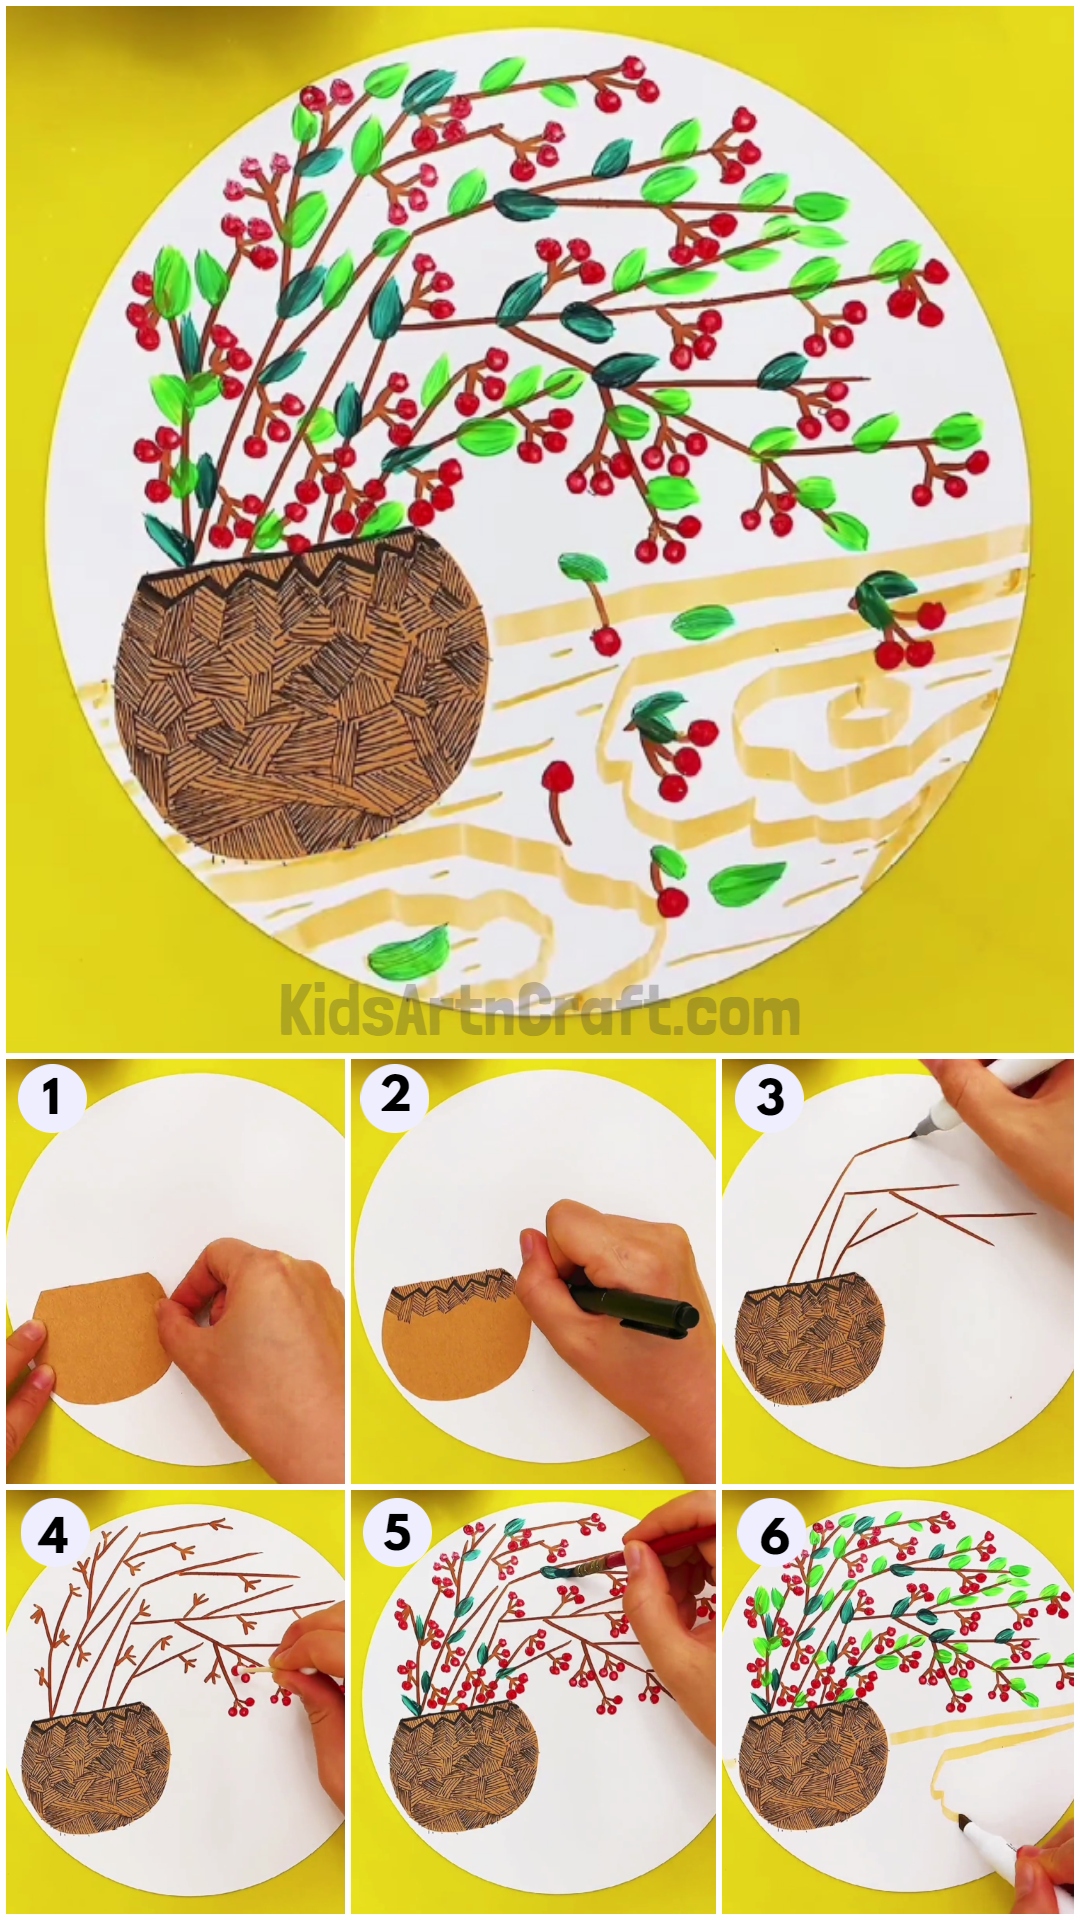
Step 1: Stick Brown Craft Paper On White Craft Paper
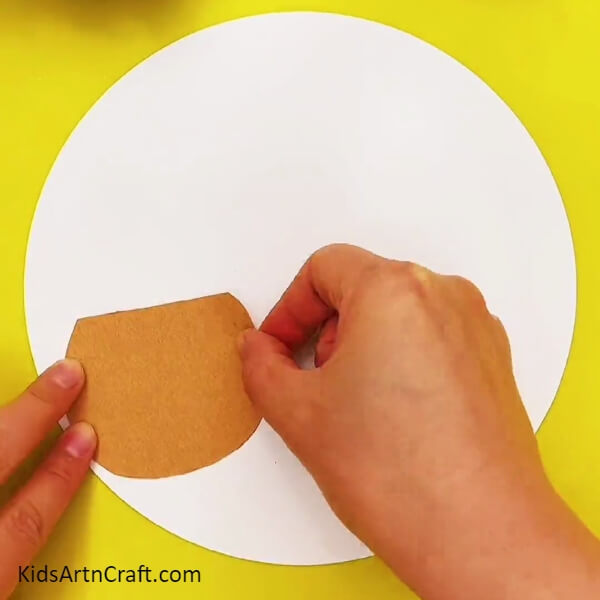
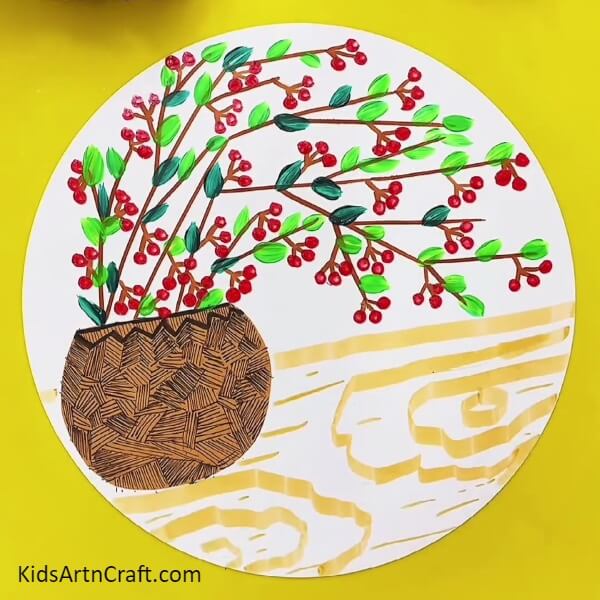
Your first step is to take a white coloured craft paper. The white coloured craft paper should be in a circle shape. Then, take a brown coloured craft paper. Make the brown coloured craft paper in a semi-circle shape or a pot-type shape as shown. After making brown coloured craft paper into a semicircle or pot-type shape, stick the brown coloured craft paper on the white coloured craft paper with the help of glue. Remember to stick the brown coloured craft paper on the left side of the white coloured craft paper.
Step 2: Make Lines With A Black Marker/sketch Pen On Brown Craft Paper
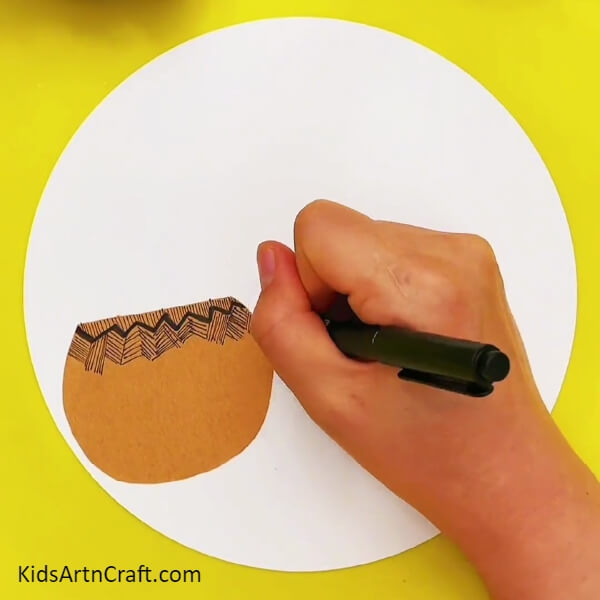
Now, take a black marker/sketch pen. After taking a black marker/sketch pen, make lines on the brown coloured craft paper or pot as shown. Remember to first make double zig-zag lines on the brown coloured craft paper with the help of a thick black marker/sketch pen. Then, with the help of a thin black marker/sketch pen, make a design on the brown coloured craft paper as shown.
Step 3: Complete The Design With A Black Marker/sketch Pen

By repeating the same step of the design on the brown coloured craft paper, complete the design on the brown coloured craft paper or the pot with the help of a thin black marker/sketch pen as shown in the picture.
Step 4: Make Branches With Brown Marker/sketch Pen
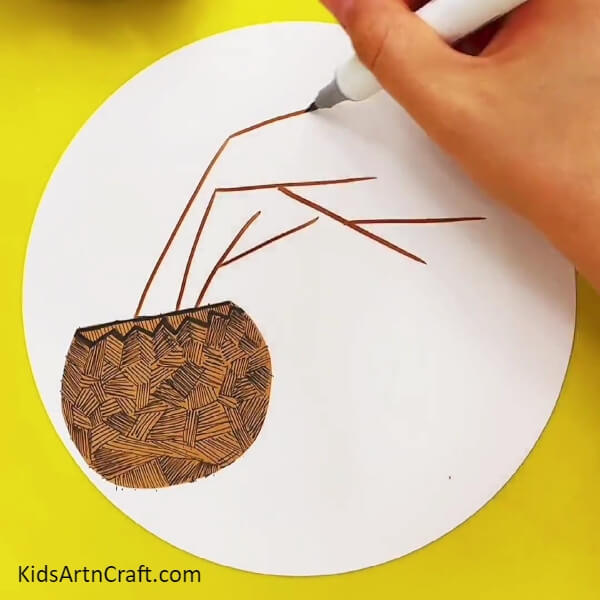
Now, take a brown marker/sketch pen. After taking a brown marker/sketch pen, make branches starting from the brim of the brown coloured craft paper or the pot. Cover the whole white coloured craft paper while making the branches with the help of a brown marker/sketch pen.
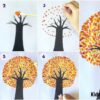
Step 5: Make A Flower With Red Poster Colour And An Earbud

Take the red poster colour and the earbud. After taking the red poster colour and an earbud, dip the earbud into the red poster colour. After dipping the earbud in a red poster colour, make dots on the branches which are made from the brown marker/sketch pen.
Step 6: Fill All The Branches With Red Dots
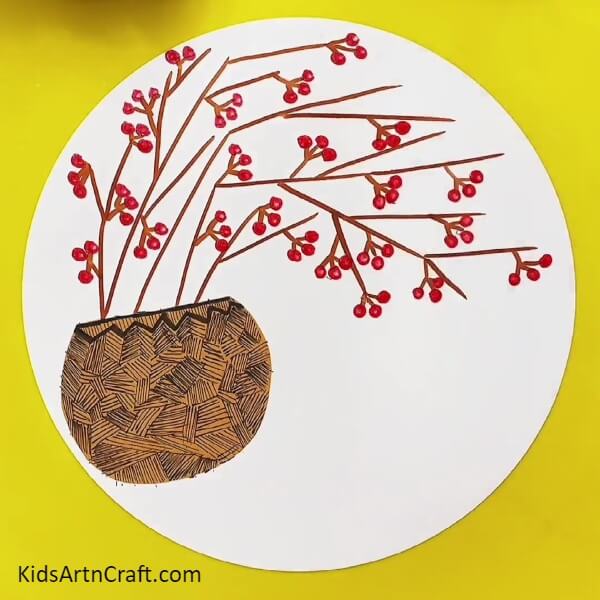
Keep repeating the above step of making dots by dipping the earbud in a red poster colour and filling all the branches which you made from brown marker/sketch pen as shown in the picture.
Step 7: Make Leaves With Dark Green Poster Colour
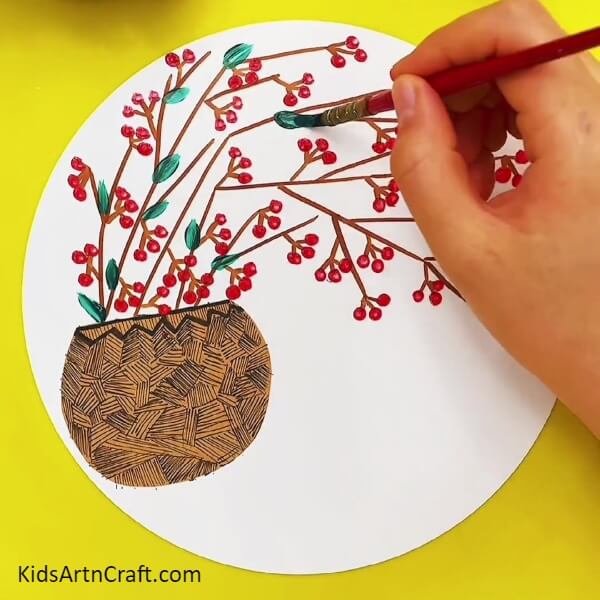
Now, take a dark green poster colour. After taking a dark green poster colour, make leaves with the help of a dark green poster and the paintbrush. Make leaves on the branches which you have made from brown marker/sketch pen.
Step 8: Make Leaves With Light Green Poster Colour
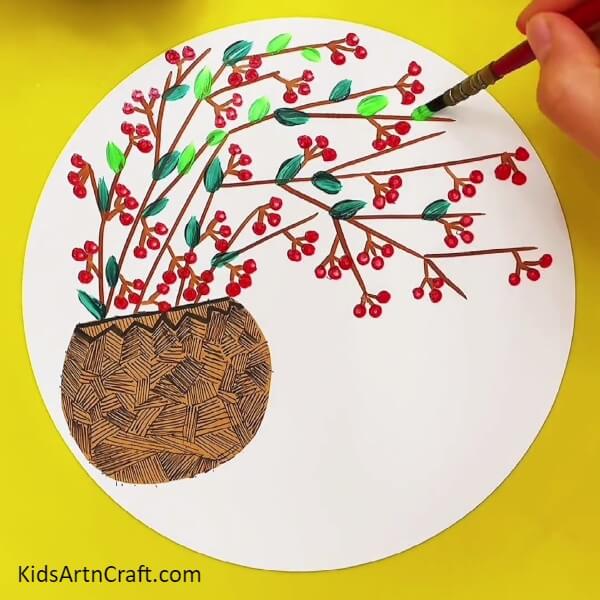
Repeat the same process of making the leaves on the branches which you have made from brown marker/sketch pen, but this time make leaves with the help of light green poster colour and a paintbrush. Make leaves on the branches where there is space as shown.
Step 9: Make Land With Ochre Marker/sketch Pen
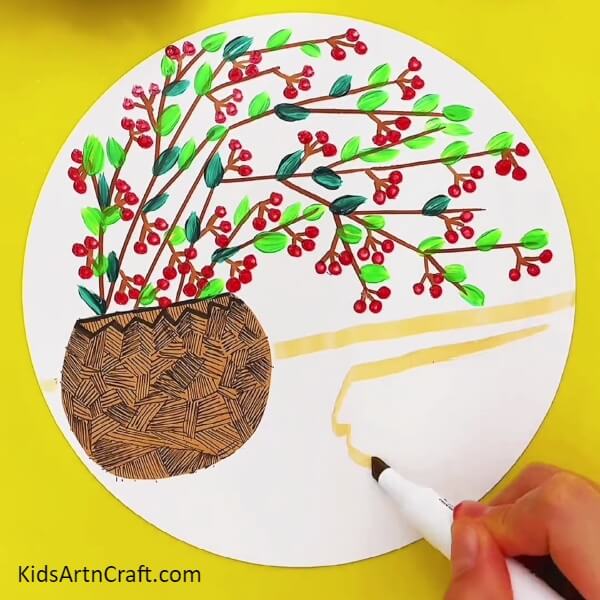
Now, to place the flower pot somewhere, we need land. So, take an ochre marker/sketch pen and with the help of an ochre marker/sketch pen, make land on the white coloured craft paper as shown in the picture.
Finally, Your Flower Pot Is Ready To Be Placed In Your Garden
Finally, your flower pot is ready to be placed in your garden and you can see whether it looks good in your garden or not. But if you ask me, this beautiful flower pot will go in any garden. So, I would definitely recommend you to try this art and you will even learn many things from this artwork.
If you have a keen interest in gardening and want to know more about gardening stuff, you should definitely try this art technique and learn more about it. Happy learning!
Follow us on Youtube for art and craft tutorials and much more.
More Articles from Kids Art & Craft
- How to Make an Easy Paper Craft Bird Artwork
- Easy Balloon Face Art and Craft for Kids
- Easy Paper Snail Craft tutorial For Kids
- How to Make Ladybug Crafts tutorial for Kids
- Easy Bunny paper craft for kids