Paper Crafts
How to Make Paper Birthday Hat – Step by Step Instructions

Birthdays are always a special day for all of us. It is a day to celebrate as we grow older by the year. On the day of our birthday, we naturally feel happy, excited and special. It so such an exciting feeling to receive wishes, gifts and cakes from people. Among all the people around us, we feel like we’re the most important person in the room naturally during this day. The element of surprise, party, food, etc., is so thrilling that day. So, let’s make birthday hate either for us or our loved one’s birthday!
How to Make Paper Birthday Hat
Material Required:
- 1 paper plate
- Cutter
- Coloured papers
- Scissors
- Glue
- Pencil
- Eraser
Instructions:
Let’s make DIY paper birthday hats!
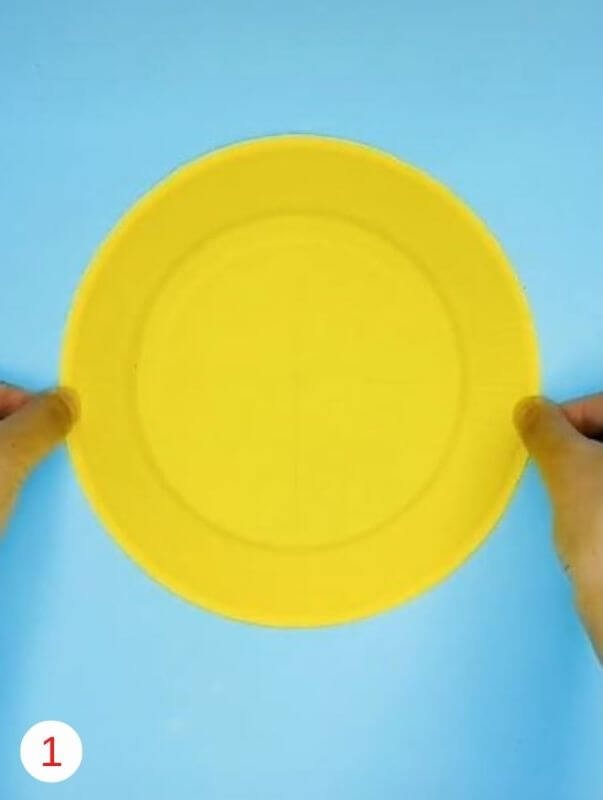

Step 1: – Plate
Keep the paper plate ready.


Step 2: – Surface
Keep the paper plate on a straight surface.
Step 3: – Cut
Using the cutter, Cut through the plate in the centre. Be careful while handling a cutter.
Step 4: – Triangle
While cutting, make triangular cuts where all the triangles meet at a point.
Step 5: – Unfold
Gently unfold the triangles one by one.
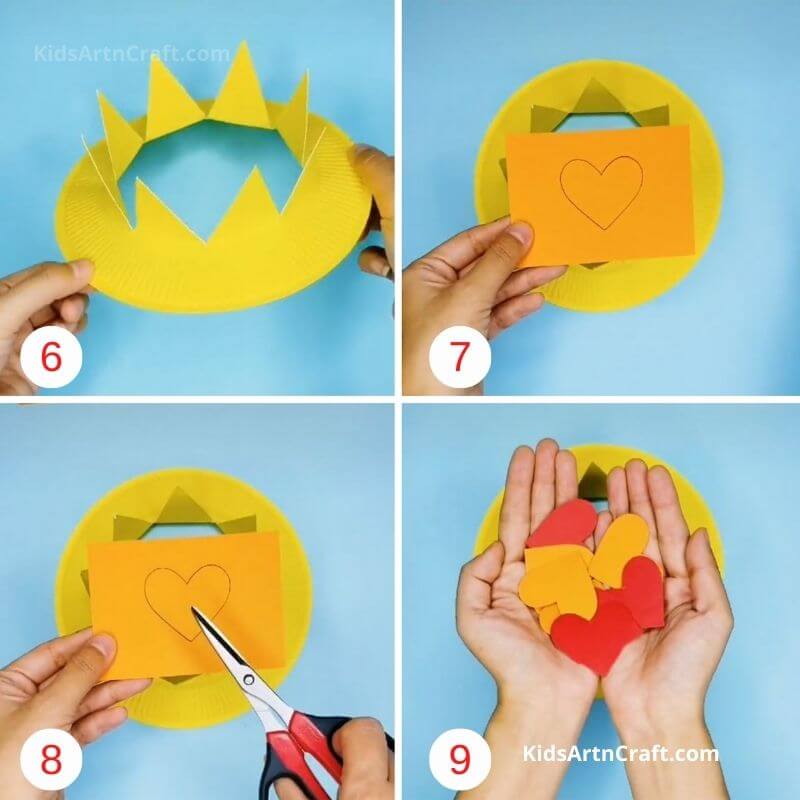
STEP 6 – CROWN
Once all the triangles are unfolded, it’ll look like a crown.
STEP 7 – HEARTS
Using the different coloured papers. draw medium-sized hearts on all the papers.
STEP 8 – CUT
Carefully cut out the hearts using the scissors. Be careful while handling the scissors.
STEP 9 – ASSEMBLE
Once all the cut-outs are ready, assemble them.
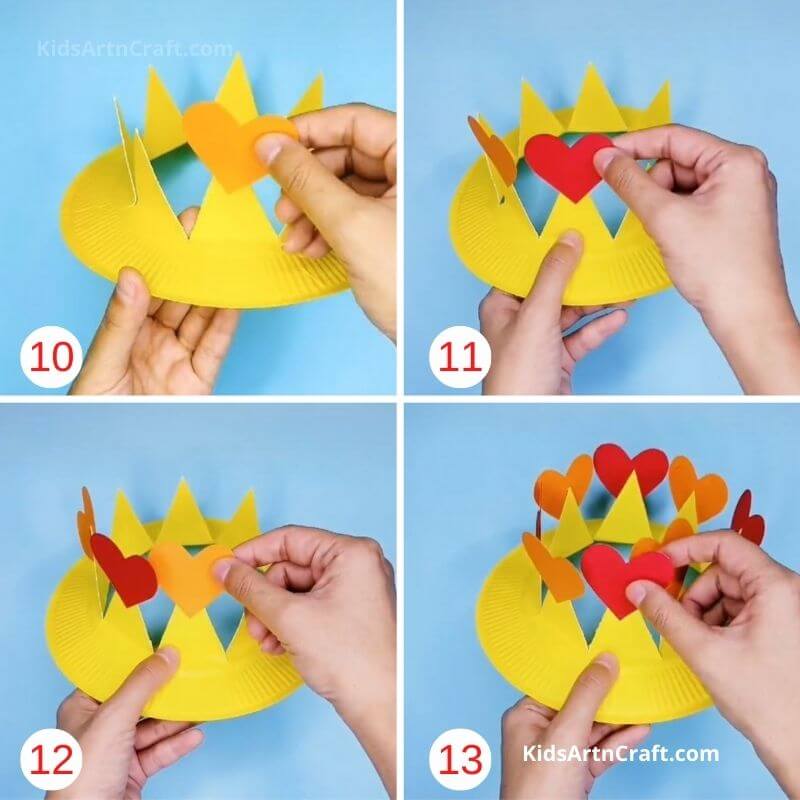
STEP 10 – GLUE
Take one heart of your choice, and stick it to the end of the triangle.
STEP 11 – REPEAT
Similarly, take another colour of the heart and stick it to the next triangle.
STEP 12 – REPEAT
Now alternate the colour and do this till the end.
STEP 13 – DRY
Once all the hearts are stuck to the triangle, keep it aside to dry.

STEP 14 – CHECK
After about an hour, check of the hearts has dried and fixed properly.
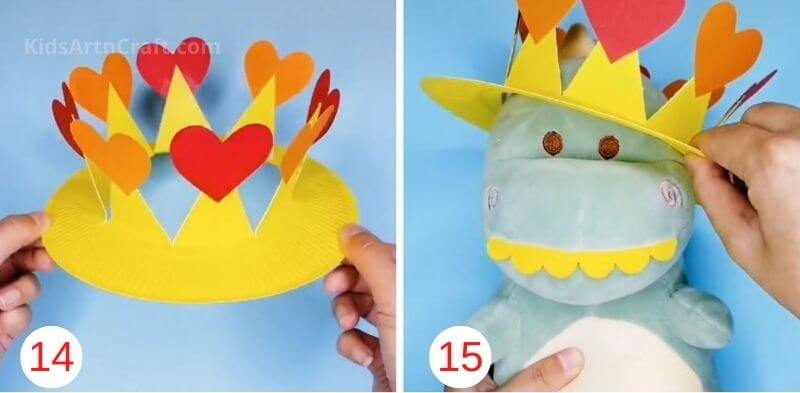
STEP 15 – IT’S READY!
Once it is dried completely, it’s ready to use.
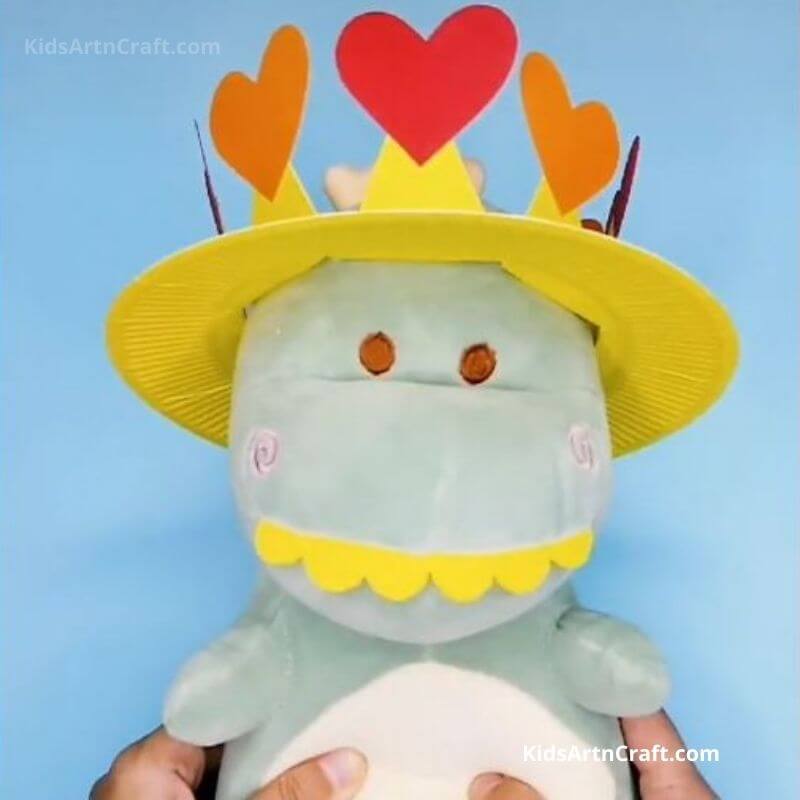
Your DIY birthday hat is ready! You can gift this to someone on their birthday or you can even wear it for your birthday. You can also use this as a decorative hat on a teddy bear’s head. This is a fun, easy and creative way to make birthdays fun and exciting. Children will love this idea. So pick up your paper plates and start making birthday hats!
Fun facts about Hats:
- The idea of birthday hats came from ancient Egypt, where people used to wear long pointy hats.
- Jewish people wore big cylindrical hats to distinguish them from the Christians.
- Witches and wizards wore similar hats for their wizardly experiments.
- Pointed hats were introduced to stand out of the crowd and to feel majestic.
- It was heard that princesses wore conical hats as a symbol of prestige.