Paper Crafts
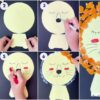
Fun Paper Dog Toy Craft Step By Step Tutorial

Make your own paper dog toy with this simple guide. This activity is great for both children and adults and can be used as a decoration or present. Be creative and enjoy yourself!
Welcome to this step-by-step tutorial on how to make a paper dog toy. This toy craft requires some basic mathematics skills. Nevertheless, it is open to all age groups. Everyone can try out this fun way of making a paper dog toy. You will require some paper and basic craft material for this toy. Let’s get started!
Simple Paper Dog Toy Craft For Kids
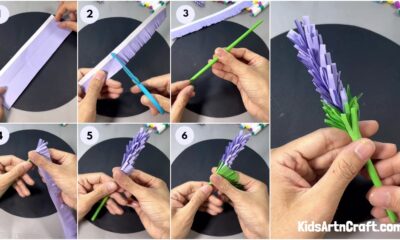
Read More: Origami Crab Making Easy Tutorial For Kids
Materials Required
- Papers – blue, yellow, red
- Pencil
- Ruler
- Paper cutter
- Scissor
- Glue
- Black sketch pen
Procedure
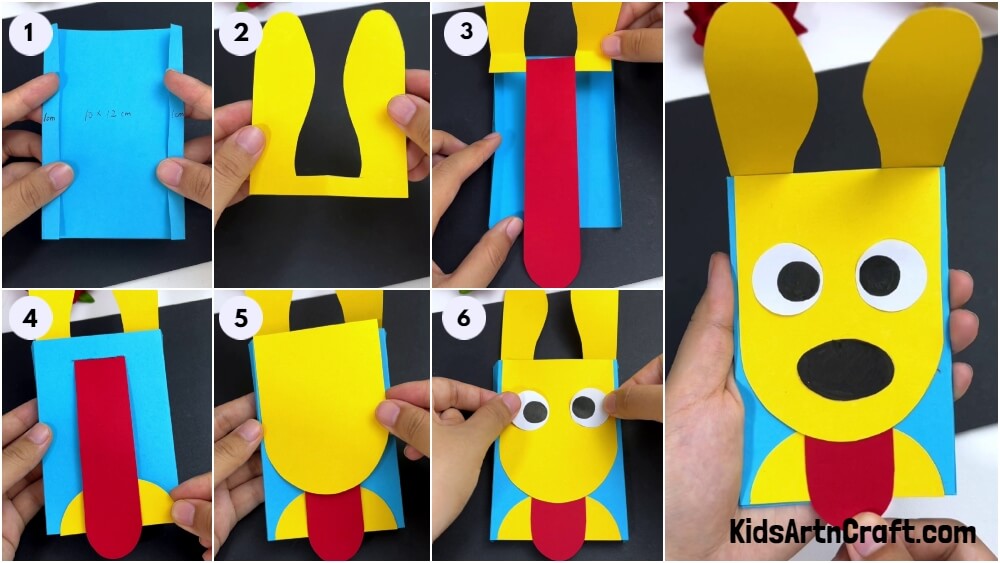
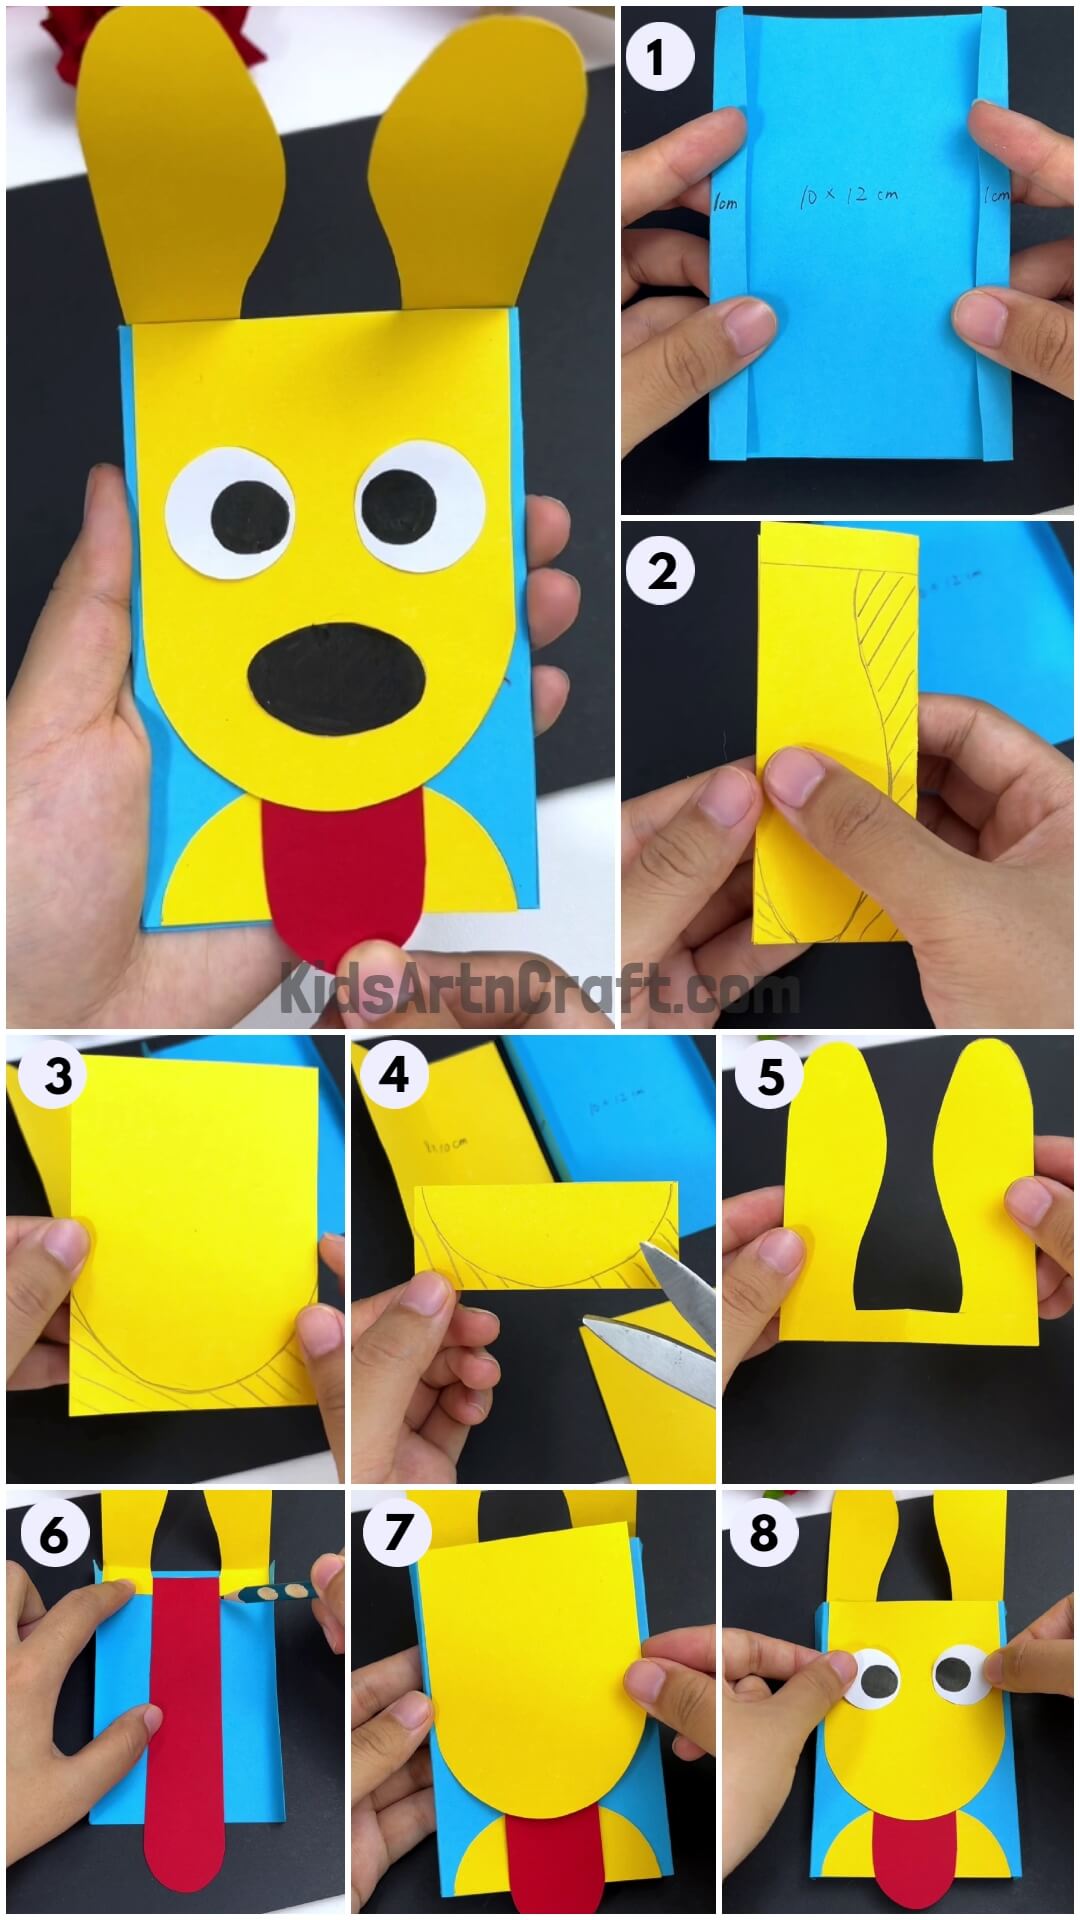
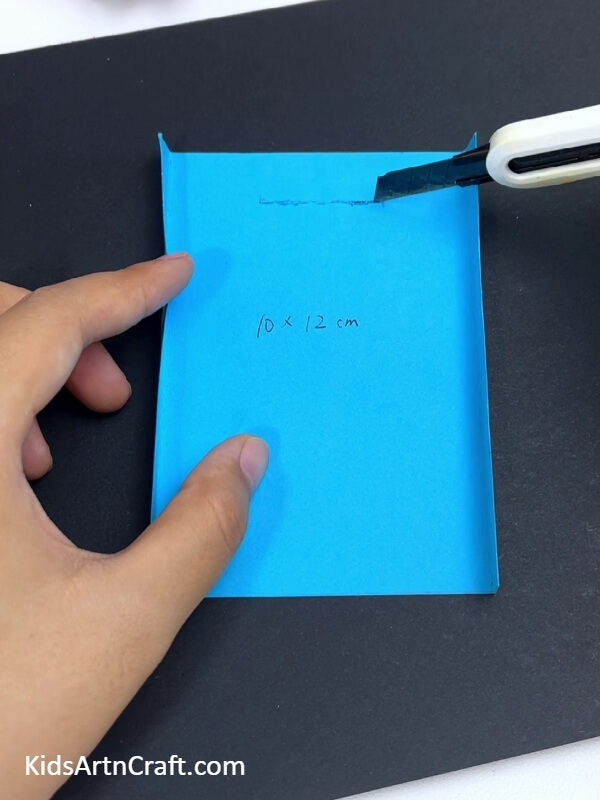
Step 1: Writing The Measurements
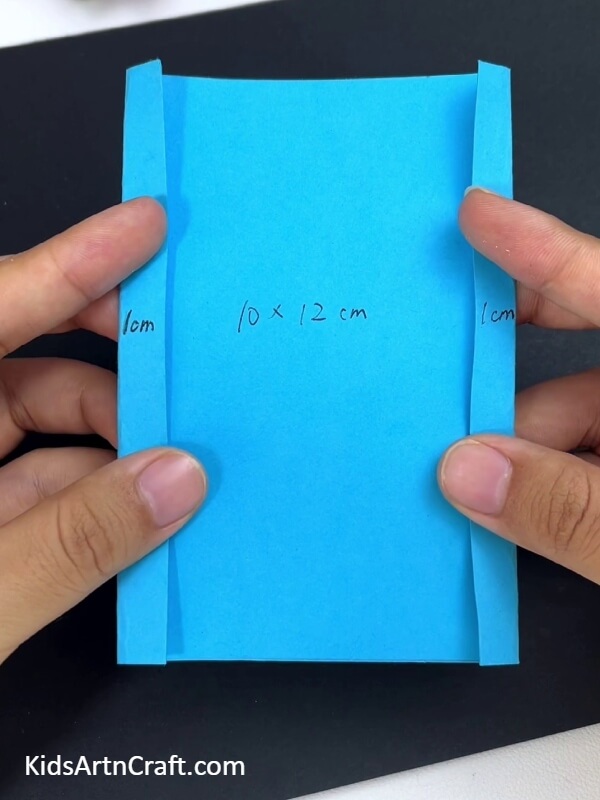
Using a ruler, measure and cut the blue paper accordingly. Make the folds properly on each side (1cm each). Length = 10cm and Breadth = 12cm
Step 2: Body Measurements
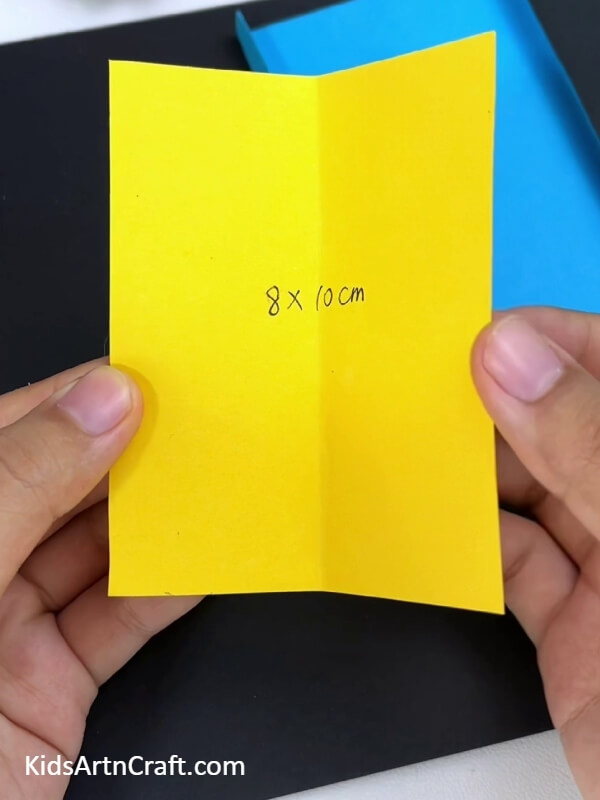
Follow the measurements written above, and cut the yellow paper accordingly. Length = 8cm and Breadth = 10cm
Step 3: Marking The Yellow Paper
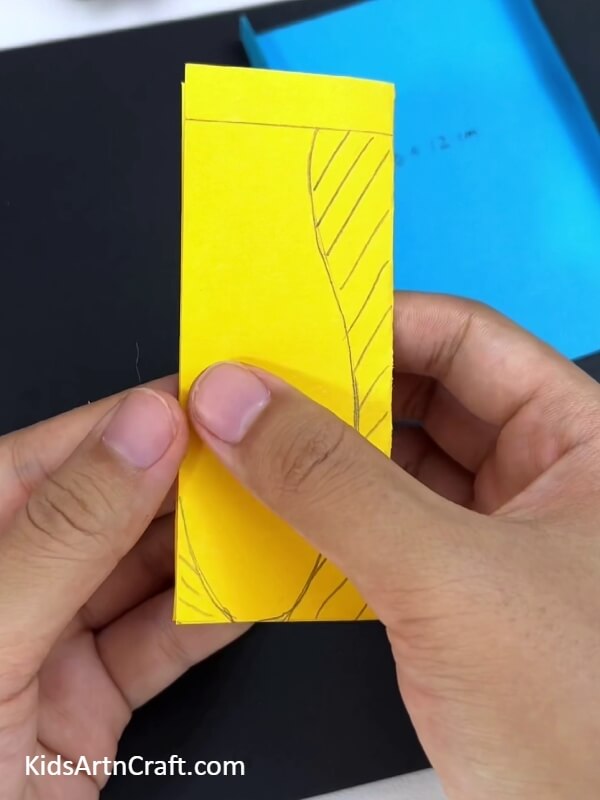
Fold the yellow paper from the middle. Draw lines just as shown above.
Step 4: Drawing On The Yellow Paper
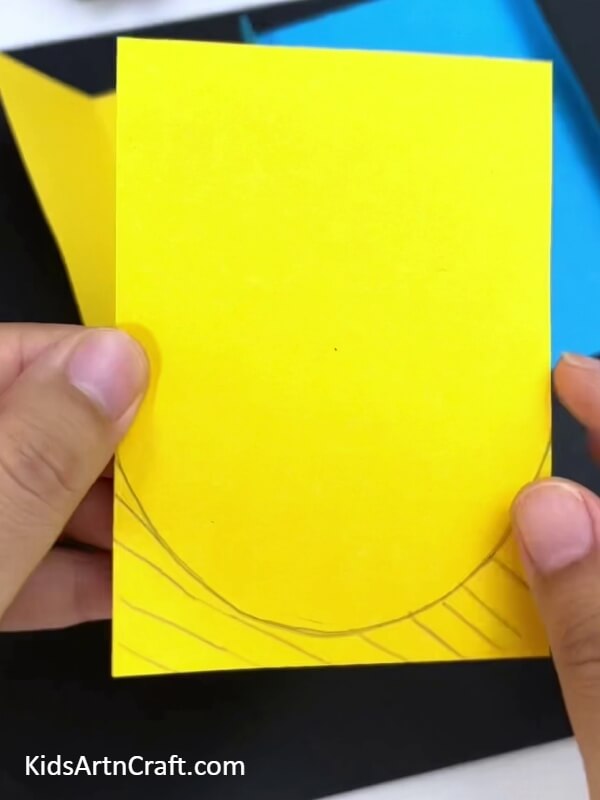
Draw a semi-circle at the bottom with the lines as shown above.
Step 5: Measurements On The Yellow Paper
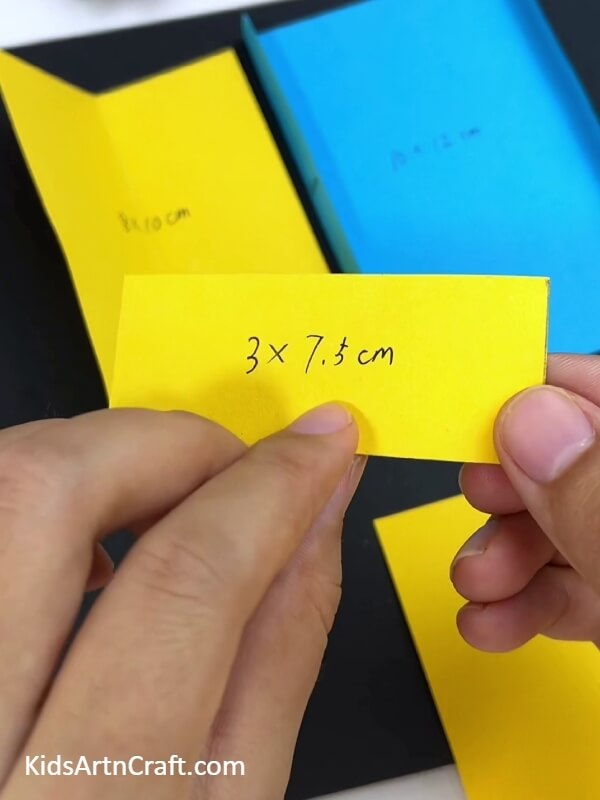
Cut another yellow paper using the measurements above. Length = 7.5cm and Breadth = 3cm
Step 6: Cut The Semi-circle
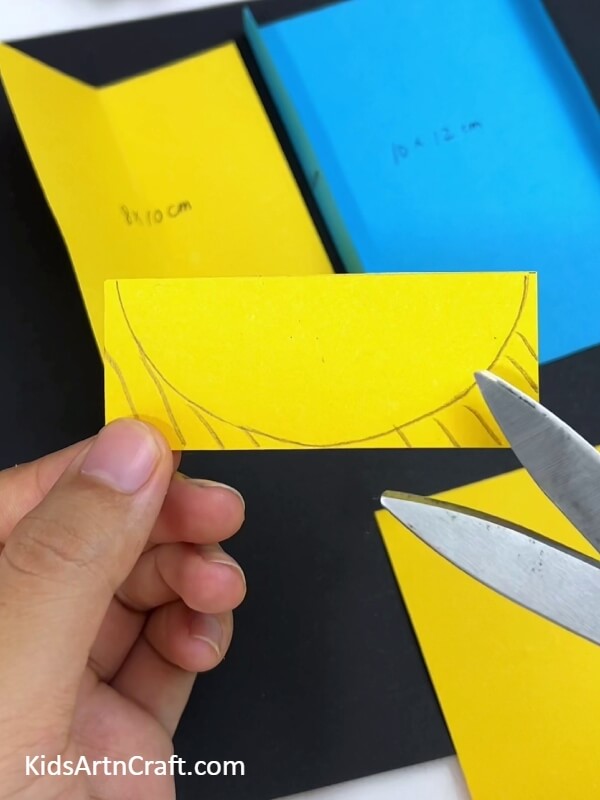
Using the scissors, cut the semi-circle.
Step 7: Cutting The Previous Yellow Paper
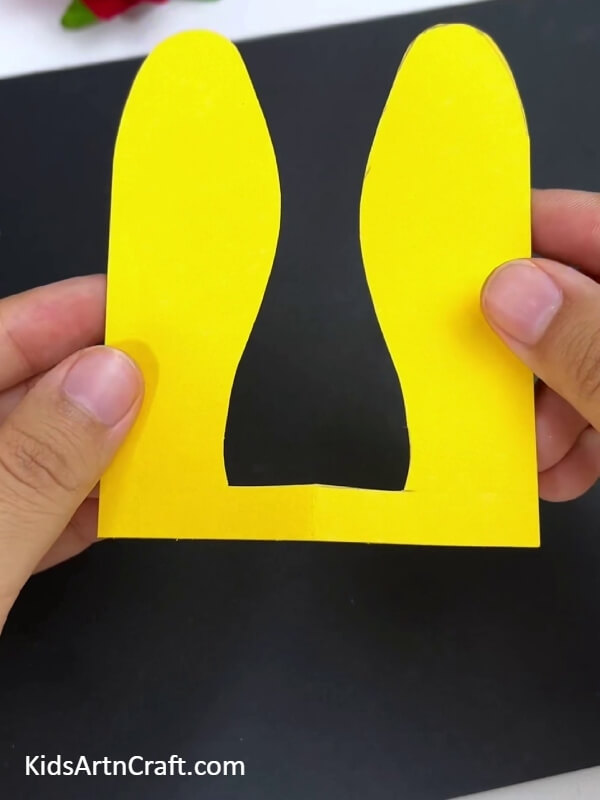
Cut the previous yellow paper. An ear-like shape appears after cutting it.
Step 8: Attaching The Tongue Of The Dog
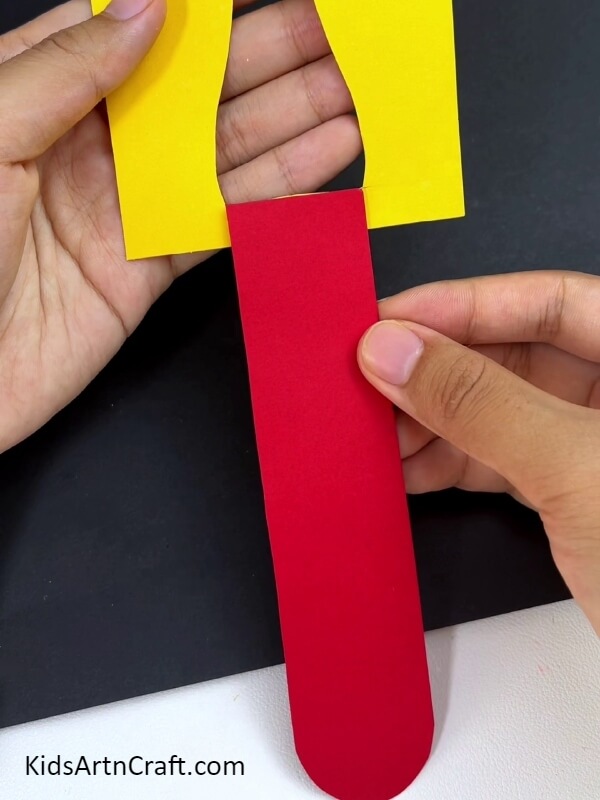
Cut a long red strip of paper and attach it to the bottom of the yellow paper you have just cut. Follow the above picture.
Step 9: Adjusting The Mechanism
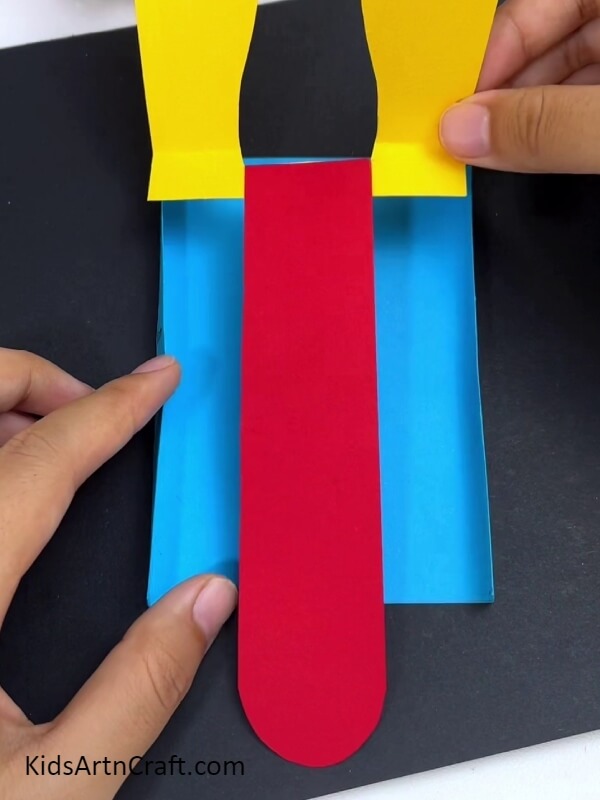
Place the yellow paper with the tongue attached, now to the previously measured and cut blue paper. Just like shown above.
Step 10: Marking The Required Parts
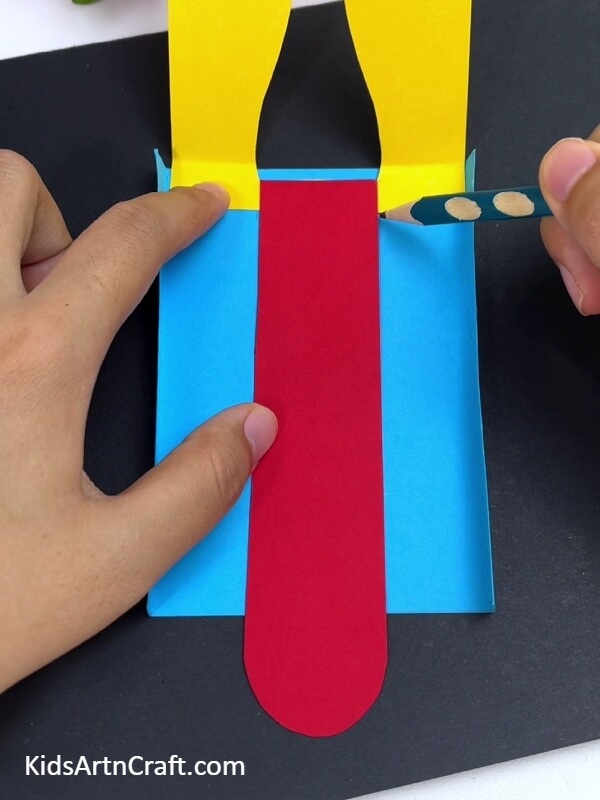
Mark the beginning of the tongue part on the blue paper.
Step 11: Using The Paper Cutter
Use the paper cutter to make a straight line cut in the middle of the marked region on the blue paper.
Step 12: Inserting The Tongue Of The Dog
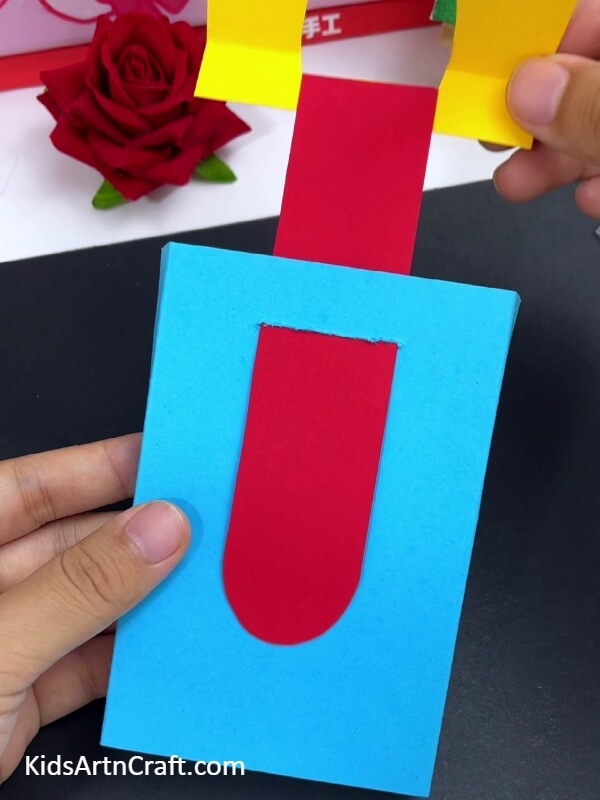
Now, insert the tongue of the dog through the hole made in the blue paper.
Step 13: Attaching The Semi-Circle
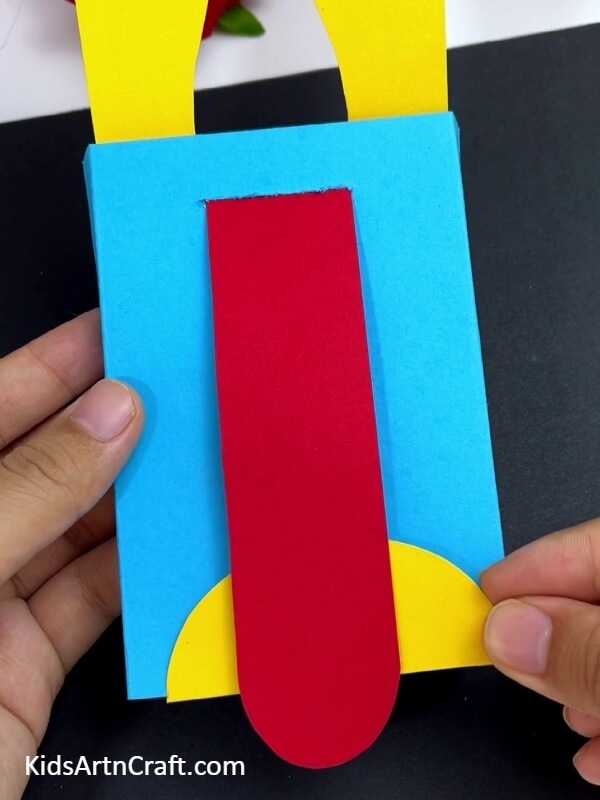
Attach the semi-circle at the bottom of the blue paper, beneath the tongue.
Step 14: Attaching The Face Of The Dog
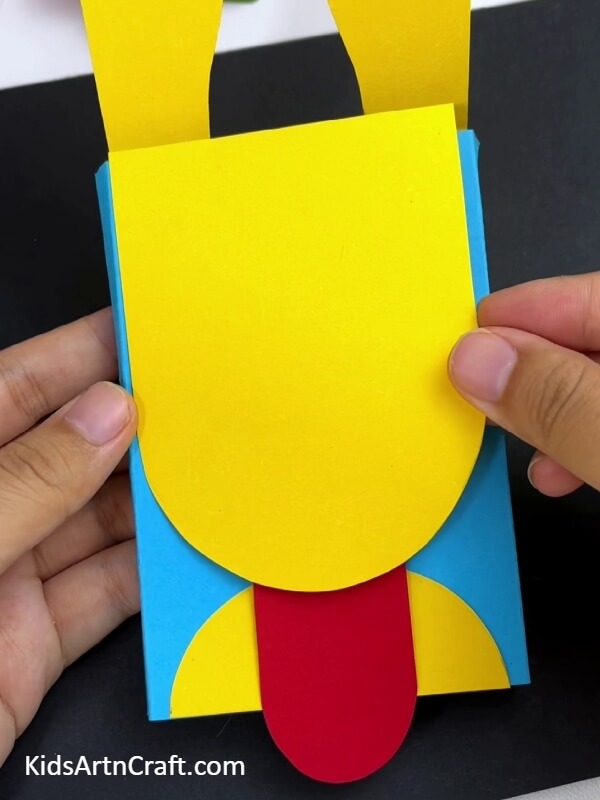
Above all of this, attach the face of the dog that we had measured and cut previously.
Step 15: Attaching The Eyes Of The Dog
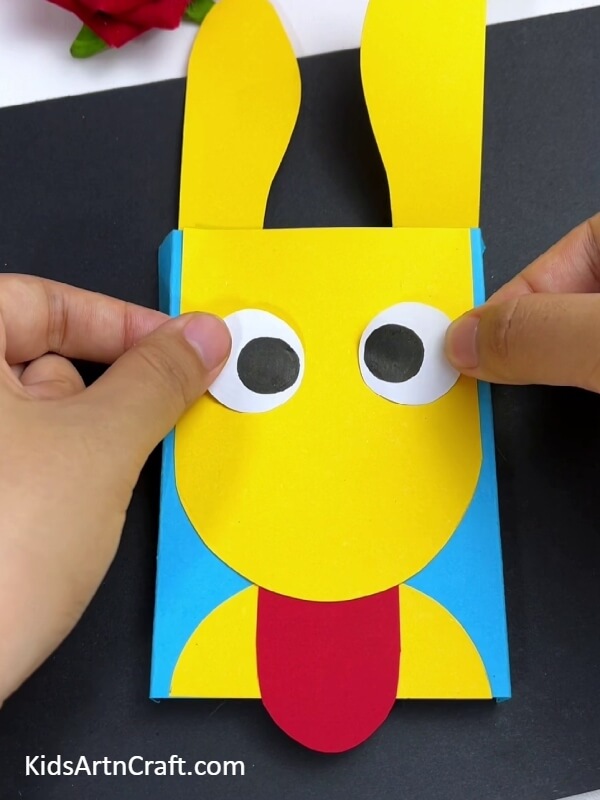
Using the black marker, draw the eyes of the dog and attach them to the face of the dog.
Step 16: Attaching The Nose Of The Dog
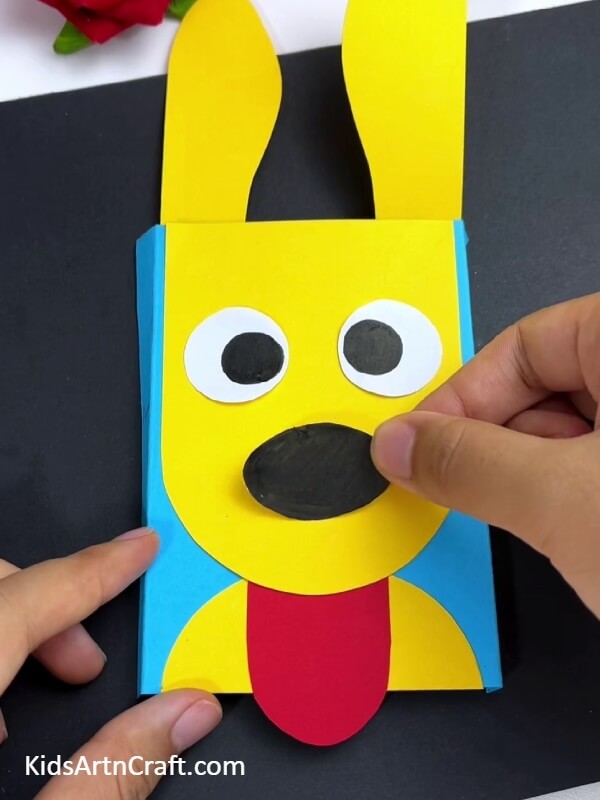
Draw and attach the nose of the dog as well.
Step 17: Adjusting The Blue Paper
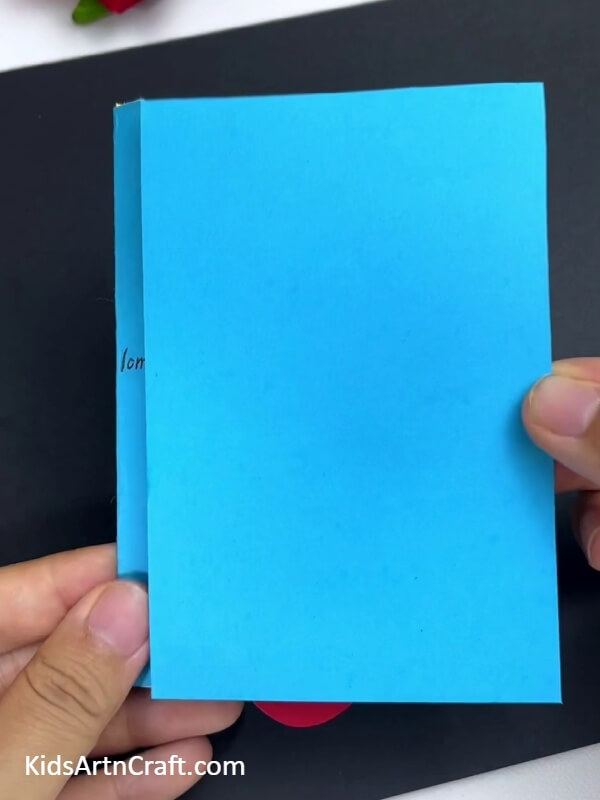
Attach the previously measured and kept blue paper at the back of our dog craft.
Step 18: Finishing Touches To Our Paper Dog Craft
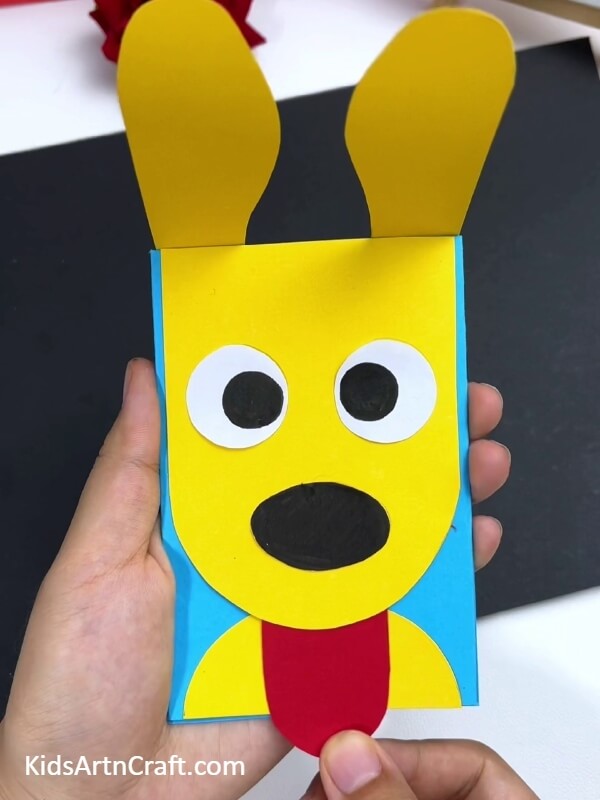
Pull the tongue of the dog to check whether our mechanism of the entire dog craft is working or not.
Paper Toy Dog Craft Step-by-Step Tutorial
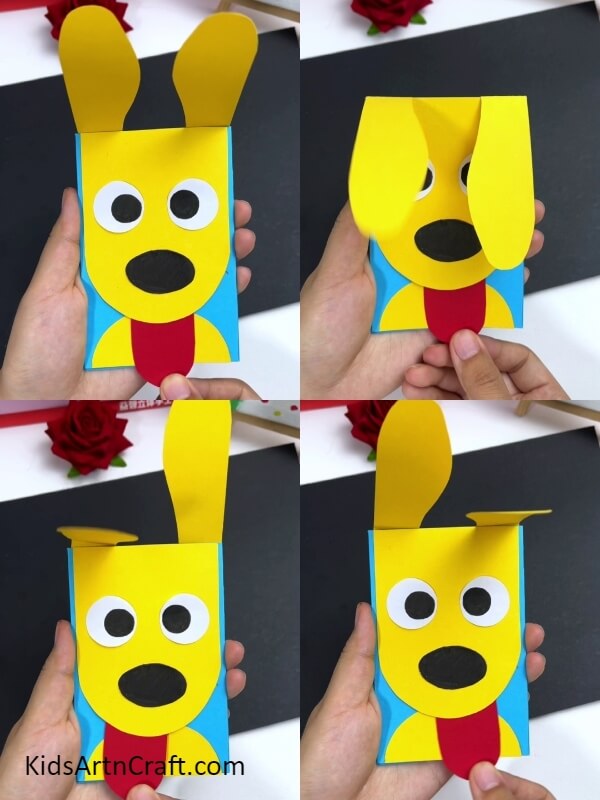
How amazing! Pull the tongue to see the dog move its ears! Isn’t this paper toy craft fun? That’s right, its super easy to make as well. We have provided a detailed step-by-step description of how to make this paper dog toy craft. You can try it out anytime you want. All you need is some basic mathematics and crafty skills. Make your own paper dog toy now!
Hope you like this article on how to make a paper dog toy craft. We would love to hear your thoughts on this article in our comments section below. Please do visit our website for other such interesting and fun art and craft articles.
Thank you for visiting our website.
Follow us on Youtube for art and craft tutorials and much more.
More Articles from Kids Art & Craft
- DIY Bird Nest Paper Craft For Kids
- DIY Simple Paper Toy Craft For Kids To Play
- Easy Paper Craft Toy Tutorial For Kids
- DIY Easy Paper Cactus Craft Tutorial for kids
- DIY Easy Origami Paper Shark Toy Tutorial For Kids