Clay Crafts
Cute Peppa Pig Scenery Craft Step-By-Step Tutorial
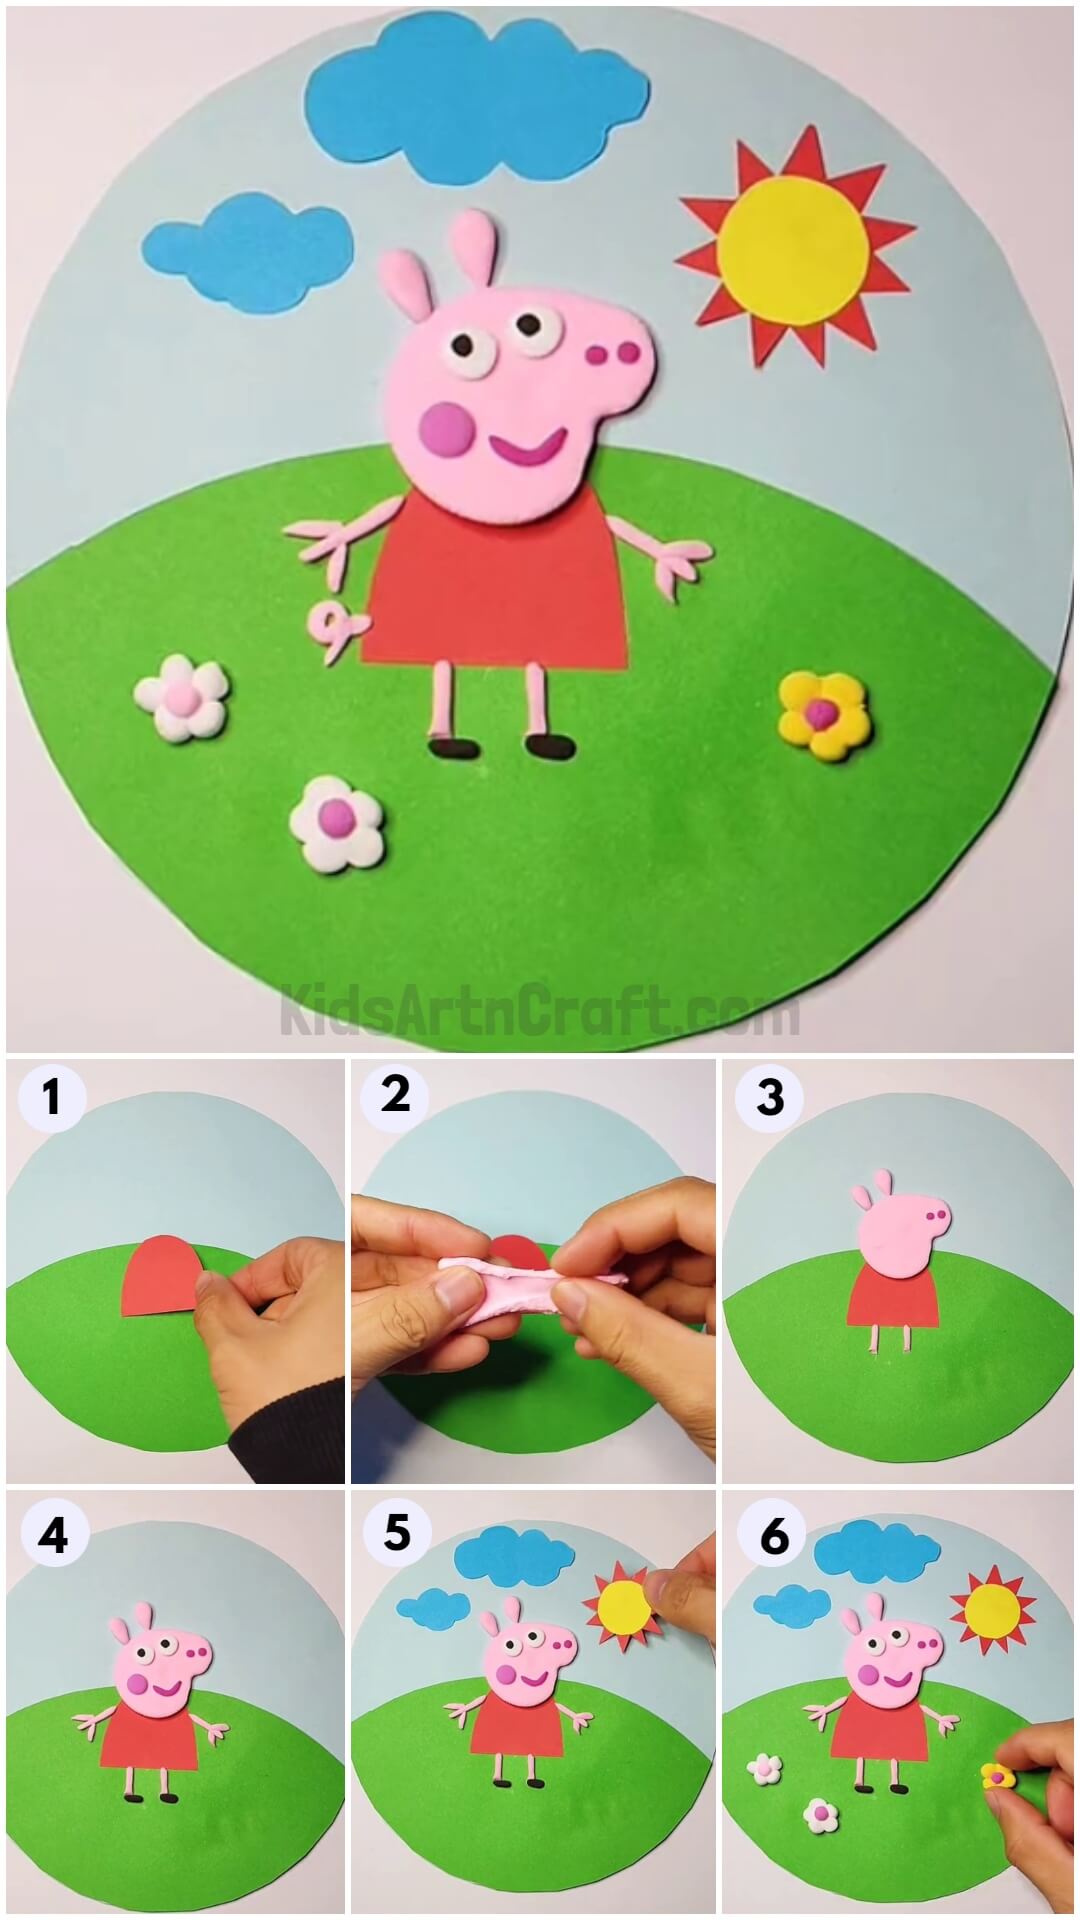
This tutorial will show you how to make a nice Peppa Pig scenery craft. It’s great for kids of all ages and you’ll be able to make gorgeous Peppa Pig pictures quickly.
Welcome to the world of adorable and entertaining craft ideas for kids! If you’re searching for a simple yet fun activity to keep your kids entertained, we’ve got you covered. Introducing the beautiful Peppa Pig scenery craft, ideal for encouraging children’s creativity and imagination. This craft idea not only entertains children but also helps them develop fine motor skills and attentiveness. So gather your paper, pencils, and scissors because we’re about to take you on a step-by-step tutorial adventure that will have everyone oinking with glee!
Cute Peppa Pig Scenery Craft For Kids

Read More: DIY Clay Giraffe Step by Step Tutorial For Kids
Materials Required
- Blue (light And dark), Red, Yellow, Orange And Green Coloured Sheets Of Paper
- A Pair Of Scissors
- Any Adhesive
- Clay Dough Of Various Colours
Procedure
Step 1: Create The Background For The Scenery By Adding Sky And Grass

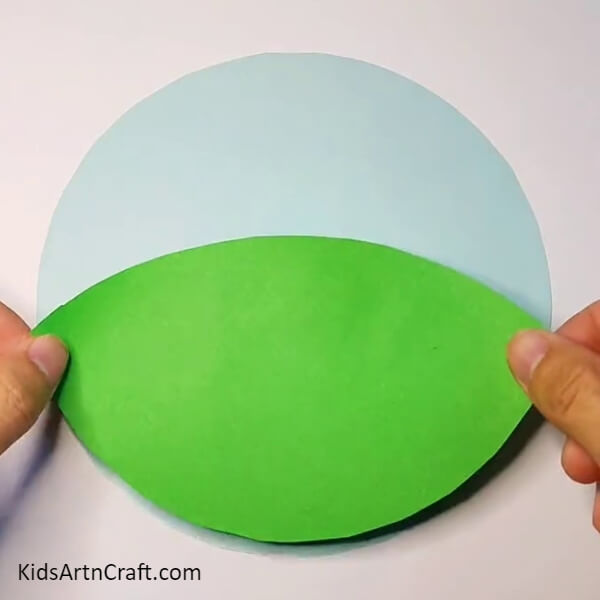
For the first step, take a light blue coloured sheet of paper and cut it into the shape of a circle using a pair of scissors. Then, take the green sheet and cut it into a large leaf-like shape and then paste it over the blue sheet using the adhesive.
Step 2: Paste The Peppa Pig’s Outfit Cutout
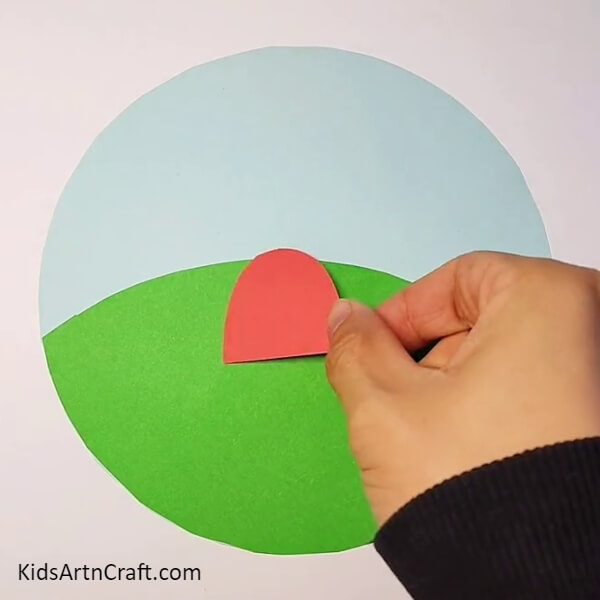
Then, take the red-coloured sheet of paper and cut it into a shape similar to that of a half oval. Then, paste the shape on the paper using the adhesive.
Step 3: Take Pink Clay Dough And Mould It
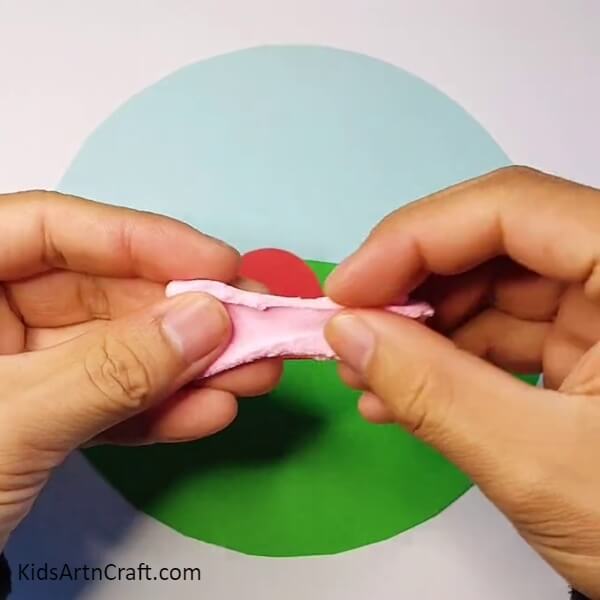
Here, you are supposed to take the pink-coloured dough and mould it into the shape of the face of a Peppa Pig, very similar to the shape of a whistle.
Step 4: Paste The Dough On The Outfit
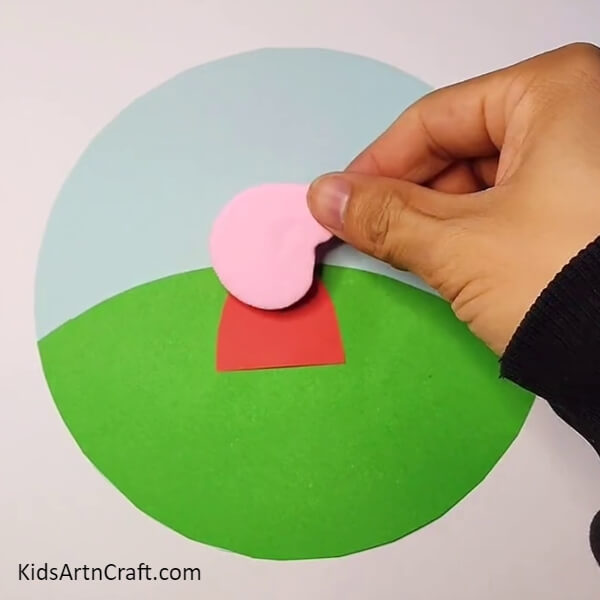
Now, you are supposed to place the dough on the outfit as shown below.
Step 5: Add Details Such As Nose And Eyes Using Clay Dough
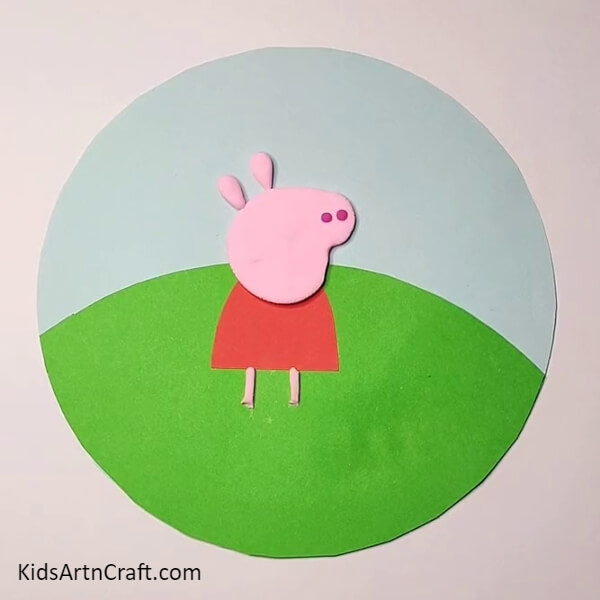
Then, you are supposed to add other details using the dough, such as the nose (mould into two small circles), ears (mould into two small leaves ), legs (mould into two straight lines ) and eyes( two small black circles on the white bigger circles ).
Step 6: Use Paperweight To Secure The Whole Design
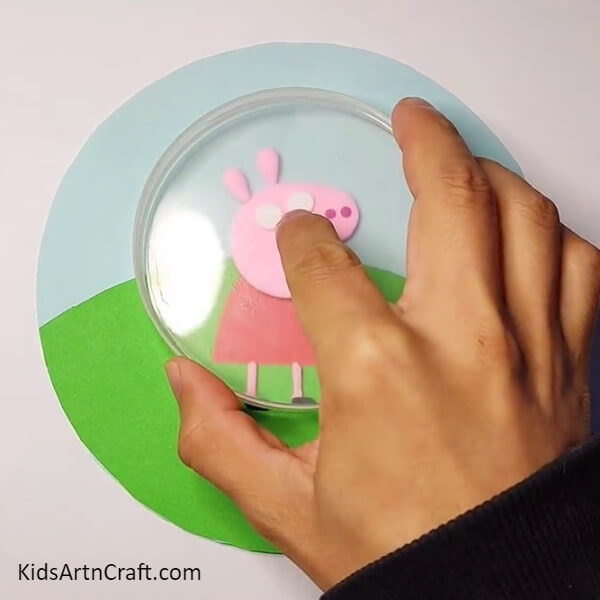
Now, take a paperweight and apply pressure on the design to secure it in one place.
Step 7: Add a Smile, Two Hands And Some Blush!
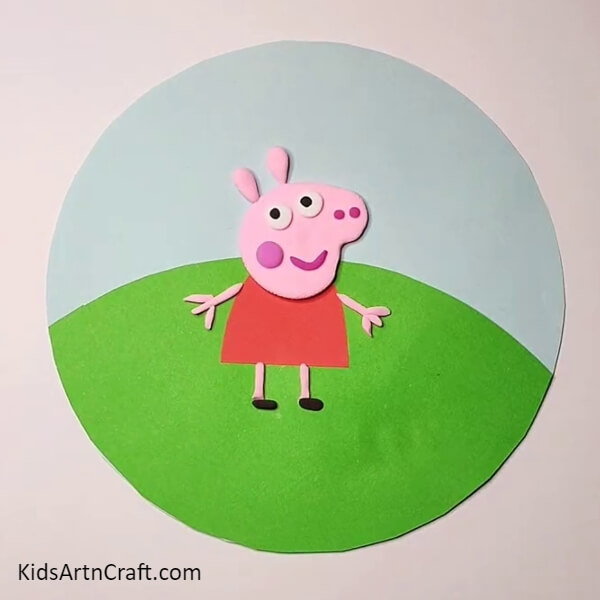
Now, take some more dough and add two hands, some blush and a smile by moulding the dough into the required shapes.
Step 8: Paste The Cloud Cutouts
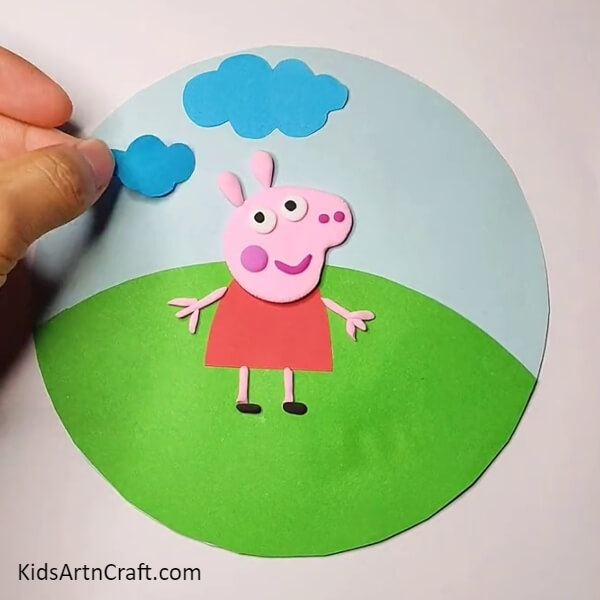
Now, take the darker blue-coloured sheet of paper and cut it into the shapes of clouds of different sizes, then paste them on the scenery cutout using the adhesive.
Step 9: Paste The Sun Cutout
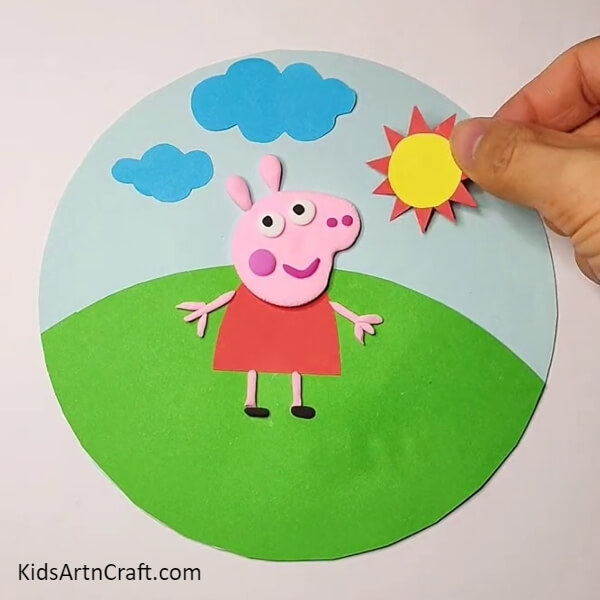
Now, take the yellow sheet and cut a circle. Take the orange sheet and cut small triangles out of it. Paste them together using the adhesive and then paste the whole cutout on the scenery.
Step 10: Add Flowers Made Of Clay Dough And a Tail Too!
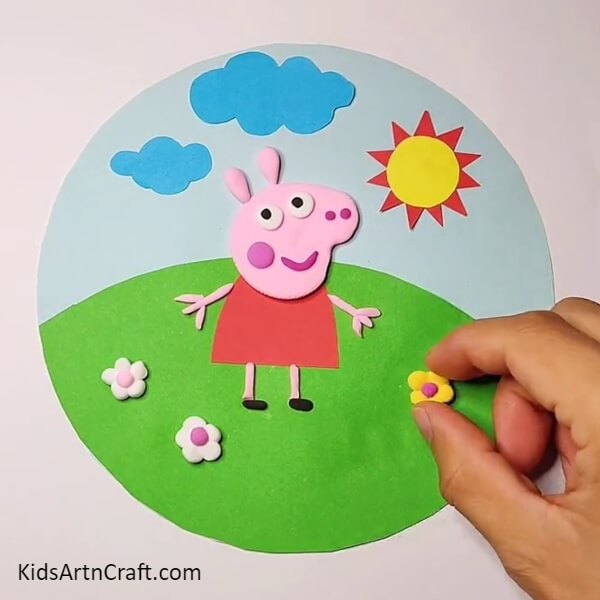
Finally, take some more dough to create flowers and place them on the greener side of the scenery.
Viola !! Your Scenery Is Ready !!

The adorable Peppa Pig scenery project is a great option for kids who adore this famous TV character. They will not only have fun making it, but they will also learn how to follow directions, be patient, and persevere.
This project has various advantages, including keeping the kids engaged in an entertaining activity that keeps them from viewing devices or being idle. However, when engaged in creating activities, several cares should be considered. Always ensure that youngsters use non-toxic, age-appropriate materials. To prevent mishaps, make sure that sharp objects, such as scissors, are used under adult supervision.
Making a lovely Peppa Pig scene may bring hours of entertainment for both youngsters and adults! So grab your materials and get started !! Let us know your thoughts in the comment section and do check our other posts for more such amazing ideas!
Follow us on Youtube for art and craft tutorials and much more.
More Articles from Kids Art & Craft
- How to Make a Clay Bird Easy Artwork tutorial for kids
- DIY Miniature Clay Cake Craft Activities for Kids
- How to Make Clay Flower Easy Tutorial for Kids
- Clay watermelon ice cream easy craft tutorial
- How to Make Worm Using Clay For Kids