Fall & Autumn
River Landscape Fall Leaves Craft Tutorial

Learn how to make a stunning river scene with autumn colored leaves and craft materials. Follow our simple instructions to create the ultimate fall landscape.
Welcome to this step-by-step tutorial on how to river landscape fall leaves craft. This artwork will be helpful for all those who want to draw the landscape in a unique way. This craft will require very simple and basic craft skills. This artwork is beginner friendly and can be made with less effort. This will require very basic materials which will be available easily in any art and craft store. So without any further ado, let’s get started and come let us make it together.
Simple River Landscape Fall Leaves Craft

Read More: Learn To Make Easy Heart Shaped Paper Mouse Craft
Materials Required
- White paper
- Yellow craft paper
- Fall leaves
- Blue sketch pen
- Black sketch pen
- White marker
Procedure
Step 1: Sticking Yellow Craft On White Paper To Make Ground
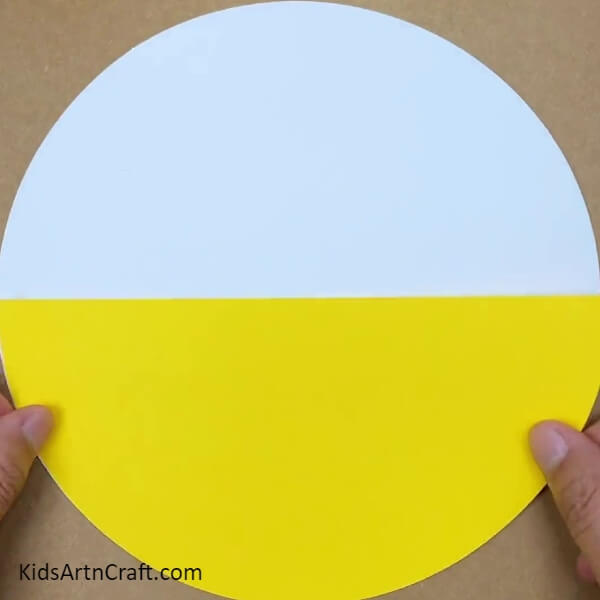

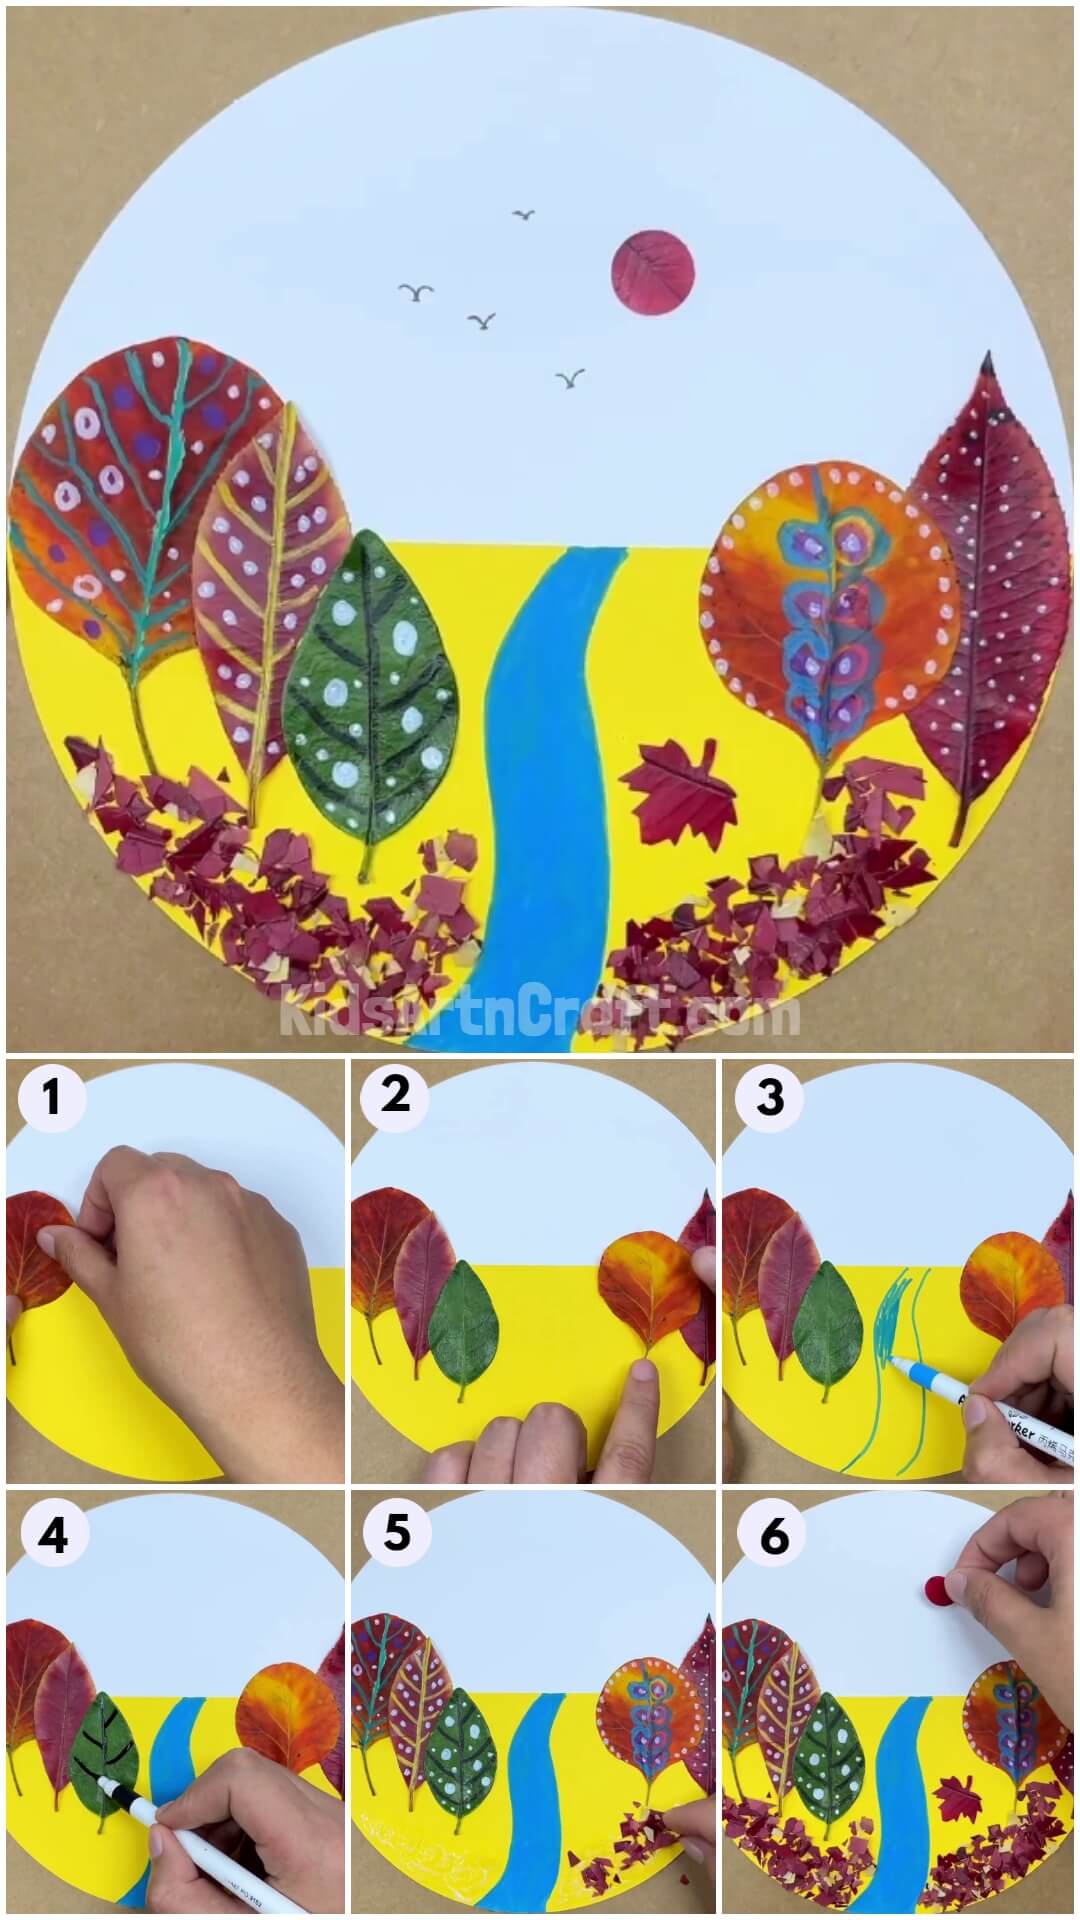
For this craft take yellow craft paper and cut it in the shape of the semicircle. After that stick it above the white paper as shown in the photo above.
Step 2: Sticking Fall Leaves To Make Trees
After making the ground, now it’s time to take some fall leaves. Then start sticking them on the paper one by one side by side of each other. Take every size to get a good mix of small and big trees. Start sticking them above the yellow craft paper with the help of fevicol.
Step 3: Sticking Small Fall Leaves
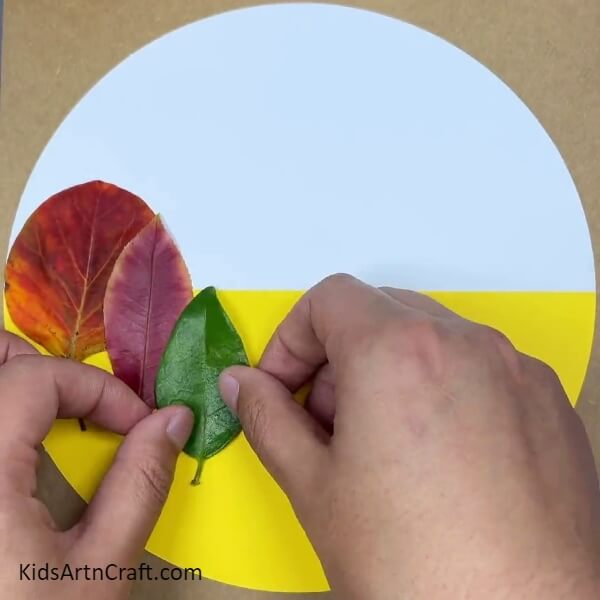
Now take a small size lead as compared to other leaves and start sticking it in the paper as shown in the photo above.
Step 4: Sticking Different Shape Fall Leaves To Make Trees On The Landscape
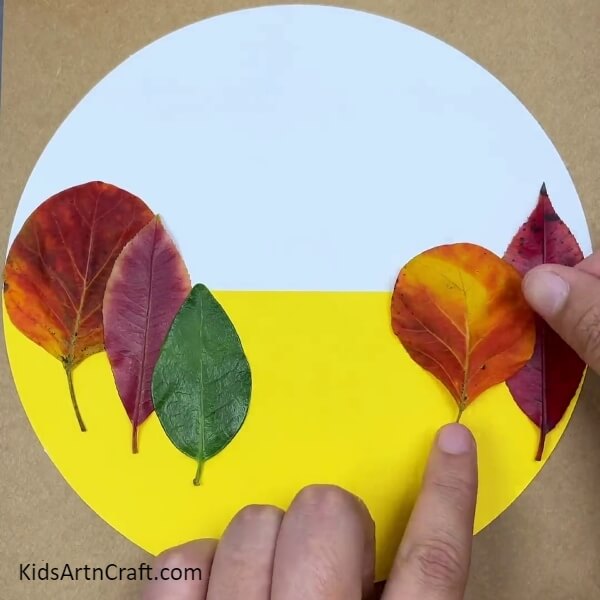
Keep on taking different shapes of leaves like broad and narrow. Then keep on sticking them with fevicol as shown in the photo above.
Step 5: Make A River With A Blue Sketch Pen
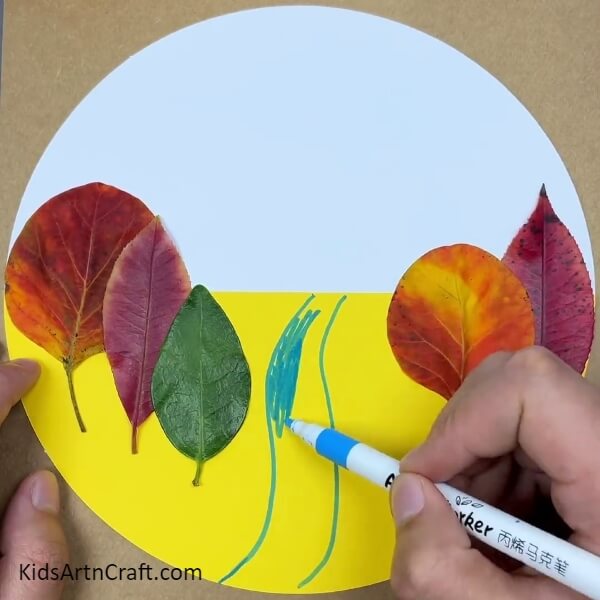
Now take a blue sketch pen and start drawing waves to make a river. Then fill it with a blue sketch pen as shown in the photo. Draw a river in the middle of the trees.
Step 6: Make Details In The Leaves With A Black Sketch Pen
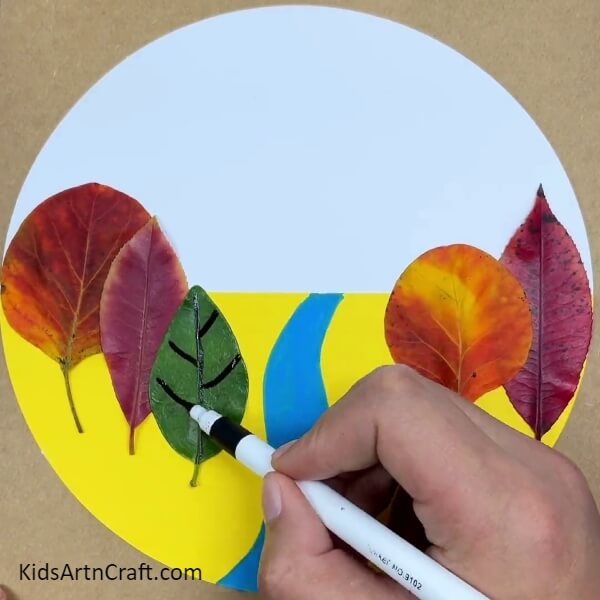
After drawing the river, now start making the details in the leaves with a black pen. Like drawing some lines as shown in the photo above. And also make some dots in the leaves as shown in the photo above.
Step 7: Stick Some Fall Leaves To Make The Grasses Of The Landscape

After completing the details, now stick some fevicol in the bottom of the ground as shown in the photo above.
Step 8: Sticking Pieces Of The Fall Leaves
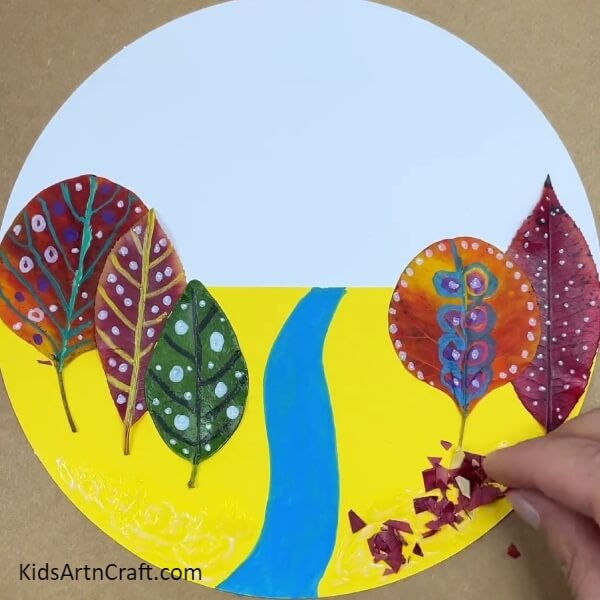
Now break the fall leaves into small pieces. Then start spreading it over the fevicol as shown in the photo above.
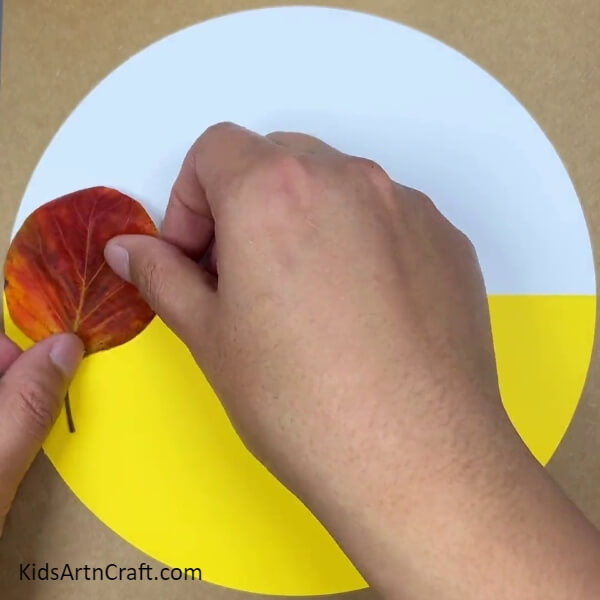
Step 9: Making Sun With The Fall Leaves
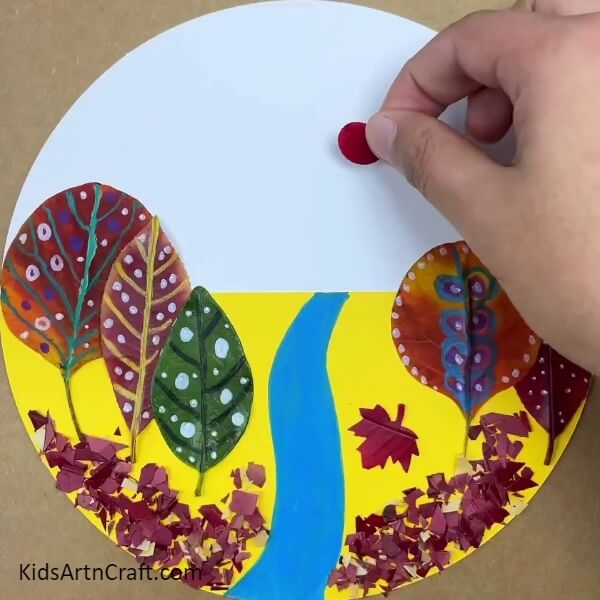
After making the grasses in the ground with the fall leaves and sticking some fallen leaves to give it fall vibes, now it’s time to make sun using fall leaves. Cut out the circle from the fall leaf and stick it on the paper as shown in the photo above.
Step 10: Draw The Birds With A Black Sketch Pen
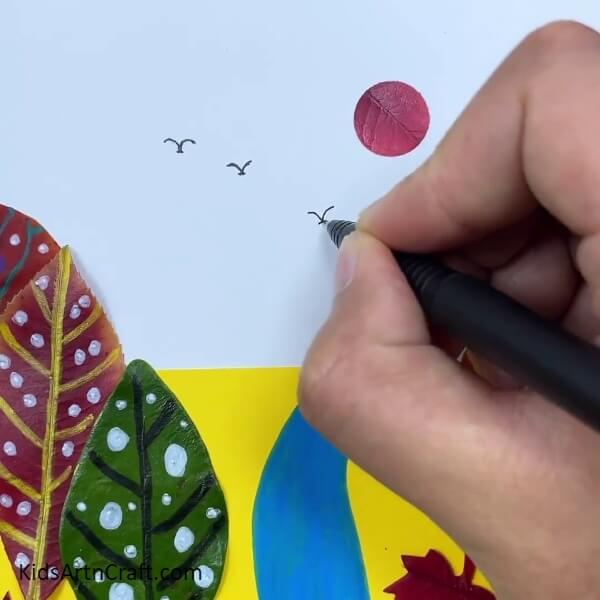
Now after making the sun, now it’s time to make the birds without any landscape is not complete. For this draw birds with a black sketch pen as shown in the photo above.
Tada! Our Beautiful And Serene River Landscape Is Ready
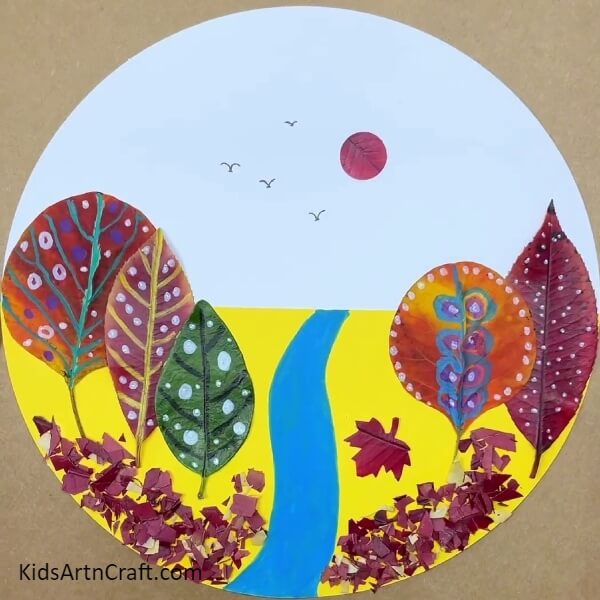
Tada! Our beautiful and serene river landscape is ready. Isn’t it so beautiful and serene? This is a super cool and fun idea to make a landscape that will mostly fall leaves. It is perfect for beginners and kids who do not like to draw the landscape as this only requires sticking the fall leaves. It is a very unique way of making landscapes. Now it’s your turn to try them and let us know in the comments how much you enjoyed them. Also, let us know much useful this tutorial is for you and your opinion. We would love to read your comments.
And also visit other articles for more art and craft ideas!
Thank you for visiting our website.
Follow us on Youtube for art and craft tutorials and much more.
More Articles from Kids Art & Craft
- DIY Easy Paper Chick Craft For Kids
- DIY Heart Shape Cat Craft for Valentine’s Day
- Heart Shaped Paper Mouse Craft Step by Step Tutorial
- How to Make Easy Paper Snowflakes Tutorial
- DIY Paper Tree Crafts for Kids Easy Tutorial