Paper Crafts
Christmas Santa Face Paper Craft Step-by-step Tutorial For Beginners

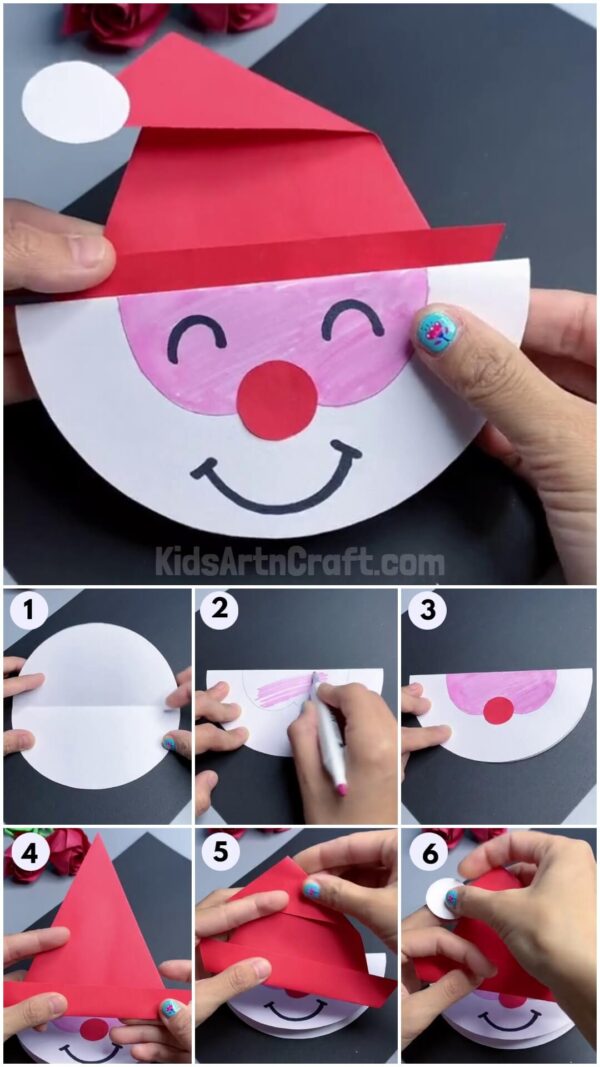
This step-by-step tutorial will teach you how to make a cute and easy paper Santa face craft! Perfect for beginners and great for Christmas decorations. Learn how to make your own festive holiday decoration with this fun tutorial.
Christmas is all about gifts and joy and the person who brings us both is Santa Claus. Let’s create a Santa’s face craft step-by-step in no time. This craft is loved by both children and adults alike. Anyone from toddlers can recreate this with just a few things like colored craft sheets, markers, and some glue. Let’s get started!
Christmas Santa Claus’ Face Paper Craft

Read More: Learn to Make Origami Snake Craft Step-by-Step Tutorial for Kids
Materials Required
- Craft Paper(White, Red)
- Marker ( Black, Pink, and Red )
- Glue
- Scissors
- Pencil
Procedure
Step 1: Folding A Circle
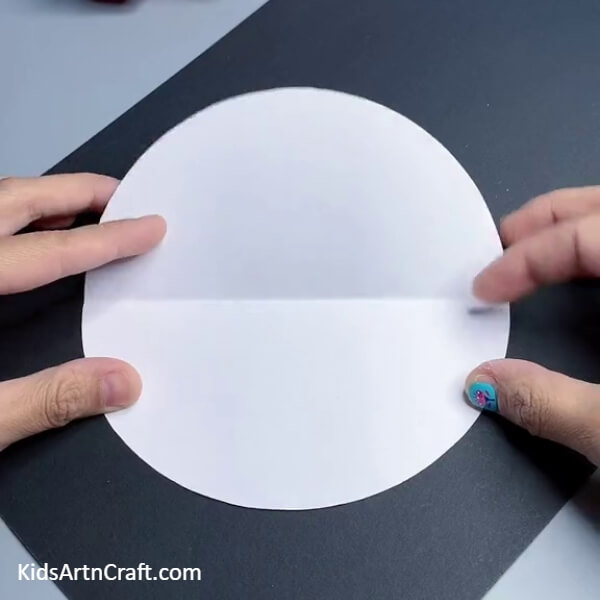

Let’s begin with creating Santa’s face. For that, you will need a white craft paper. Fold it in half.
Step 2: Making A Semicircle
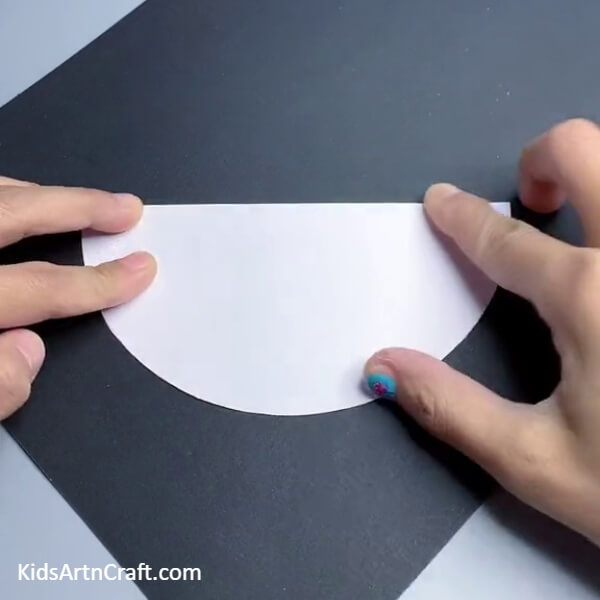
After that, fold the paper in half to form a semicircle as shown.
Step 3: Drawing And Coloring The Eye Area
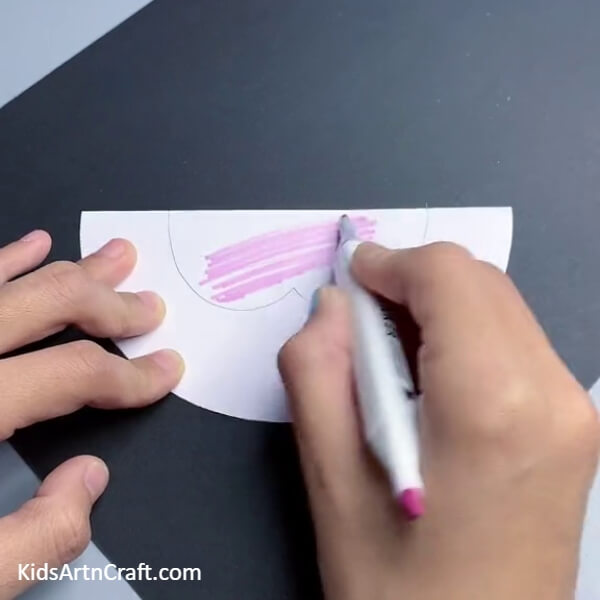
Right after folding, grab a pencil to draw the eye area along the closed edge, as shown in the picture. Fill it with pink color. Draw a red nose in between the eye area with the red marker as shown.
Step 4: Pasting A Red Nose
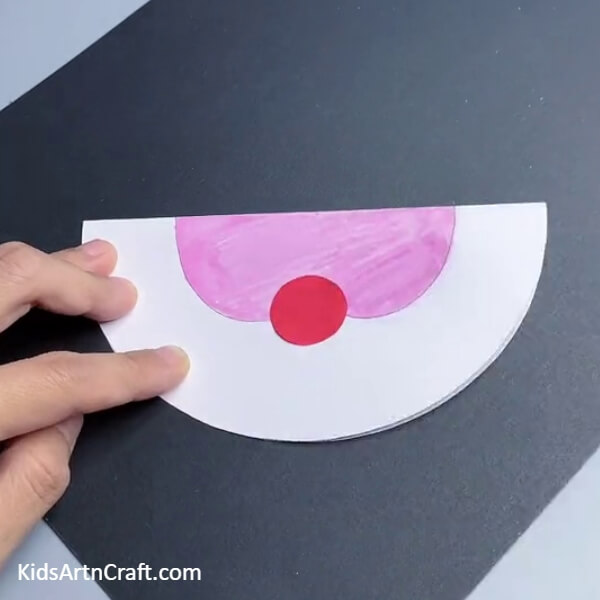
Using scissors, cut out a red nose from a red sheet of paper and paste it in the bottom center of the eye area.
Step 5: Making A Red Triangle
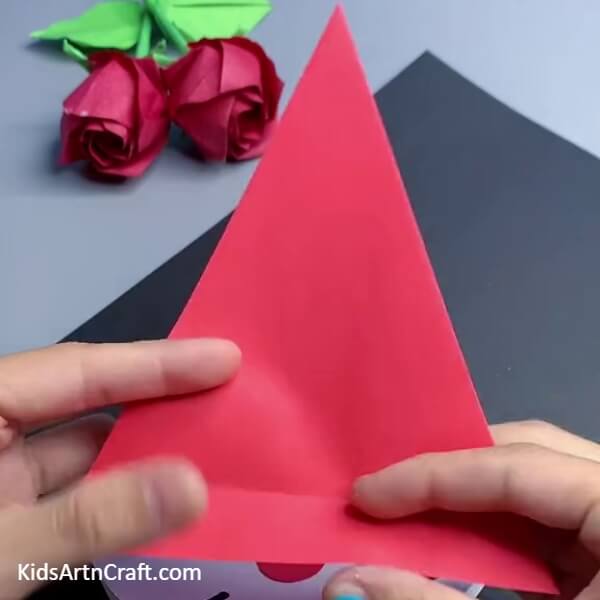
Now, you will need red craft paper. Cut it into the shape of a triangle or fold the square paper. This will become the hat for Santa Claus.
Step 6: Folding The Hat From The Bottom
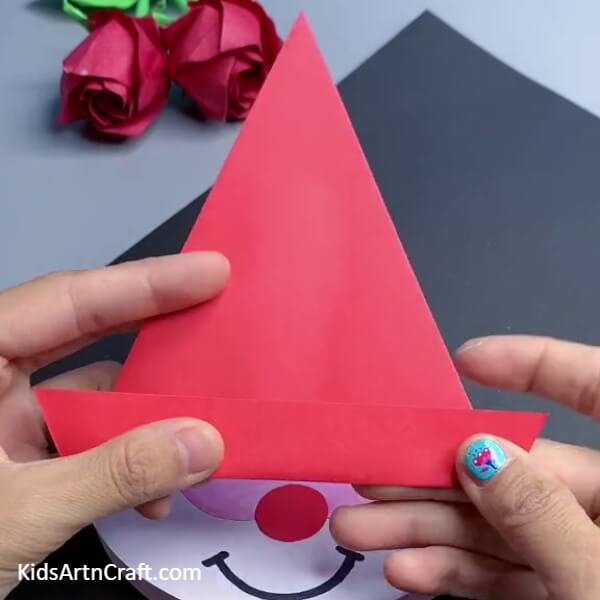
Now, from the bottom, make a narrow rectangular fold.
Step 7: Folding The Hat From The Top
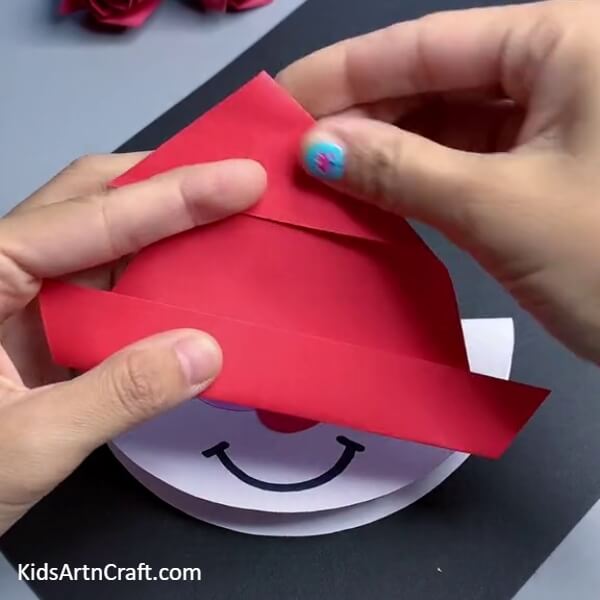
After the first fold, next fold the top and let the tip of the hat face to the right side.
Step 8: Pasting A White Circle
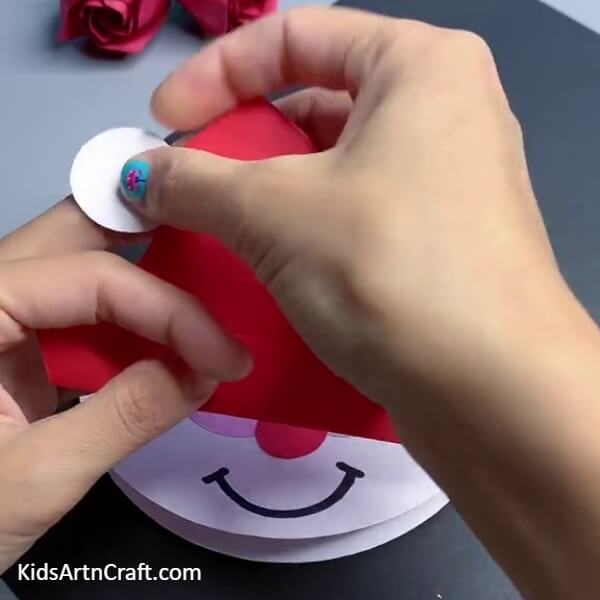
To finish up the hat, cut a small piece of the white circle and place it on the tip of the hat as shown in the image, and paste it. You can even add some fur to it to make it look more real. Paste the red hat on top of the white semi-circular face of the Santa Claus.
This is The Final Look Of Our Paper Santa Claus Face Craft!
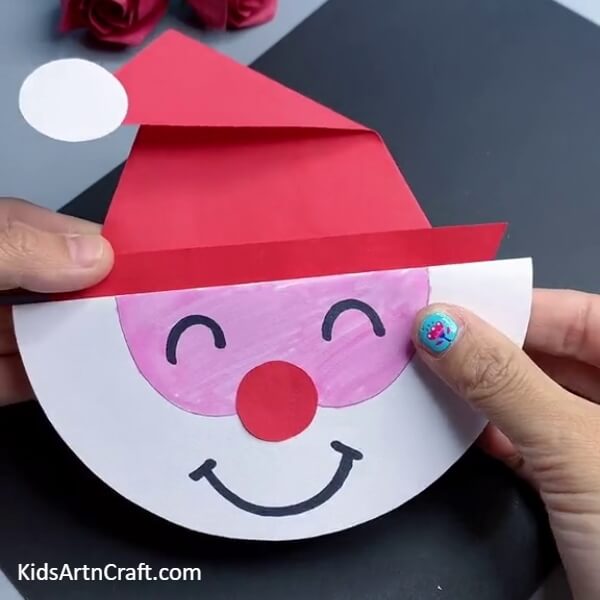
For the next step, take a black marker and draw the eyes and mouth as shown in the picture. And here is your Crafted Santa Claus ready to be used as a Christmas Decoration. You can stick it on the Christmas Tree or near the Crib!
Hope you liked and enjoyed doing this craft as we did while sharing it. Let us know your thoughts and do let us know how it turned out in the comment box below. Don’t forget to check out other craft ideas on our website. Thank you for visiting our website.
Some More Santa Craft Tutorial
Easy to Make Origami Santa Paper Craft For Kids

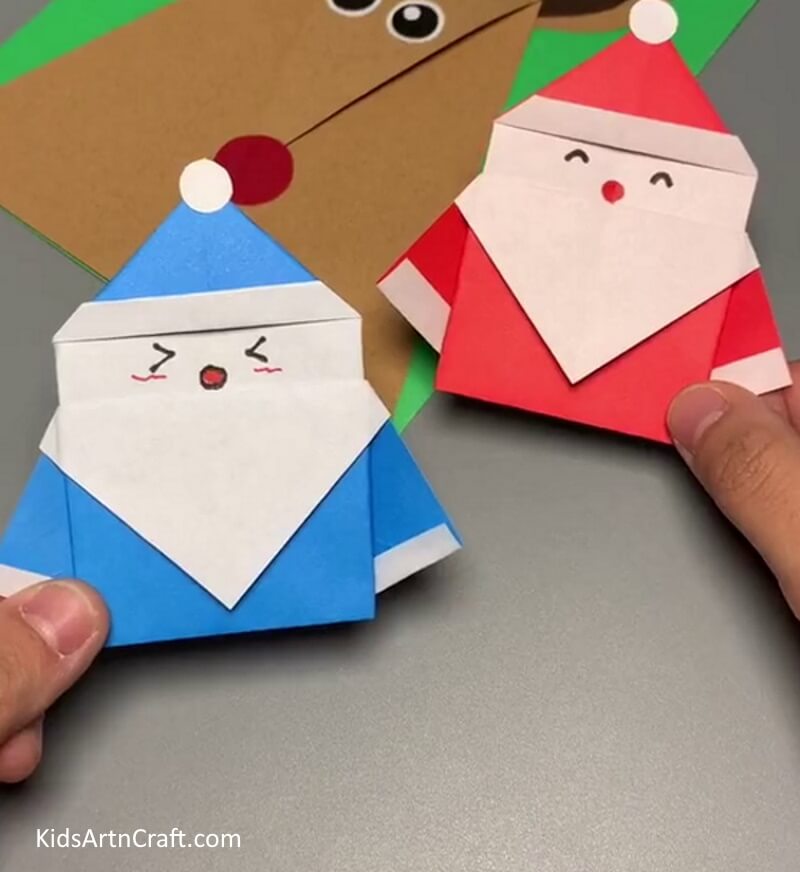
Image Source/Tutorial: Kids Art & Craft
Making Santa from paper is a fun and easy activity for kids! Kids can create their own unique Santa and have fun decorating him with markers, crayons, and glitter. This project is a great way to get the creative juices flowing.
Learn Christmas Snowman Craft For Kids

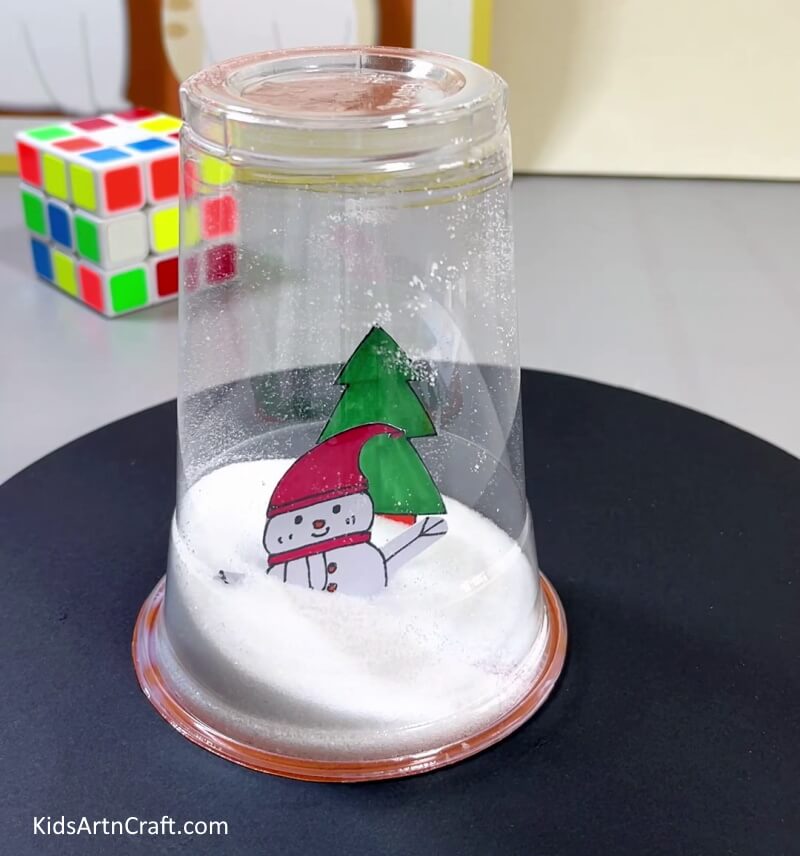
Image Source/Tutorial: Kids Art & Craft
This Christmas craft for kids is sure to get them in the festive spirit! Learn how to make a cute snowman with a few simple materials – it’s a great way to get your little ones excited about the holidays.
Follow us on Youtube for art and craft tutorials and much more.
More Articles from Kids Art & Craft
- Paper Snowflake Pattern Step-by-Step Tutorial
- How to Make Easy Paper Snowflakes Tutorial
- Summer Paper Fan Step-by-Step Tutorial for Kids
- DIY Bird Nest Paper Craft For Kids
- Paper Christmas Trees Step-by-Step Tutorial For Kids