Recycled Crafts
How To Learn Turtle From Walnut Shell Craft Tutorial

This tutorial will show you how to make a turtle with walnut shells. Read each step carefully and you’ll be able to create your own one-of-a-kind turtle.
Hello everyone! Welcome to this turtle craft tutorial! In this tutorial, we are going to learn how to create turtle crafts using walnut shells. You should have some walnut shells, green color paint, a sketch pen, and some glue to create this turtle craft. Let’s start!
How To Learn Turtle From Walnut Shell Craft Tutorial

Read More: How to make Turtle Paper Craft for Kids
Materials Required
- White sheet
- Walnut shells (3 pieces)
- Green acrylic paint and paintbrush
- Crayon (Dark& light green)
- Light blue sketch pen
- Glue
- Pale brown color clay
- Doll eyes
Procedure
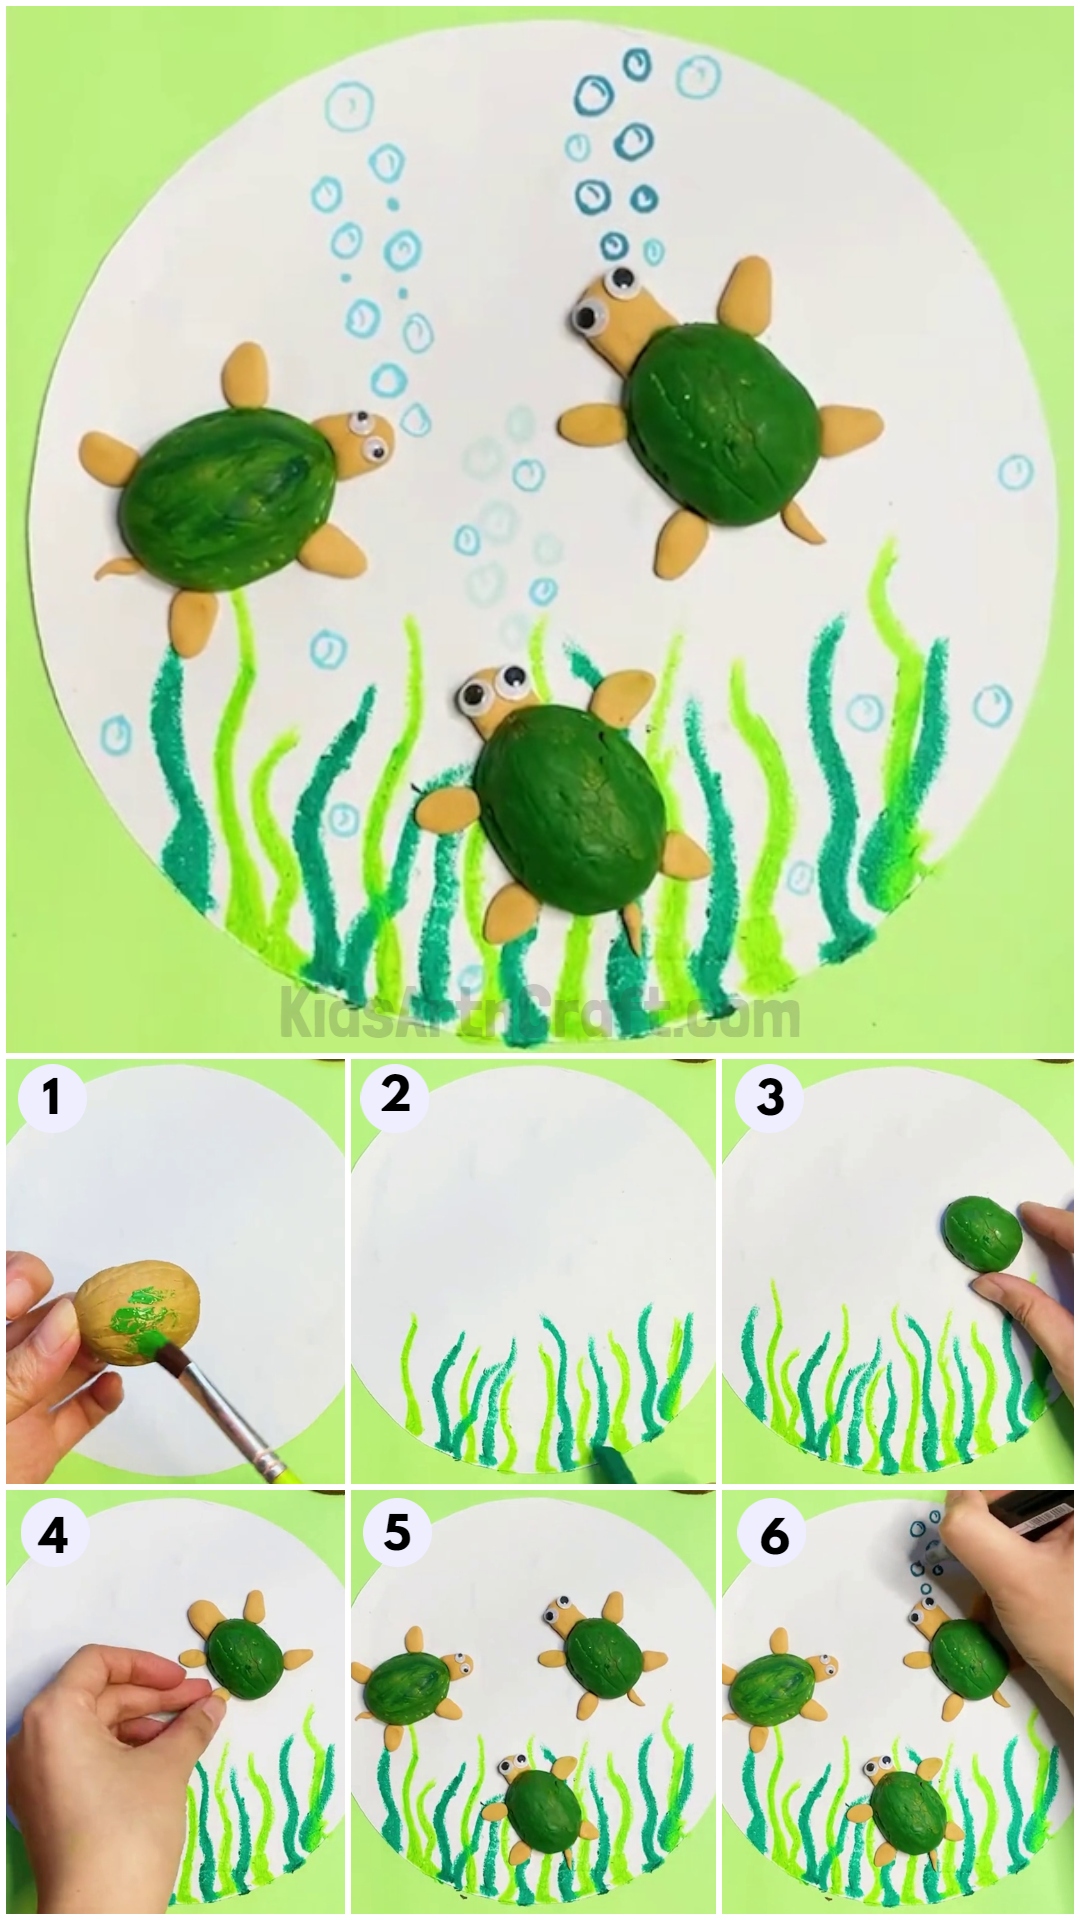
Step 1: Painting Walnut Shells With Green Color Paint
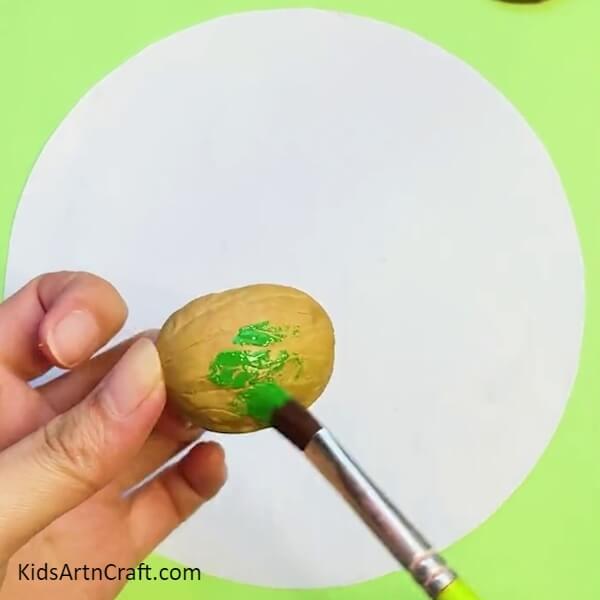

Dip your painting brush in green color acrylic paint and paint green color on each of the 3 walnut shells and let it dry.
Step 2: Drawing Green Grasses Using Light Green Crayons On A White Sheet
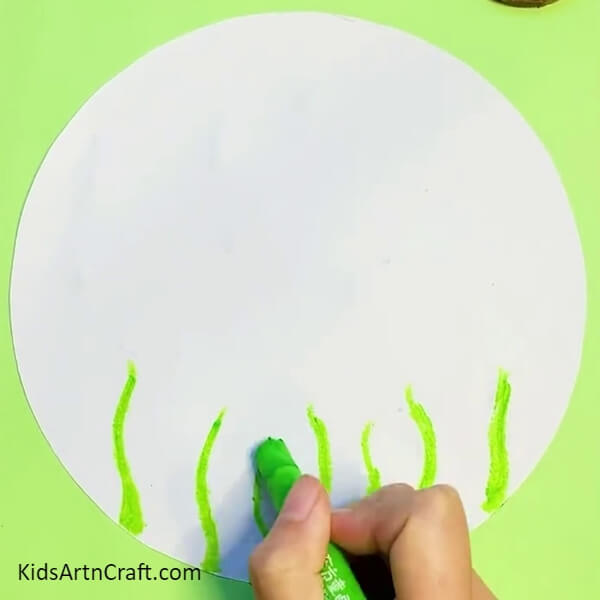
Grab a light green color crayon and start to draw some light green curvy lines on the bottom of your white sheet.
Step 3: Drawing Green Grasses Using Dark Green Crayons On A White Sheet
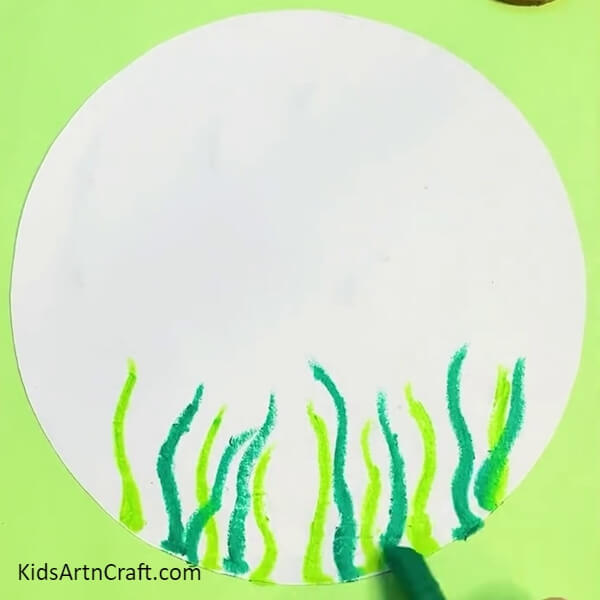
Now take your dark green color crayon and again draw some curvy lines in between all those curvy light green lines.
Step 4: Drawing Tall Grasses
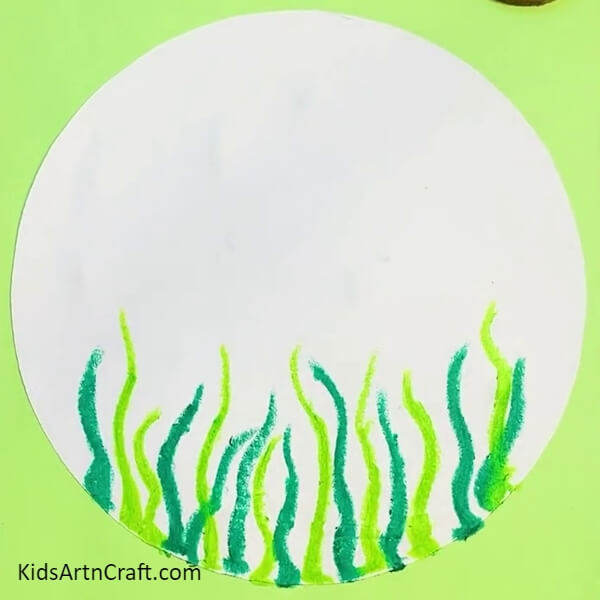
Now randomly draw some lengthy lines in between those short lines that we draw before with the use of both dark and light green color crayon.
Step 5: Pasting One Walnut Shell On White Sheet
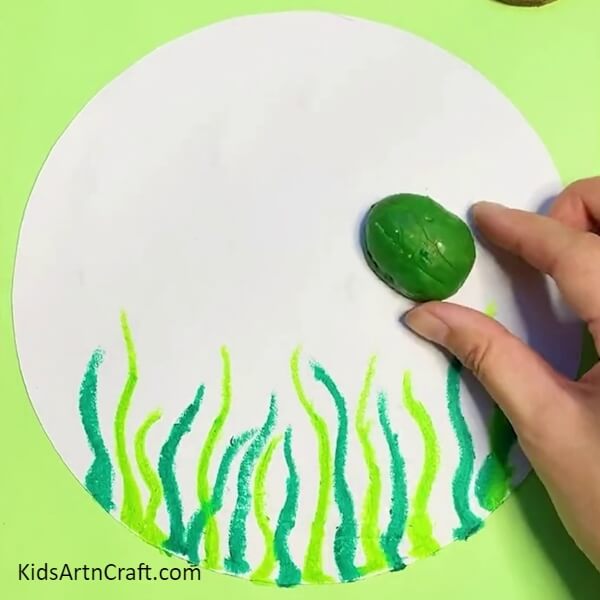
Paste one painted walnut shell above the grasses on right side of white sheet using glue.
Step 6: Pasting Clay With Walnut Shell To Create A Turtle
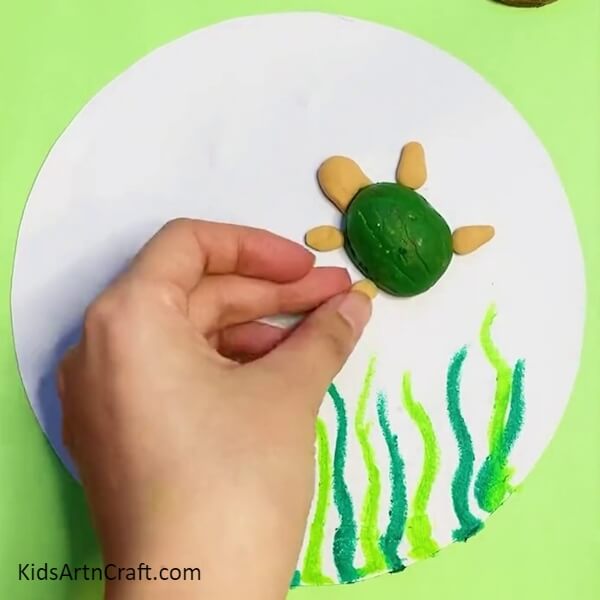
Take 4 small pieces from pale brown clay and roll it into oval shape, then press it into flat pieces. Then paste two pieces on left side of walnut shell and another two pieces of clay on right side with some gap. Then take one little big piece from clay, then roll it and paste it on top of shell as shown.
Step 7: Pasting Doll Eyes On Turtle’s Head
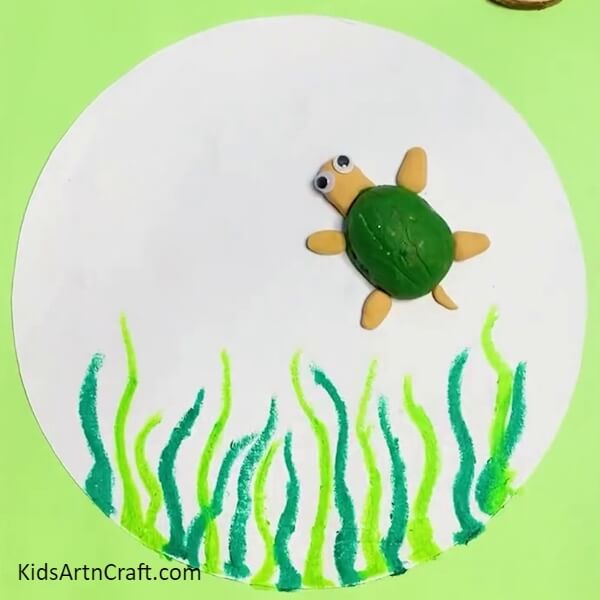
Take a very small piece of clay, roll it and paste under shell to create turtle tail. Now take 2 pieces of doll eyes and paste it on your turtle’s head as shown in the image.
Step 8: Pasting Two More Turtles On A White Sheet
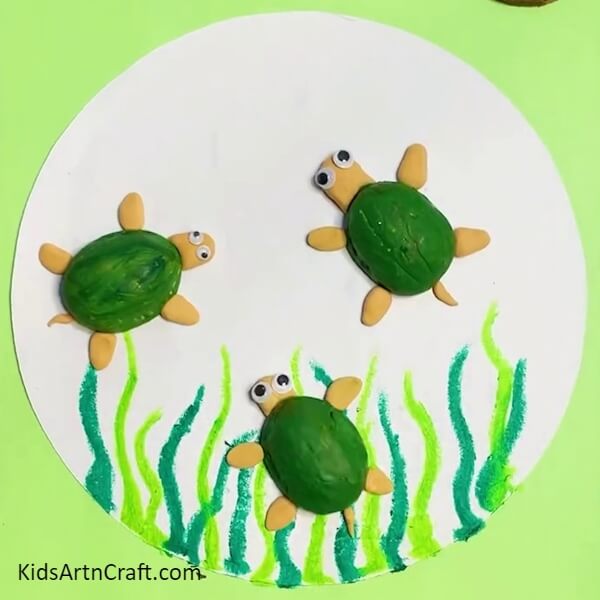
Create two more turtles, paste one turtle on the grass and another turtle on the left side of a white sheet.
Step 9: Drawing Bubbles Using A Blue Color Sketch Pen
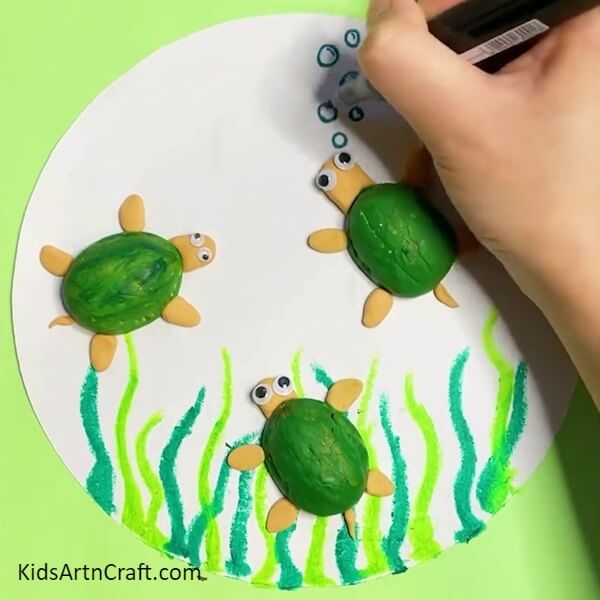
Draw small and also some big circles above each turtle’s head with the use of the light blue color sketch and draw a very small line in each circle to make it look like bubbles and draw some small bubbles on grasses too,
Finally, Our Walnut Shell Turtle Craft Is Ready

We have finished our turtle craft, this craft is suitable for all ages kids and also adults. You can try this fun craft when you get bored.
Some More Turtle Craft Tutorial
Make a Turtle Craft Using Clay For Kids

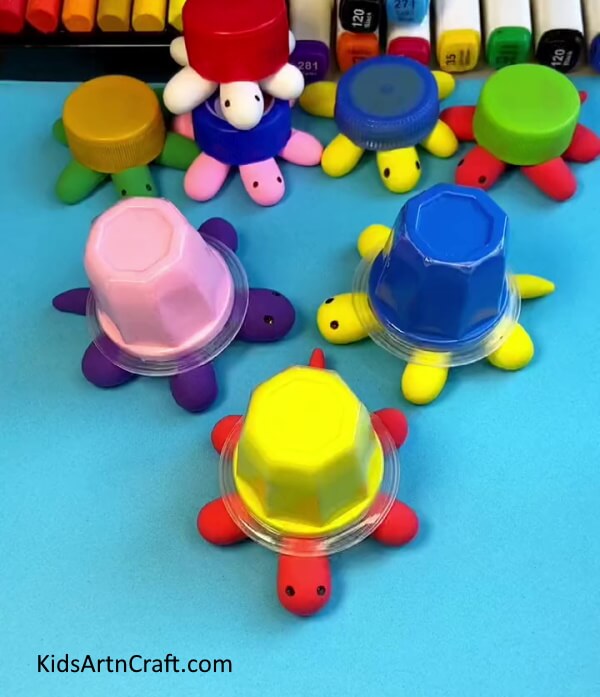
Image Source/Tutorial: Kids Art & Craft
This fun and easy turtle craft is perfect for kids of all ages to make. All you need is some clay and a few other materials to create this fun and creative turtle. It’s a great way for kids to explore their creative side and have a great keepsake at the end of the day.
Hope this easy turtle craft is useful for you all, share your thoughts in the comment section. For more easy and fun crafts like this, visit our website.
Thank you for visiting our website!
Follow us on Youtube for art and craft tutorials and much more.
More Articles from Kids Art & Craft
- How to Make Frog by Toilet Paper Roll Step-by-Step Tutorial
- Paper Strips Frog Craft Step By Step Tutorial
- DIY Leaf Art Fish Making Easy Tutorial for kids
- Paper Cup Octopus Craft Tutorial For Kids
- DIY Alligator Animal craft From Toilet Paper Rolls